A Room of One's Own

Yesterday on social media I posted the video of my long-awaited studio completion. If you weren't tuned in to that, I'm including it below. Today I'm also sharing a few more photos and some details because I'm really excited to finally have a permanent home to create my work.

Yes, the garage-to-studio is complete! Hurrah! 😄 I feel as if I have been moving for nearly two years, because, well, I have. So just the very thought of not having to shuffle my supplies and equipment from one place to the other is a most delicious concept to me.

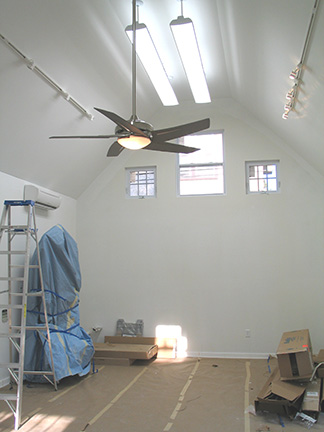
It doesn't have the cottage charm of my former studio,  but it's open and airy and has North light and storage, so I feel like I'm in luxury any way. Here are the bins we had built:

artbins_jenniferyoung

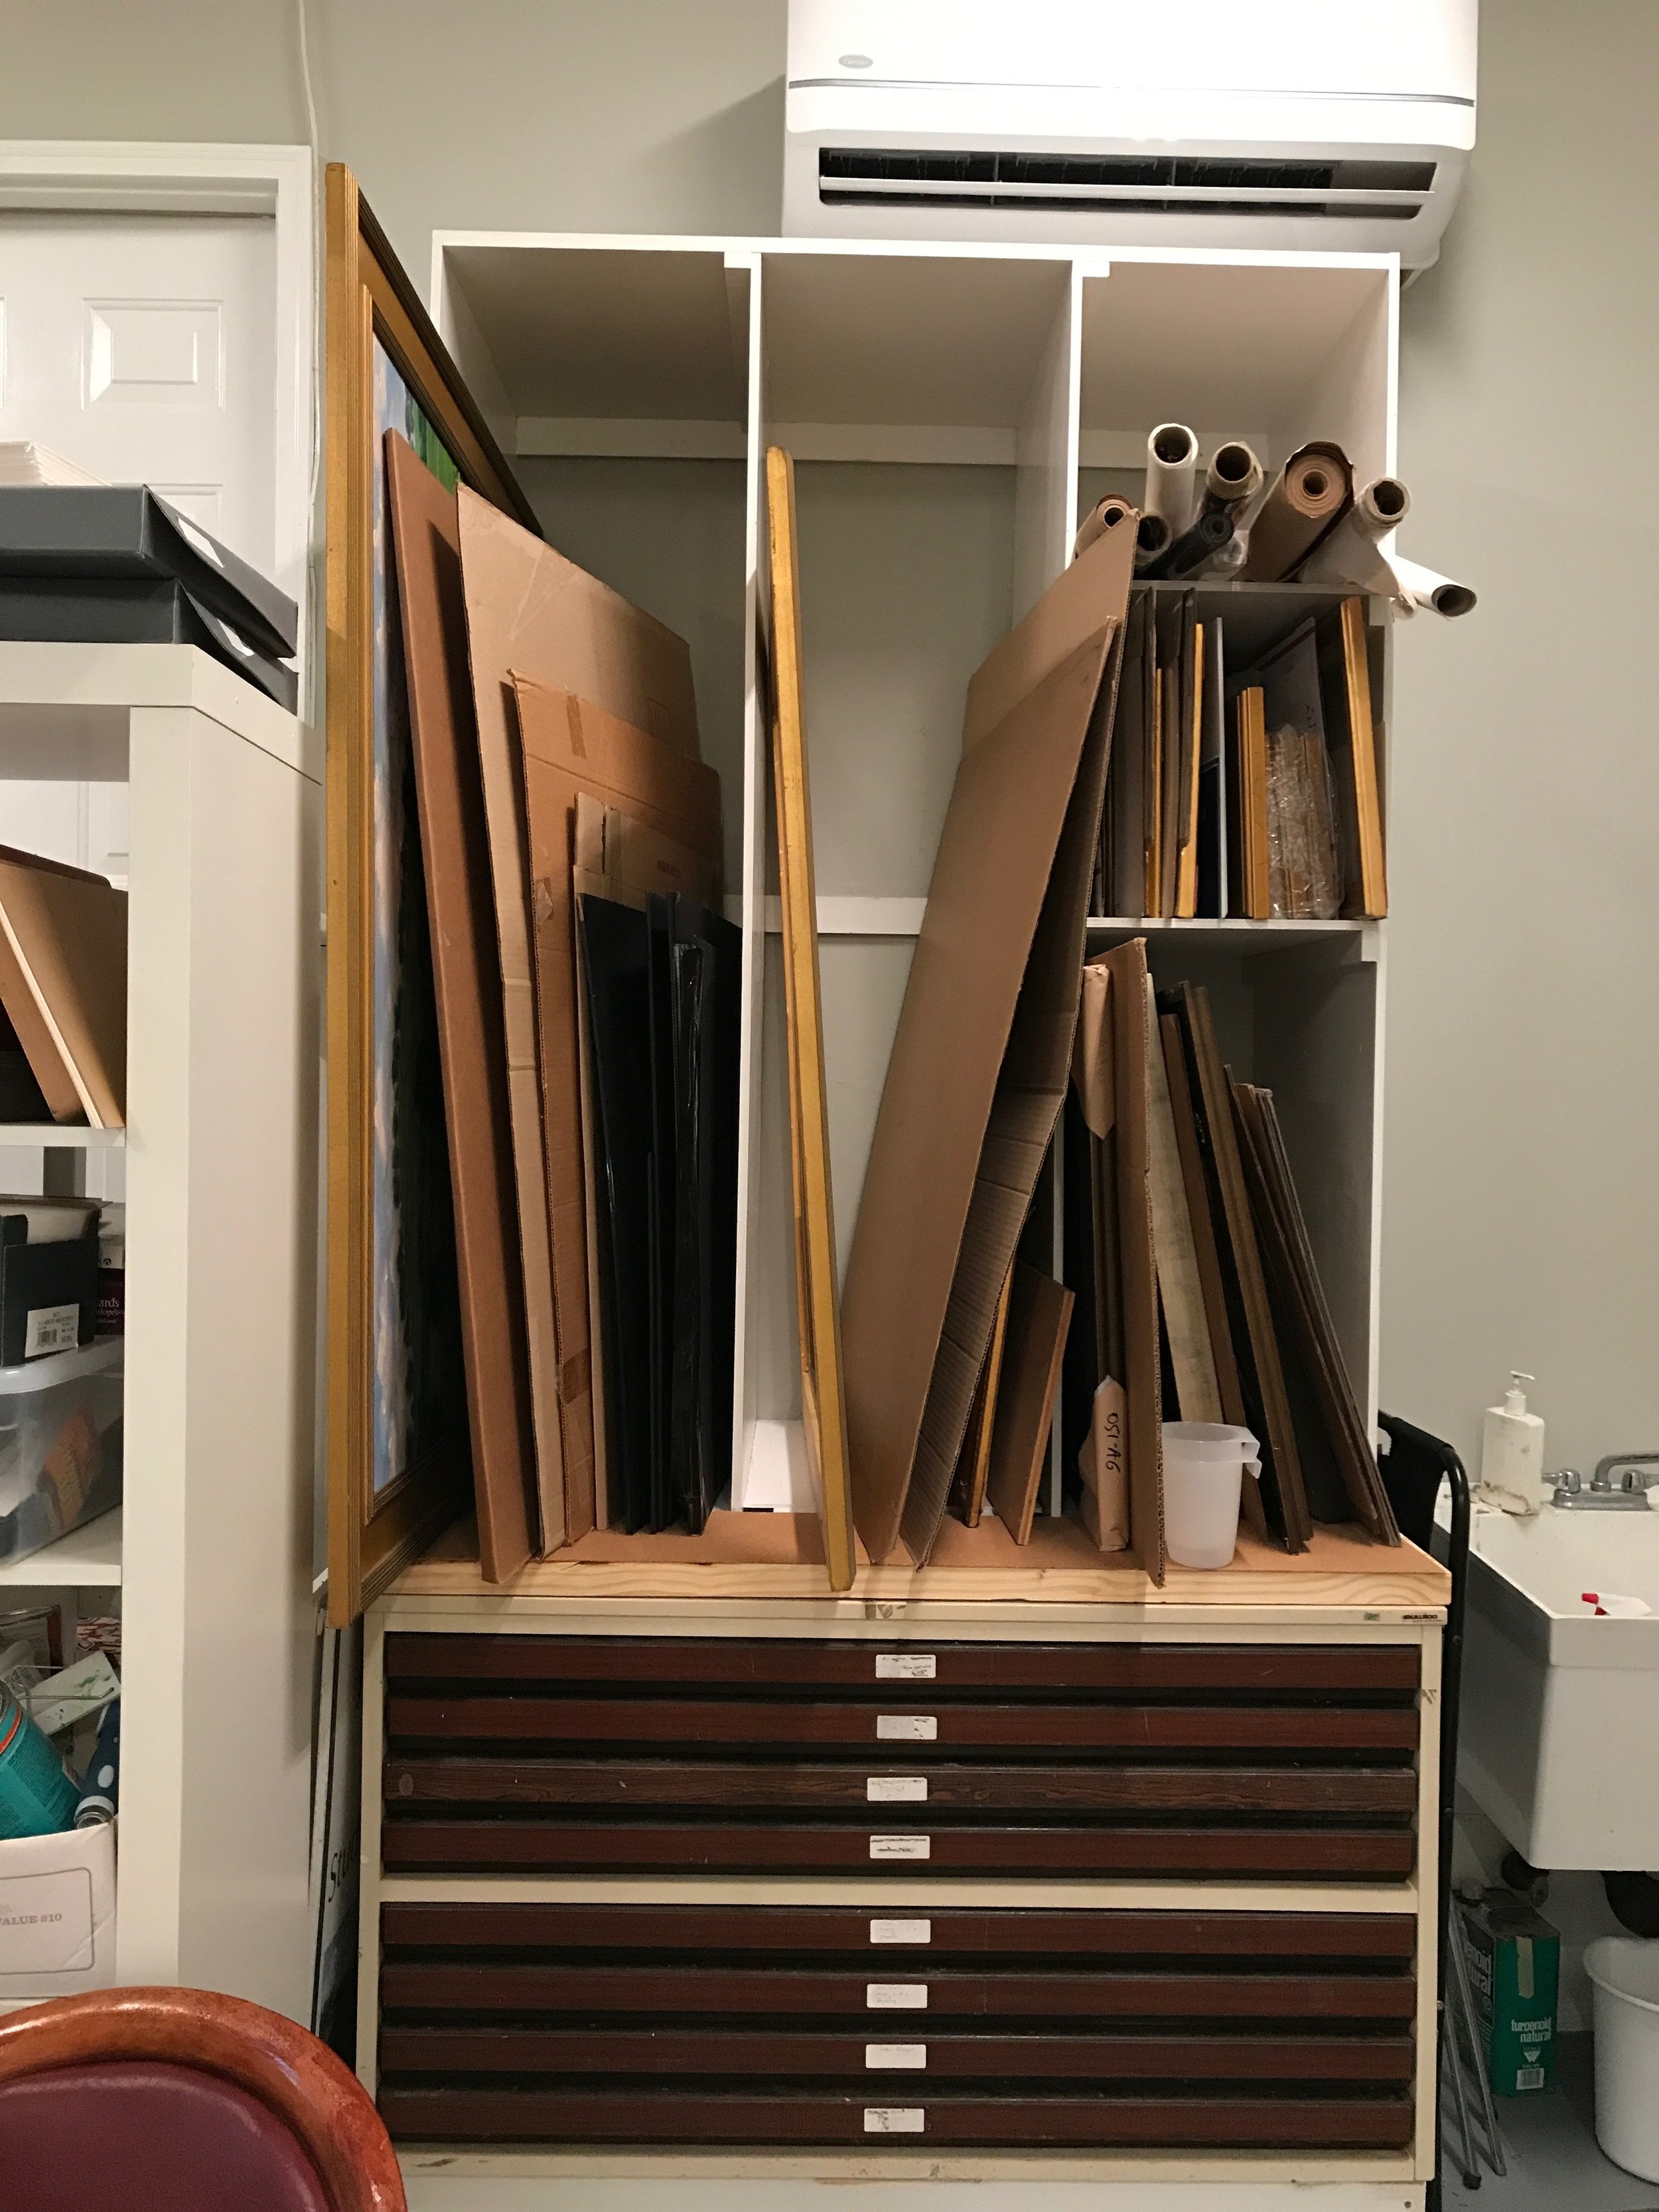
We built them "up" to keep the work off of the floor, even making use of the space over the water heater. 

File Jun 10, 6 08 16 AM.jpeg

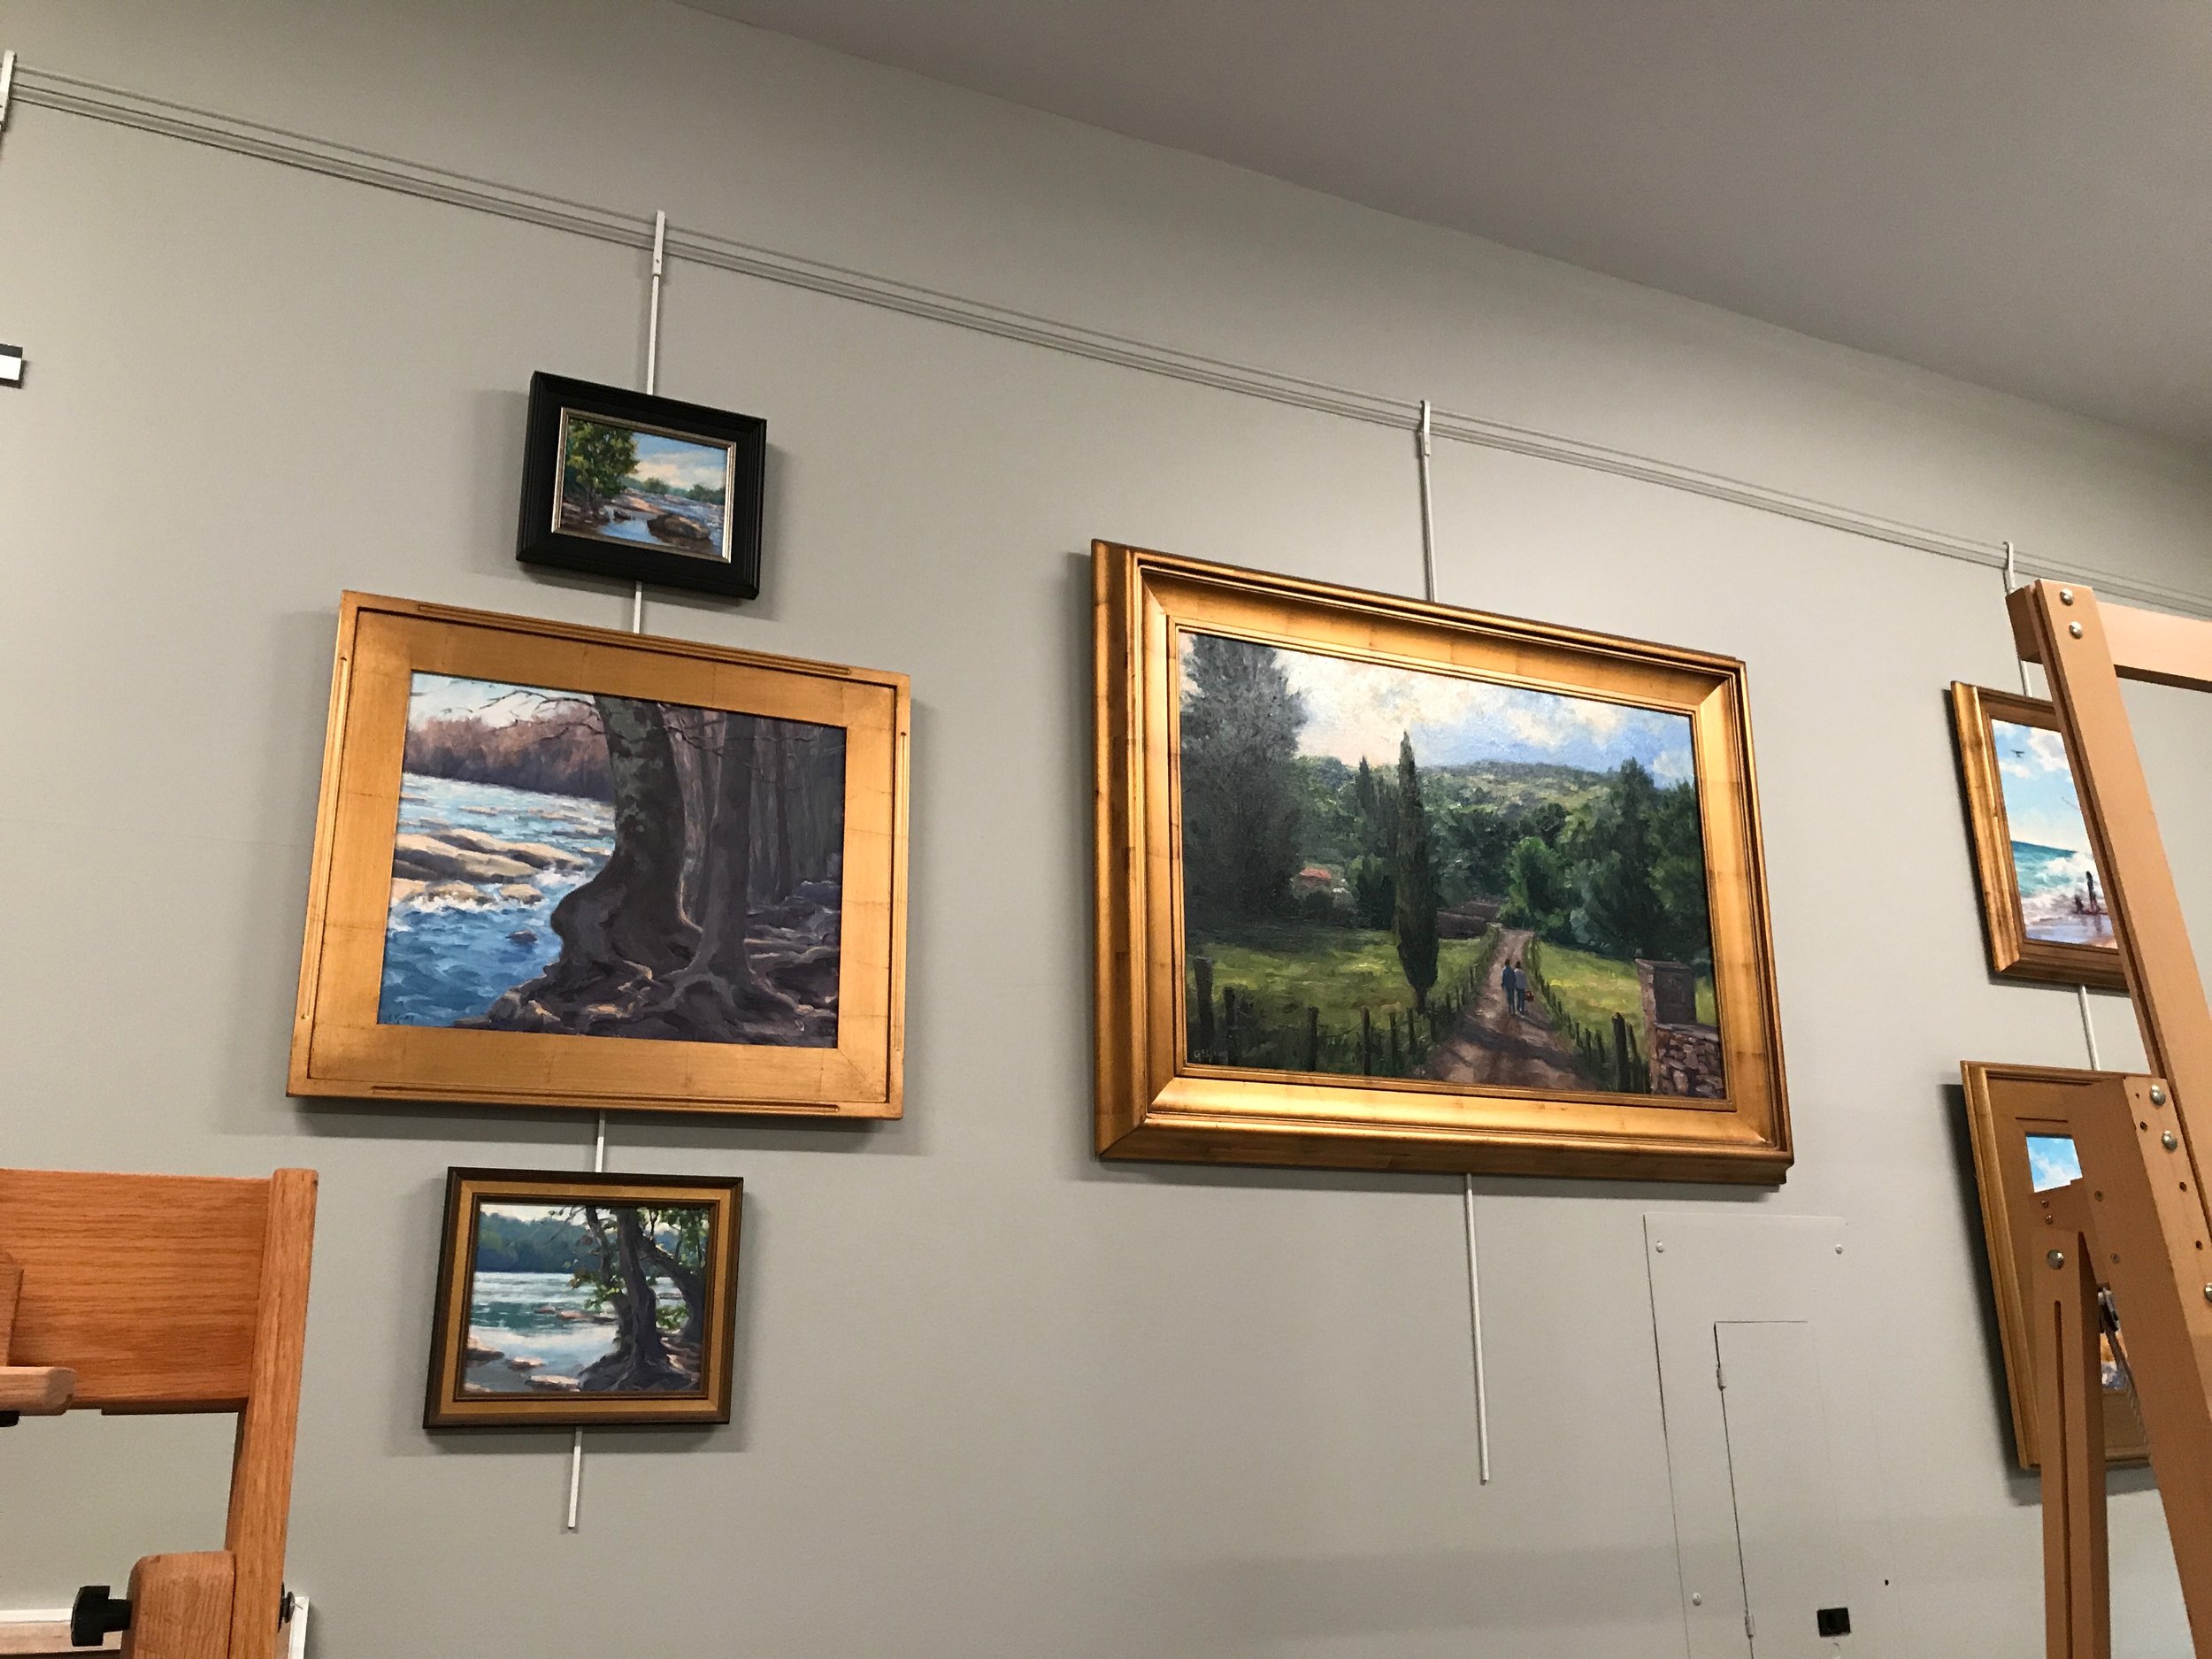
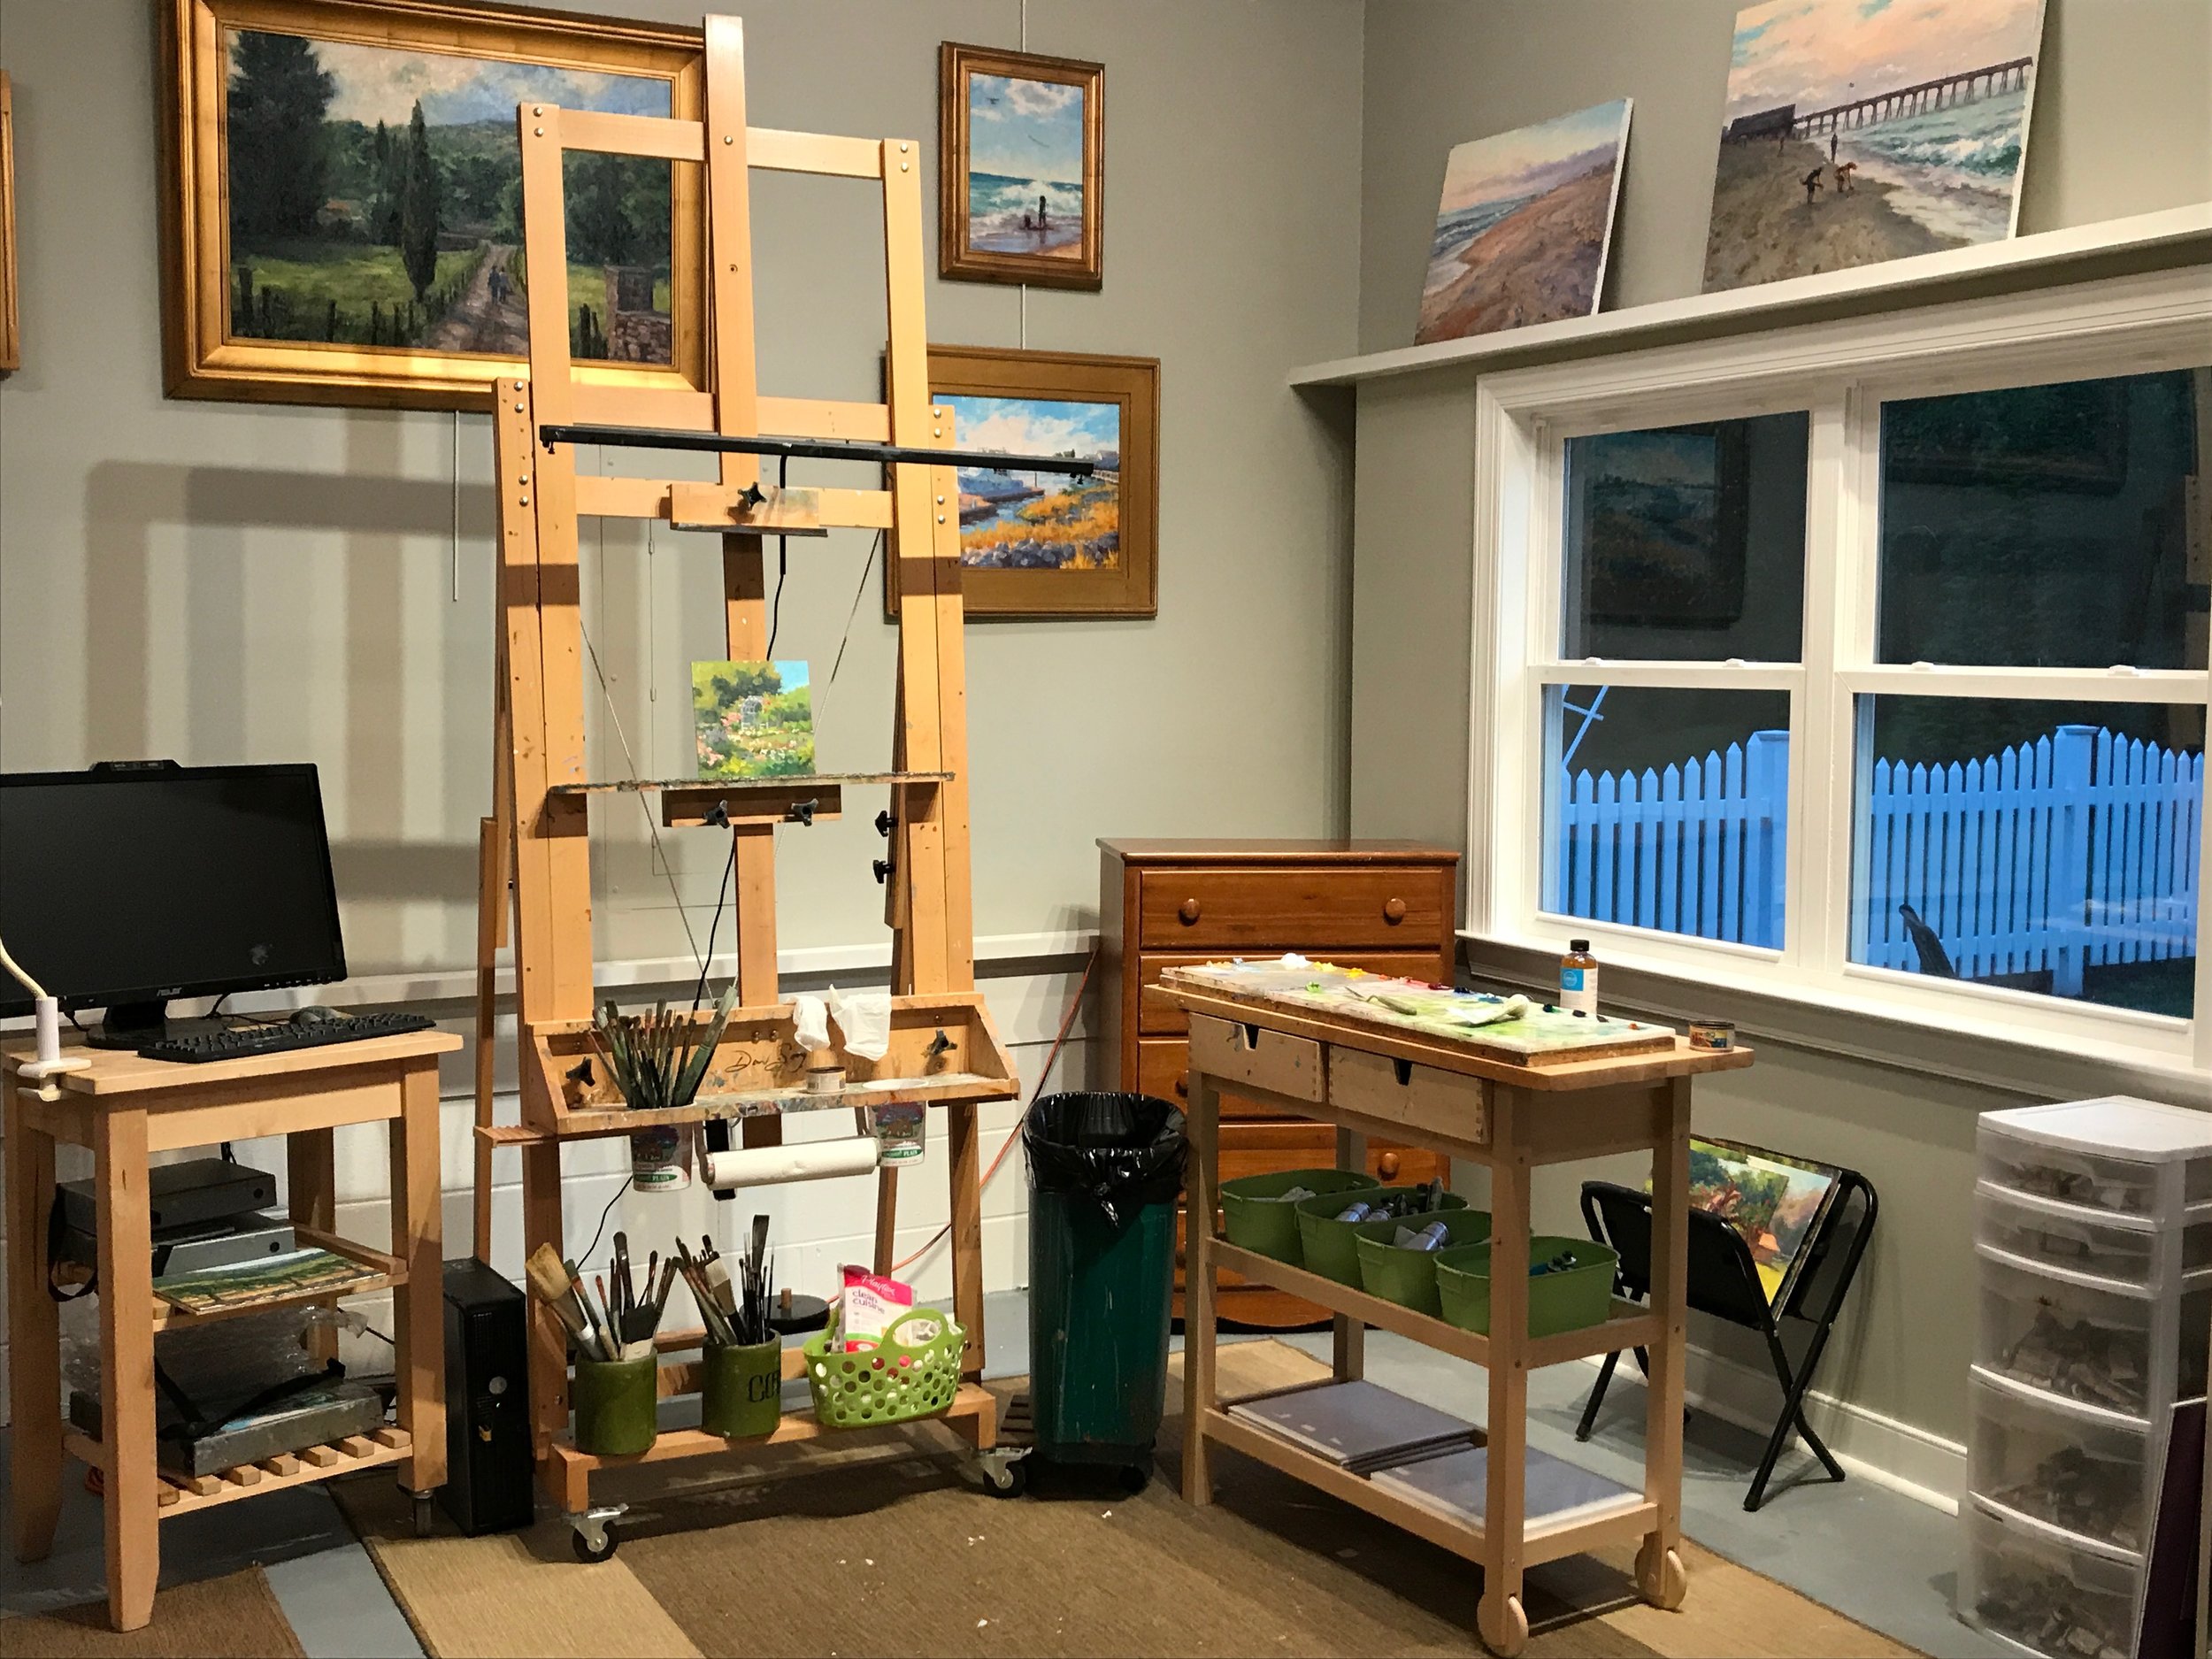
I'm using the same hanging system for hanging art as I did in the last studio, using picture rail and a hook and rod system from Walker Display. But my favorite feature is the shelving that runs along the perimeter of the space. 

IMG_3283.JPG

This came about because I had a strange cinder block bump-out that ran along the walls of the garage, and the carpenter suggested capping this off with some shelving where I could perch works-in-progress, wet paintings, or other unframed art. He also ran this same shelving over the doors and windows I had framed in, in place of the the old garage doors. 

File Jun 10, 6 08 37 AM.jpeg

This space is just slightly east of due north studio lighting. But as you can see, when the sun goes down I still need supplemental lighting. For that I have installed Daylight LED tube lights and tracks. At some point I may install a couple of additional short tracks over my framing and auxiliary painting area, but I have enough to get me up and running. 

In keeping with tradition, I maintain my usual impeccable timing, and have completed the studio just in time to leave for two weeks on a plein air painting trip to Maine for an artist's residency. So, as excited as I am for my new space, it will have to wait to get junked up until I return! 😉  Meanwhile, God and internet willing, I hope to blog from the road during my travels. 

Changing spaces (again)

I mentioned in one of my recent posts that we are in the planning stages with a builder to build a new studio at our new residence. It's coming along-- I'm excited! 😃  But given that we are just in the permit stage, I know enough about building an art studio to know that it will be a while yet before that dream becomes a reality.  Meanwhile, it will be important to save some money to help pay for the new digs. Sooo, I'm giving up my rental space and yet again, moving my studio. 

This time I will attempt to work once more in the house. I feel like we have rearranged our house so many times in the year that we have lived here, that it's comical. So what's one or two times more, in the scheme of things? The room I've cleared out for my little temporary studio has been a catch-all room; a mud room, a temporary guest bedroom, and eventually it will be my office.  It has a door that leads to the back screened porch and faces the site of the future studio. It sits a bit away from the rest of the house, and is just down the hallway from the garage. So in some ways,  the location is ideal for a little painting space.  

What's not ideal though, at ALL, is the lighting. This room is very, very dark, which is why I never thought to use it previously for a home studio. What's changed since we moved to Ashland though,  is the easel light, shown below (installed on my Sorg easel, with an unfinished painting.) 

image.jpg

The light is one by Revelite, which I learned of from seeing postings raving about it in several of my friends' Facebook feeds. Revelite makes traditional picture lights for lighting artwork, but also these work lights designed to work with artist's easels. They are slim profile, adjustable LED bulbs, with a high color rendering (CRI), purportedly, of over 90. 

I purchased the 36" light. I will admit I was sweating bullets when I ordered this thing because while I was "pretty sure" this light would work with my easel, I still harassed Revelite's customer service for a few weeks with a barrage of inquisitive emails.  It was, after all, a very expensive light. And it carried a hefty restocking fee in the event it needed to be returned.  Luckily, though, the light mounted to my easel without an issue, and I am really pleased with the quality of the light it provides to my painting surface. 

image.jpg

Above is my new home-based  temporary studio! Although I still think I need more light for the room, at least I have lit the most important parts of my workspace in order to get the job done.  I've lit the palette area with a standing Ott-lite for now, but as you can see this is a very cold, bluish light compared to the warmer but still very clean easel light (which I prefer.) I am still working on a better solution to this problem, because putting different lighting on my painting and palette will likely be problematic. 

If this little space is looking quite neat, it's because the rest of my supplies (frames, equipment, paintings, etc) are stashed in a million different places throughout my house,  with even more still at the rental space. All of that stuff will need to be moved out and consolidated and organized by the end of August, so aside from painting and splashing in the water with the kiddo, you can guess how I will be spending a good part of the rest of my summer! 

Studio building project- the final stretch

My online presence has been a little quiet lately because we are getting down to the "finishing touches" of prepping my new art studio for move-in. After my lights were installed, I finally came to a decision about the color of the walls, and I've spent the majority of my time in the last couple of weeks painting the walls and trim, installing picture moulding, painting more trim, and touching up walls and trim some more.  (Just one more door to go!) Not only am I body-weary, but I am also decision-making weary. So it is a good thing that most of the big decisions are now behind us. I really had a time trying to decide on wall color. I knew I wanted a color (as opposed to white/off-white). But having had yellow walls in my last studio, (great color for the gallery walls, not great for art-making) I also knew I wanted something that was neutral enough so as not to cast the wall color onto my paintings and palette.

While the color that's so popular right now with many portrait painters (mentioned in this previous blog post) was waaay too dark for my taste, I did like the idea of a neutral gray/green. So I decided to start my quest by playing with a sample of the portrait painters' color (Benjamin Moore's "Mohegan Sage", #2138-30) to see if I could figure out the underlying base color by tinting it with a bit of white.

It may look a little more "colorful" on the computer monitor, but the lightest tint was a fairly dead-looking gray. Benjamin Moore lists Mohegan Sage as a "black", and having tinted it I can see why. It probably is a combination of black with just a touch of yellow. It's very rich in its full strength, but none too inspiring in my tinting experiment! Still, tinting up to an almost elephant gray, I couldn't deny that it is a very neutral color, and thought I could use my tinted sample against some other color swatches to find a related color that was both lighter and more inspiring but still neutral for my studio walls.

What I found was a beautiful rich color that seemed to be in line with the darker sage, though perhaps a tiny bit cooler. It's a color called "Storm Cloud Gray" (also by Benjamin Moore, # 2140-40.)

art studio building wall color

While this color is a good deal lighter than the dark sage, I was still a little concerned that it would be too dark. So I decided to use it on just one wall as an accent and do the rest of the walls in an even lighter shade that I also liked-- again a gray green called "Paris Rain," (BM color #1501). Here is the result:

art studio wall color Jennifer Young

Here are the lighter walls running into the deeper accent wall, complete with sleepy husband reporting for cleanup duty last Saturday morning (what a guy!)

art studio wall color Jennifer YOung

I find both of these colors really lovely and pleasing. Sometimes they look more gray, sometimes more green; though in either instance they still remain neutral enough not to overpower.

In the above picture you can also see the picture moulding we installed so that I can hang artwork. Unlike the trim moulding, I decided to paint the picture rail the same color as the walls, both because I wanted to keep the high walls looking "high" and because the picture moulding was fairly plain and nothing special.

Since Dave (and friends) installed both the floors and the trim moulding, I wanted to do all of the painting myself to give the poor man a break. I totally underestimated how much time it would take. I guess it was those high walls that fooled me, but at last it's more or less done and we've had the "SmartBox" delivered (portable storage box). Over the next few we can actually start the process of moving in, assembling furniture, and piecing together my various work stations. This too will take a while (and likely a few more trips to IKEA) but it's actually starting to feel like a real art studio now. I'm excited about the prospect of being in there and getting back to painting again (as in ART) on a regular basis!

The next big challenge will be figuring out some storage solutions that make sense for the new space. Much of that will have to be dealt with after I've gotten my main workstations set up, but I will be sure to blog about it as I go along. Meanwhile, I doubt I'll do much blogging over the next few days, as we will be moving and dismantling my office for a bit.

All aglow with studio progress!

We've had some delays, but lights have finally been installed in the new studio. We still have to get the final electrical inspection, but I'm really excited as I can now move forward and paint the walls and trim. Then we just need to install the sink and address all the little picky finishing, stuff and then I can move in!  I only had time to take a quick snapshot before I head out for a life drawing session, but here's a sneak peek, with more/better pictures to come: (Note: the ceiling fan was mounted with the 6 foot down-rod recommended by the store, but I've decided this is too low so it's getting raised tomorrow.)

daylightfixtures_studio

I was pretty happy and relieved to see the amount of light we were able to achieve with the fixture/lamp combo I selected. I was also happy to see that the wall color paint sample I'd chosen still looked as I'd predicted it would, without much (if any) discernible color shift due to the installed lights. It was all kind of a crap-shoot, because no matter how much reading and deliberating I'd done, there was really no way to know if my plan was sufficient until the "deed was done" and everything was installed.

In the end I went with T5HO (high output) fixtures with 5000K temperature lamps. These lamps are among the thinner, newer tube type fluorescents on the market. Because they're so new and also high output, replacement lamps will have to be ordered online. But with 24000+ hours predicted in their life-cycle, I shouldn't have to order them all that frequently.

It's pretty bright in there now, but fluorescent tubes are always their brightest at the beginning of the life cycle, with no dust or dirt to diminish them. I've also installed track lights, so in the event that I need more light I can supplement with some of the full spectrum Solux halogen wide beam floods in my work area.

I have to admit, the main delay in installing the lights was due to the fact that I changed my mind about the fixtures. I was getting pretty frustrated with myself and my inability to make up my mind. But my good husband reminded me that there aren't any manuals out there on the perfect formula for lighting an art studio with high ceilings and no natural northern light to speak of. Believe me I've looked!

Initially I was going to go with an open industrial-type direct lighting fixture (the kind they use in warehouses) that would accomodate more lamps and a whole lot o' light:

highbaylight_jenniferyoung

 I may have over-thought the whole thing, but for the oil painter there IS such a thing as too much light, especially if it's shining right on the painting surface. Not only can it cause glare, it can really skew your perception of colors and values because a very bright light makes your pupils contract so much.

It's the reason plein air painters often employ the use of an umbrella to shield their work from the direct sun. The few times I did try painting outdoors without angling or shading my canvas from the sun, I found my colors and values appeared much too dark when I brought them inside.

So while I wanted a lot of light, I didn't want too much of it either. Nor did I want glare or direct light that cast shadows over my canvas as I worked. And that's the danger with a lot of the high output direct lighting fixtures I was finding--even when mounted at 15 feet up.

After scrapping my original idea, I called a halt on the electrician and went back to the drawing board (and back to "the oracle"--A.K.A. Google-- to search for more ideas.) I eventually found this helpful article from the DesignLights Consortium on energy efficient commercial lighting designs for various functions and environments (schools, factories, offices, etc.)

The article has a lot of ideas about lighting, and delves deeper into many good points I'd already considered about light quality, including the importance of glare control and color temperature.  But there were other points I hadn't considered quite as much, such as issues of reflectance, contrast, and wall color.

For instance, while you don't want lights bouncing around willy-nilly off of a ton of shiny reflective surfaces, you can use reflectance to your advantage. Wall color is important. Darker wall colors have their advantages, but lighter walls and ceilings painted in matte or low sheen surfaces can go a long way towards maximizing the reflectance and distribution of light in a room without the glare.

As to contrast, while some of it is needed in order to define shape, a lot of contrast can cause eye strain and fatigue. So even if the work area of your studio is sufficiently lit, if the rest of the room is dim or dark your eyes have to work a lot harder, expanding and contracting the pupils to adjust light intake each time you look from one part of the room to another.

I'd been so focused on how to light my work area, but now began to consider lighting up the whole studio space a bit more evenly so as to avoid this overly-contrasty affect. Choosing fixtures that have an indirect feature (up-light) as well as a direct feature (down-light) can help with this. By washing some of the light up onto a white ceiling it can reflect back down into the room to diffuse and more evenly distribute light across a broader area.

Armed with this info, I did finally find a fixture that I thought might work. It's actually a commercial light that you'd find in retail stores. It has an up-light feature so we've pendant-mounted them to take advantage of this fact. It also has a wide beam spread and louvres shielding the lamps, which help to soften and diffuse the light even more. I've installed two 8 foot fixtures over the side of my studio where I intend to paint, and one on the framing/office side, which also gets a lot of natural daylight from the east. Each fixture has its own switch so that if I want to work in low light I can douse one or more (for a dramatically lit still life, for example.) These fixtures don't accommodate as many lamps as the industrial warehouse fixture, but since the lamps are high output I think it will be close to, if not more than enough. Onward-ho!

P.S. This is part of a series of posts I've explored while building my new art studio. For my earlier in-depth analysis on studio lighting for artists, go here and here.

Art studio update: doors & floors

I have a new painting completed but it's been raining so much lately that I haven't been able to get a good shot of it. The sun has finally returned though, so hopefully I'll have a picture of it to post soon. Meanwhile, in spite of a holiday break, progress continues with the new studio. We've done some exterior painting to the posts and doors, and I finally have a floor as well!

This shot shows the doors painted red to match the doors on our house. The pavers create a sidewalk and courtyard to connect the studio to the house. I'll have enough space on either side of the french doors for some flower beds. It's probably good that I'm shooting this in winter while the Crepe Myrtle is dormant, as I'm able to get a good shot of both the side and end elevations at once:

art studio building

It's interesting to note how different the angle of the sun is in winter. During the summer we don't have the long shadows coming over the yard from the trees across the street. The end elevation (below) faces the back door of our house. This is the door I'll use most often:

art studio building progress

I took a shot of the Pergo flooring just before covering it up with contractor's paper. I initially considered solid bamboo but at less than half the price I really had to go with the laminate. I must say this looks pretty good for an imitation:

building an art studio

I think the hanging wire and bare lightbulb really tie the room together ;-)

building an art studio

We're cutting the trim/mouldings this weekend, and we hope to install the track lights and overhead fixtures next week (more on the lighting I've chosen in a future post). After that, we just need to take care of the sink and the interior painting. I do think I want a wall color other than just plain white--though nothing near as dark as the deep sage color mentioned earlier that seems so popular with many of the portrait painters. Right now I'm eyeing a much lighter neutral gray/green/beige. My description makes it sound like a hospital color, but it's really quite nice.  I'll wait and see how the color looks after the lights are installed, however. It's amazing how much colors shift in different lighting conditions.