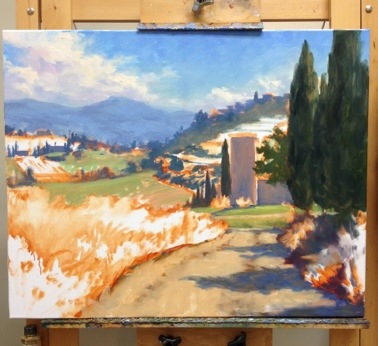
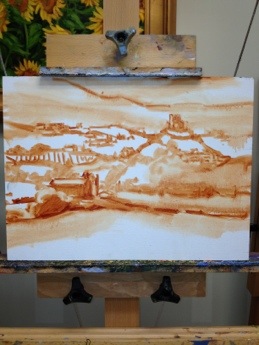
Commissions, part III; wrapping it up!

In my last two posts, I took you through the proposal process of one of my recent commissions. If you wish to read this series from the beginning, start with Part I, followed by Part II. Today I'd like to share with you how the commissioned paintings turned out. I also have a few thoughts on commissions in general; both what to expect if you are a collector, and how to consider going about them, if you are an artist.

After having submitted my proposals for both of the paintings, I have now received the go-ahead to proceed. Here are the two completed paintings:
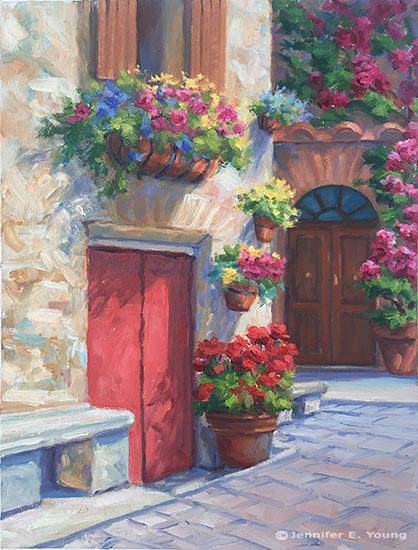
Italian village painting by Jennifer E Young

"The Potted Garden II", Oil on linen, 16x12"
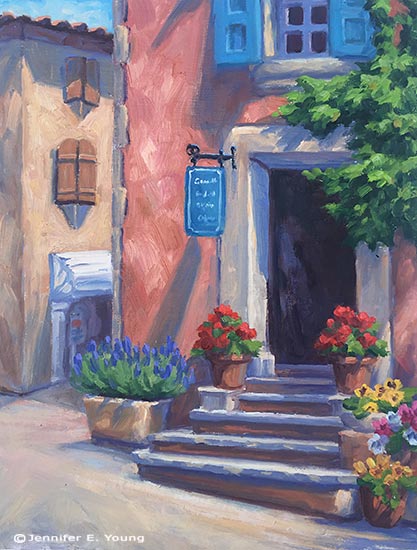
"The Corner Shop, Roussillon" by Jennifer E Young, All rights reserved "The Corner Shop, Roussillon", Oil on Linen, 16x12"

I'm very glad to say that the client expressed great satisfaction with the two paintings and they are now framed and in their new home.

Commissions are great experiences for artists because they push us to think about our art from a new perspective. Yes, as artists we all want our work to stand on its own. At the same time, nothing exists in a vacuum, and I am ok (and in fact, really flattered) with the knowledge that my paintings will coexist with other art in a collection, as well as other family heirlooms that will be important and valued by a family, possibly for generations.  So it's a great honor to even be asked about commission work and I am always happy to discuss that possibility and to converse in-depth about not only the art but the environment where the art is intended to be placed. With this in mind, here are a few things to note that make commissioned work a special animal, worthy (apparently) of three blog posts!

1) The Conversation

The conversation ( usually more than one) is probably the single most important element of any commission. This is the artist's opportunity to gather all of the relevant information about size, environment, and (very important) color preferences. Color, in fact, is the one topic that comes up rather emphatically in nearly every conversation I have with prospective commission clients. It's understandable, as color elicits so many varying emotions.

Ideally these conversations would be done face-to-face, but that is usually either not possible or practical. Most of my commissions have actually been negotiated, in fact, via email and phone. In these cases, Photoshop is definitely my friend!

2) The Proposal:

This is where I do my best to incorporate the ideas and desires of the client into a work of art. Sometimes, as in the examples I've provided in these last couple of posts, I have studies or compositions already worked out. In these cases, I just use my old buddy Photoshop.  More often, though, I am creating something from scratch. In these cases I will submit a  sketch with color notes, as well as a few of my photo references that I will use to incorporate some elements into the composition. The more visual examples given at this stage, the better.

3) The Approval:

The next step is to await the feedback of the client, or, if things go really smoothly, await the client's approval to proceed.

3) The Deposit:

This topic is often one that people don't like to talk about, but it's an essential part of many artists' working methods, so I am going to throw this horse right on out there on the middle of the dining room table. As artists, we need to decide for ourselves our best practices so that we feel good about the work we are doing.

Earlier in my career, I did not ask for a deposit for most of my commissions. As long as I felt like I was able to sell the work in a gallery if needed and that it didn't stray too far from the rest of my body of work,  I felt okay about working on speculation. Times change though and though the vast majority of my experiences were excellent, an odd one or two "hiccups", as well as certain life experiences (like having a child)  helped to shape my perspective on the boundaries I should set for myself and my work.

Nowadays, with few exceptions I require a deposit to proceed. This would occur once my proposal has been approved by the client.  The amount is either 1/2 down, or, if it is a very large and involved commission, 1/3 down, 1/3 at approval half-way, and 1/3 prior to delivery. Most collectors are okay with this arrangement and understand the whole working -for-compensation thing. I also think they appreciate that that it is to everyone's advantage that there is a commitment made to secure the agreement.

A deposit doesn't just cover an artist's materials, by the way. It also covers her time. Keep in mind that a proposal already commands a good deal of time and effort to prepare. Time is the most precious commodity I have. It is up to each individual to determine how they wish to work and what they want to spend their time working on.

4) Art Direction

Some artists are more ok with art direction than others. Having had a taste of the heavy-handed variety, I can most definitely state that I am not in favor. ;-) This is not to say that I am adverse to hearing client's preferences and feedback!  This is the whole point of "The Conversation", and I do welcome it if a minor adjustment is desired. However, I can't start over with a new concept, (which would mean a new painting) make profuse alterations, or do anything that I feel would greatly compromise the integrity of the painting.

Most clients understand, and I do my best to clarify in advance,  that any painting I make is going to be unique,  not  a copy--either of my own work or anyone else's . Beyond preference in color and subject, a collector commissions an artist because the artist has his or her own voice, and it's up to the artist, ultimately, to determine the best expression of their idea. In other words....Nobody puts Baby in a corner!

All joking aside, most people are really very happy to let the artist do her thing.  In fact, "that thing she does" is the whole reason the client was attracted to her work to begin with. Nevertheless, it's good policy, and indeed it's the artist's responsibility to clarify all of that with the client so that expectations are managed. Of course, every commission is unique and there are definitely nuances that  can vary my approach to a certain degree. The key is to keep communication lines open and to be open to honest feedback.

This just about wraps up my commission process, or at least the highlights. If there is anything I have missed, or if you have any questions, please feel free to leave your thoughts in the comments. If you are an artist, feel free to share how you handle your own commissions. I would most especially  welcome the thoughts of collectors (or potential collectors) also. Have you ever commissioned an artist? What was your experience? Let me hear from you!

Commissions part II

This post is a continuation of a prior post I've written on my commission process. If you missed it you can find that post here. Having secured the final approval for the first commission I wrote about yesterday, I needed to do it again for the second painting.  During my image archives search for a complementary composition I came across this 20x16" painting, done some years ago from my own photo references and sketches done on site. I felt this composition was similar enough in feel to relate to the first painting, and yet different enough to add some visual interest:

French village painting © Jennifer E Young

Because I wanted the  two little commissioned paintings to "talk to each other", I reversed the above painting, and scaled the image to 16x12". Like the first painting, this one also scaled really nicely to the new format:

French village painting of Roussillon by Jennifer E Young

Using my photo-shopped mock-ups, I provided a this shot below to show how the two paintings would look side by side:

Vibrant paintings of French and Italian villages by Jennifer E Young

There were a few color notes to keep in mind. The client wanted these to pieces to go in a room with an open floor plan where other artwork was already present. There was one painting in particular, a large pastoral with a red barn, that I needed to be cognizant of when creating my pieces. I didn't need to "match" the red, but I needed to be aware of it so as not to clash. This painting had a mid-to-cool temperature red focal area, so I'd steer away from anything too orangey. There were also some lovely aubergine and turquoise accents  in the shadows of the large painting that I noted and would attempt to riff off of in the paintings I was about to create.

My collector gave a big thumbs up to the ideas I had proposed. Whew! Awesome! Now for the fun/hard part of creating them! In my next post I'll show you how everything came together in the final paintings, and provide some thoughts to keep in mind about commissions in general, which I think will be of interest to the collector and artist alike.

The making of a commission

It's hard to believe summer is almost over. The move of my home and business, along with family matters, tended to completely monopolize my spring and summer, and yet there is still so much to do.   While we are slowly settling into the house, it will be some time before I have a studio. So I have "made do" with either painting outside in the blazing summer heat, or setting up a temporary studio with drop cloths in my poorly lit living room. For those reasons, my painting production has been down and it's been driving me a little crazy. Nevertheless, opportunity waits for no one, and commissions are a special kind of opportunity. Time to pull out the drop cloths and shop lights again! :-)  I have been painting for 20 years, and in that time, I've had a variety of commissions. Some are more "challenging", and some are pure delight. Of course, the latter are more pleasurable, but all commissions have been, to me, opportunities for growth as an artist.

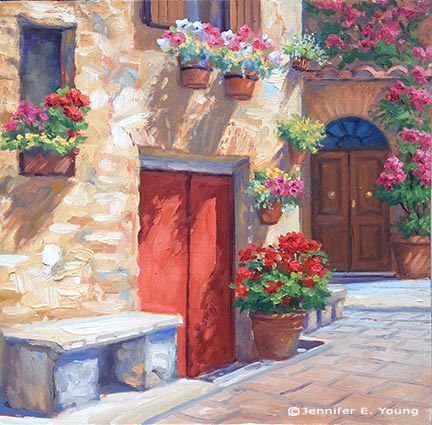
My latest commission, in spite of my less than ideal work environment,  fell distinctly in the realm of the delightful. I met the client during a painting demonstration at the Little Gallery where my work was being featured in June. He happened to love one of my paintings in that show, called "The Potted Garden, Pienza":

pienzawf_final

The only issue was that the format (square) wasn't quite right. He was looking for a slightly larger, more vertical painting, and a companion piece of the same size to complement it in an adjacent spot.

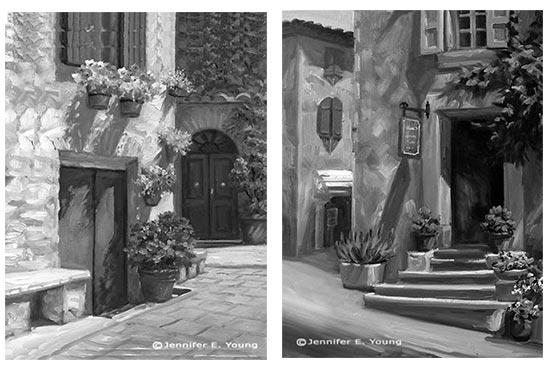
I loved this little scene and I was happy to explore it again with a different format. So my first task was to convert my square composition to a vertical piece. Luckily, the architectural subject matter leant itself to the task naturally, and I was able to use Photoshop to render a "sketch" for a proposal in much faster time than I would have been able to do free-hand:

grayscale composite mockup ©Jennifer E Young

As you can see, I didn't labor over rendering the upper portion. The purpose was just to continue it upward to demonstrate how it would look. (Photoshop is a very expensive program, but nothing beats it for working out compositional options for paintings!)

In all honesty, because the location of the focal point was in the right position for both the original 12x12"  and the commissioned 16x12" format,  I didn't have to do much to the composition of the original painting beyond extending it. That's not always the case, believe me, but this time things worked out really well. But because I was losing a window on the upper left, I did suggest that I replace the two flower pots under the window for a larger, single hanging basket, as this would give this area more unity.

Once I received the client's approval for my proposal of the first painting, I set to work finding a second composition that I would create as a companion piece. I'll cover that in the next installment. Stay tuned!

Come on Spring!

Okay, enough of winter already. I don't know about you but my winter was totally nuts. Not that spring will be less nuts but at least they will be warm ;-). Family matters have kept me from doing much painting, but here and there I have worked on this 14x18" piece, revisiting a familiar theme and experimenting with brushwork and soft edges:

Italian landscape painting with poppies by Jennifer E Young"Papaveri, Val d'Orcia" Oil on linen, 14x18" Click here for more info. To purchase, please contact me!

Finally complete- Tuscan Hay painting

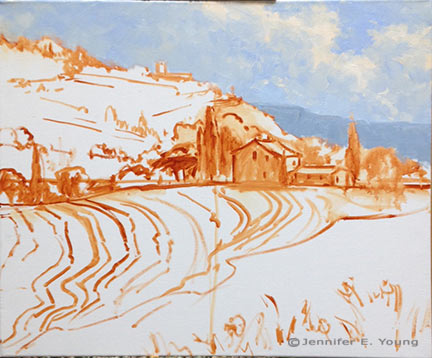
I'm taking a break from chopping my vegetables to finally wrap up the latest Tuscany painting I left flapping in the breeze on New Year's Day. After I had my composition established and my canvas covered, it was time to go back in to further develop the background, middle ground, and foreground. It sounds very systematic, but this was really more of a back and forth dance because the value, scale, edges, etc. all have to relate and are interdependent with the other elements in the painting. For instance, in the image below, I thought I had the background fairly finalized...until I took a step back and decided the buildings were too large and too prominent in relation to my foreground house. As I moved forward to the center of interest it became apparent that these two areas of the painting were battling for attention. So I went back and softened the distant village and reduced the size and contrast of the buildings a bit more, and further softened their edges.

Tuscany landscape painting in progress by Jennifer E Young

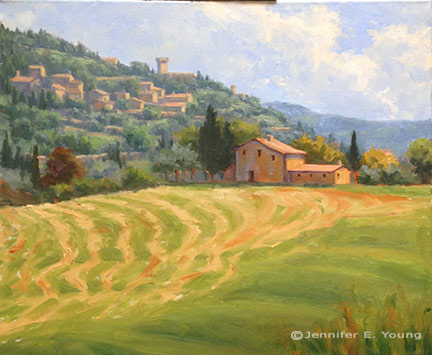
Here's the final:

Italian landcape painting by Jennifer E Young

"Tuscan Hay" Oil on Linen, 20x24"   

Progress on the Tuscan Hay painting

As is typical of my working method, I establish my sky and clouds first on my newly sketched canvas. This helps me to key the rest of my light values in the painting. At this point I also  lay in a first pass on the distant mountain.

Tuscany landscape painting in progress by Jennifer E. Young Next come the hill town and terraced hillside of the background. At this point I am still establishing the compositional elements so there is not much color or value variation. I will go back into these areas again, but I really want to develop the entire canvas to the same level before it sets up too much, as I'm not sure when my next painting session will be.
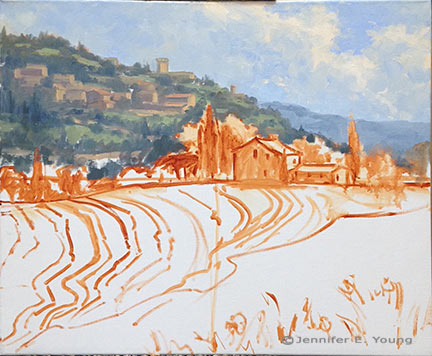
Tuscany landscape painting in progress by Jennifer E. Young Now for the middle distance, where my area of interest (the house) resides. I decided to lower the cypress to the right of the house, as I felt there needed to be some height/shape variation in the trees flanking the house.  I'll have to go back into that sky area again where I made this change to clean it up a little more. Good thing I still have plenty of that sky color on my palette! Again, I don't have much in the way of highlights yet...just a few value shifts to give certain objects a little form.
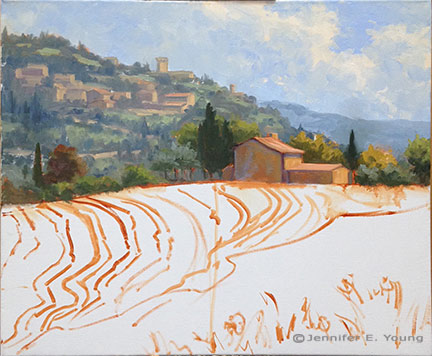
Tuscany landscape painting in progress by Jennifer E. Young Now I'm ready to start laying in the foreground hill and those groovy hay tracks.
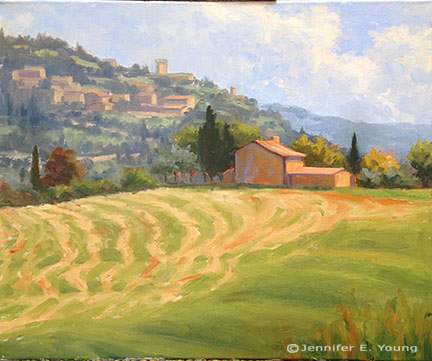
Tuscany landscape painting in progress by Jennifer E. Young That was fun! Now I have the whole canvas covered more or less to the same level of finish. There's a good deal more to do, but this feels like a pretty good start for around 4 hours of work.

Tuscan Hay

I hope you all had a very Merry Christmas! Ours was filled with laughter and fun, (which is an easy achievement when there is a 3  1/2-year-old in the house). We are still in the middle of winter break, but fortunately I can still carve out a few more painting hours between now and the dawn of a new year. I've been playing around with a composition of the Tuscan landscape of a hillside decorated with the pattern of freshly gathered hay. The meandering pattern of those undulating lines of hay shaped by the rolling hills are what first inspired me to start sketching, first in my notebook, and then more purposefully on my  20x24" canvas:

Tuscany hillside landscape painting in progress by Jennifer E. Young

My plan is actually to create those lines carved out by the harvested hay a lot more subtly, but they are pretty linear right now because I just want to establish their pattern. In the distance is a terraced hillside punctuated by cypresses, as well as  old stone walls and towers, and cypresses so typical of southern Tuscany.

The Potted Garden, Pienza (painting complete)

With school out for the Thanksgiving holiday, my studio time has been a little dicey. But now that we are back in session I have managed to wrap up my posting about the Pienza painting from earlier last week. Before I dive into painting the potted plants, I finish up the main architectural features of the painting-- the final touches on the windows and doors, and completing the distant bench.

Tuscany village painting demo by Jennifer Young

 Now let's move onto the flowers!

Pienza Italy painting demo by Jennifer E. Young

Here is the final:

Tuscany Italy street scene by Jennifer E. Young

"The Potted Garden, Pienza" Oil on panel, 12x12" Click here for more info!

The hill town of Pienza is lovely for a number of reasons. First, it overlooks the gorgeous Tuscan valley called the Val d'Orcia. Second, like so many of these small towns,  the whole village is oozing with charm and dripping with flowers, just like the scene I have painted. Third, it is the home of Pecorino cheese! Need I say more?

Shadows, doors and floors

Here is a little progress on my painting of the Tuscan street scene I posted a sketch of in my last entry. Now that I have my design, I am ready to start laying in some color. My palette is fairly expansive, which I tend to do in the studio when I am more pressed for time. Here I'm using a few convenience colors in addition to my basic primary palette of red/yellow/blue. My colors for this piece are Titanium White, Cad Yellow light, Cadmium Red Light and Medium, Alizarin Permanent, Ultramarine Blue, Sevres Blue, (Rembrandt- kind of like Cerulean but a bit brighter with more tinting strength),  Gold Ochre (also Rembrandt brand- like Raw Sienna but warmer and more golden; yum) and Burnt Sienna (tonal sketch only). I start by laying in more concretely the pattern of shadow and light. I really love the way the shadows from the potted flowers spill onto the stone wall and red door:

Painting in progress of Tuscan village street scene by Jennifer Young

 I use lots of the Gold Ochre for the wall, mixed with both blues and Alizarin in varying degrees, as the stone has lots of warmth but lots of variation in it too. For the door I started out with pure Cadmium Reds in the sunlit area, but whoa! I then decided to mute this a bit with touches of white and a tiny bit of yellow plus Sevres Blue to give it a more authentic sun-washed look. The door in shadow is a mix of Cad Red Medium, plus Ultramarine and Alizarin.  Next I start to lay in some of stone bench:

Work in progress of Pienza village in Tuscany by Jennifer Young

As you can see, I use violets in the shadows (Ultramarine Blue and Alizarin, plus touches of  white and yellow) to contrast with the bright warmth of the sunlit stone.

Tuscan village street scene in progress by Jennifer E. Young

The bench established, I add a little more texture to the stone wall and then begin to lay some pavers. Even though they are terra cotta- colored pavers, they are still very light in value in relation to the wall. I've cooled them off with a bit of  Sevres Blue as they recede, to send them back and lay them down where they belong. Next I'll start working on the potted plants and add some more color to the scene. Stay tuned!

New Italian village painting

I really enjoyed the square format of my last painting, so I thought I'd experiment with another one--this time set in the rustic hill town of Pienza in Tuscany, Italy. Here's the compositional sketch so far. I threw a  lot of angles and right edges in there to make it interesting. ;-)

Tuscany village painting in progress by Jennifer Young

Ancient Hills, Golden Valley

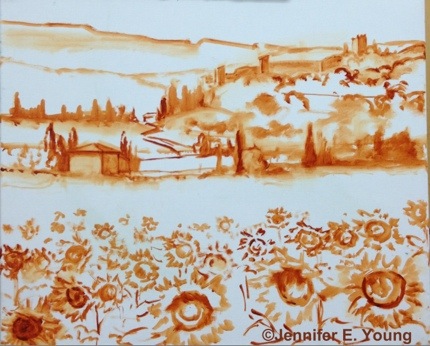
My latest sunflower landscape painting (the start of which I posted here) has actually been finished for a while. But once again I have been delinquent in posting. To make up for that fact, I offer you a slideshow of this painting, start-to-finish:

This painting measuring 20x24" is entitled "Ancient Hills, Golden Valley". For more information and/or to purchase, click here or contact me!

Sant' Antimo (Tuscany) painting complete

It took longer than I would have wanted to finalize my latest landscape painting of Tuscany, but I am really pleased with the final. Picking up from my prior post about this painting, here are a couple of additional progress shots: Continuing work to further articulate the background landscape:

Tuscany landscape painting in progress by Jennifer E. Young, All Rights Reserved

...and here I begin to work on the Abbey:

Tuscany painting in progress by Jennifer E Young, All Rights Reserved

Here, at last, is the final!

Tuscan landscape paitning Sant Antimo Abbey by Jennifer Young. All rights reserved.

"Path to Sant' Antimo" Oil on Linen, 24x30" Click here for more info!

Sant' Antimo Abbey is a beautiful Romanesque (formerly Benedictine) monastery dating back to the 1100's. It is situated in the stunning landscape of the Montalcino commune, and rests about 10 km from the town of Montalcino, (home of the gorgeous Rosso di Montalcino and Brunello wines).

In springtime the landscape of Montalcino and surrounds are strewn with poppies and other wildflowers, and the hillsides are often touched with the soft yellows and greens of golden broom.

I have a lot of reference photos of this abbey from my visit there several years ago. But I particularly like this view, which shows the focal point as a hint of the abbey in its lovely setting, but doesn't scream "portrait of a building". I also enjoy the point of view, which puts the viewer firmly on the pathway beneath the tall cypress trees, and nearly eye level with the abbey, adding to the sense of "being there".

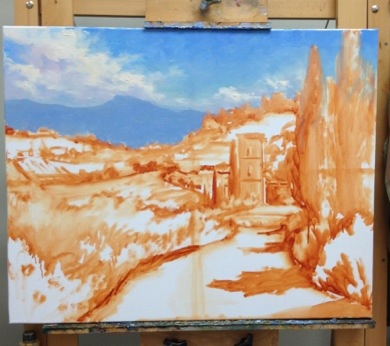
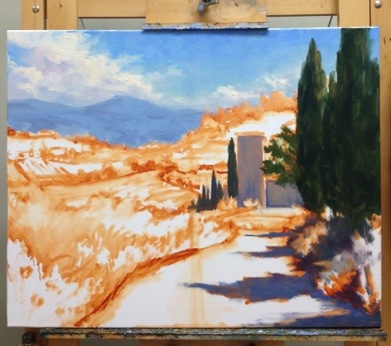
Sant' Antimo painting W.I.P. (cont'd)

I thought I would share a progress shot of the painting of the Montalcino valley (Tuscany) I've been working on. I have been under the weather, which delayed my progress for a few days. But now I think I'm getting back on track.

Tuscany landscape painting in progress by Jennifer Young

I now have the whole canvas more or less blocked in. I decided to remove the tree foliage that I'd indicated  in front of the abbey because I felt it hindered rather than added interest. I had to refer to a few other photos I had taken from different angles to figure out what is behind there, but I think the change opens it up a bit and things make more sense overall. I hope soon to be able to share the final piece....I'm getting closer!

Sant' Antimo painting progress

I thought I'd share a few quick shots of the Sant' Antimo Tuscan landscape I've been working on. The first color I lay in is the sky and clouds and distant mountains. The clouds will be the lightest value in the painting, so I want to "key" that in at the start.20130705-145652.jpg

Next come the darkest values- the majestic cypress trees so prevalent in Tuscany. At this point I also establish a rough lay in of the shadows of the abbey and cypresses:

20130705-145724.jpg

Once that's done I set about fleshing out the rest of the painting. No highlights on these areas yet. But I am establishing some of the wonderful patterns in the terraced hillside and distant landscape.

20130708-085916.jpg

Sant' Antimo on the Easel

We are back from the beach now. It was great but high winds thwarted any further attempts at plein air painting there for the remainder of the week. Anear-constant rain has kept me indoors so far this week as well, so I have started a new Tuscan studio painting to console myself ;) .

20130703-151203.jpg

This is to be a new 24x30" canvas of the Montalcino commune in southern Tuscany, at the site of the Sant' Antimo Abbey.

Happy July 4th, everyone!

Tuscan Sun Wines launch this week in Italy!

I have gotten a number of inquiries about the wine labels I was commissioned to paint for Frances Mayes' Tuscan Sun Wines,  and when the wines would be available for purchase. Well my sources (namely Twitter) tell me that the first big launch will be in Cortona Italy this week on July 4th. If you want to follow the action as it unfolds, check out Tuscan Sun Wines on Twitter . It is exciting for me to watch, if even from afar, and to see the art finally realized on the wine bottles for which they were intended.


It will be even more exciting to see (and taste) the wines in person; but we here in the U.S. will have to wait for that. The U.S. launch is slated for some time in the fall.

Feed problems? RSS readers take note!

It  appears that my last post on my recent wine label commission isn't appearing in my RSS feed, and thus, didn't get disseminated to my email subscribers either. As I am really excited to share this project, and I'd like to get to the bottom of this problem I am having with my blog feed, I hope you will forgive me if I send out this test post. I'm trying to see if there was just some sort of formatting issue with the last post or if indeed it is true that Google is no longer supporting Feedburner (which is where my blog feed gets redirected and disseminated.) Either way, I think the writing is on the wall and it is time to find a new solution to manage my blog subscriptions.

So change is in the air. I'm still trying to figure out the best way to do this, but my plan is to leave Feedburner altogether and just start using my original feed. If you currently subscribe to my blog using RSS, please change your feed subscription to link directly to my original feed:

http://www.jenniferyoung.com/blog/feed

If you subscribe to my blog by email, there should be nothing you need to do at present with your subscription (so long as I do this right!) But if there is any change, I will be sure to notify you in advance. I don't have an enormous subscriber list, but I will do what I can to keep every one of you!

In the meantime, if you would like to see the Tuscany paintings I did for Frances Mayes' Tuscan Sun Winesfollow this link!

Commissioned paintings for Frances Mayes' Tuscan Sun Wines

Speaking of commissions, I thought I would share a few details of what for me was a rather exciting (and consuming) commission this past winter:

Italy painting for Frances Mayes' Tuscan Sun Wine labels

Tuscan Sun Wines, LLC of Denver, Colorado, commissioned me to create seven paintings of the Italian countryside for their exclusive use on a new line of wine labels for writer Frances Mayes, author of Under the Tuscan Sun.

Tuscany painting for Frances Mayes' Tuscan Sun Wine labels

 Tuscany painting for Frances Mayes Tuscan Sun Wine labels

Tuscany painting for Frances Mayes' Tuscan Sun Wine labels

Tuscany painting for Frances Mayes Tuscan Sun Wine labels

Each of the seven oil paintings portrays a theme that is central to life in Cortona, Tuscany and “Bramasole,” Mayes villa made famous by Under the Tuscan Sun. Listed here are pictures of my favorite pieces completed for this project. If you follow this link it will take you to the wine distributors website where you can see how the paintings look on finished labels!

Sogno Rosso

We have been back from Thanksgiving travels for a week now, and we all received an awesome airline door prize in the form of the virus-of-the-day.  It's on the way out now, but I guess I should not be surprised to have contracted something, travelling with a toddler (who, especially since she has been in preschool has become the human petri dish!) Well, I guess as they say, what doesn't kill you makes you stronger. Any way, I am back to painting now, and I have really missed my studio time.  As I mentioned before, I am sticking to some smaller paintings for a while. The holiday schedule seems to just get fuller and crazier with each passing year. So, for sanity's sake, I think I am finally learning to just be kind to myself at the outset and not even attempt anything overly ambitious during this time.

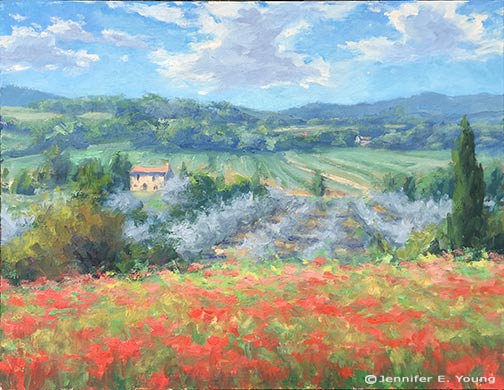
So December is officially small painting month for me! And here, to prove my point, is a 12x16" painting of the Val d'Orcia, in Tuscany:

The compositional sketch:

20121202-185123.jpg: First lay in... 20121130-170359.jpg Final... 20121202-185404.jpg

"Sogno Rosso" Oil on Canvas, 12"x16" Click here for purchasing info or just contact me !

The Tuscan landscape just seems to roll on forever. It is a painter's dream. That idea is the inspiration for the title. "Sogno" (= dream), and "Rosso" (= the red field of poppies). I am painting from photos, memory, and imagination. The photos are the touchstone, but through memory I hope to convey my feelings for this place, which, from the very first time I laid eyes on it, has pulled at my heartstrings.

I rarely paint anything exactly as it is, (whether painting from photographs or life) so that's where the "imagination" comes in. I compose, rearrange, and edit until I acheive a composition and a statement that is pleasing to me. I want to stay true to the place, but really, it's just a moment in time, and an impression of the natural world that I'm after.

Though I am temporarily committed to keeping my painting sizes small, I think this composition cries out to be reincarnated as a larger piece at some future point. What do you think?