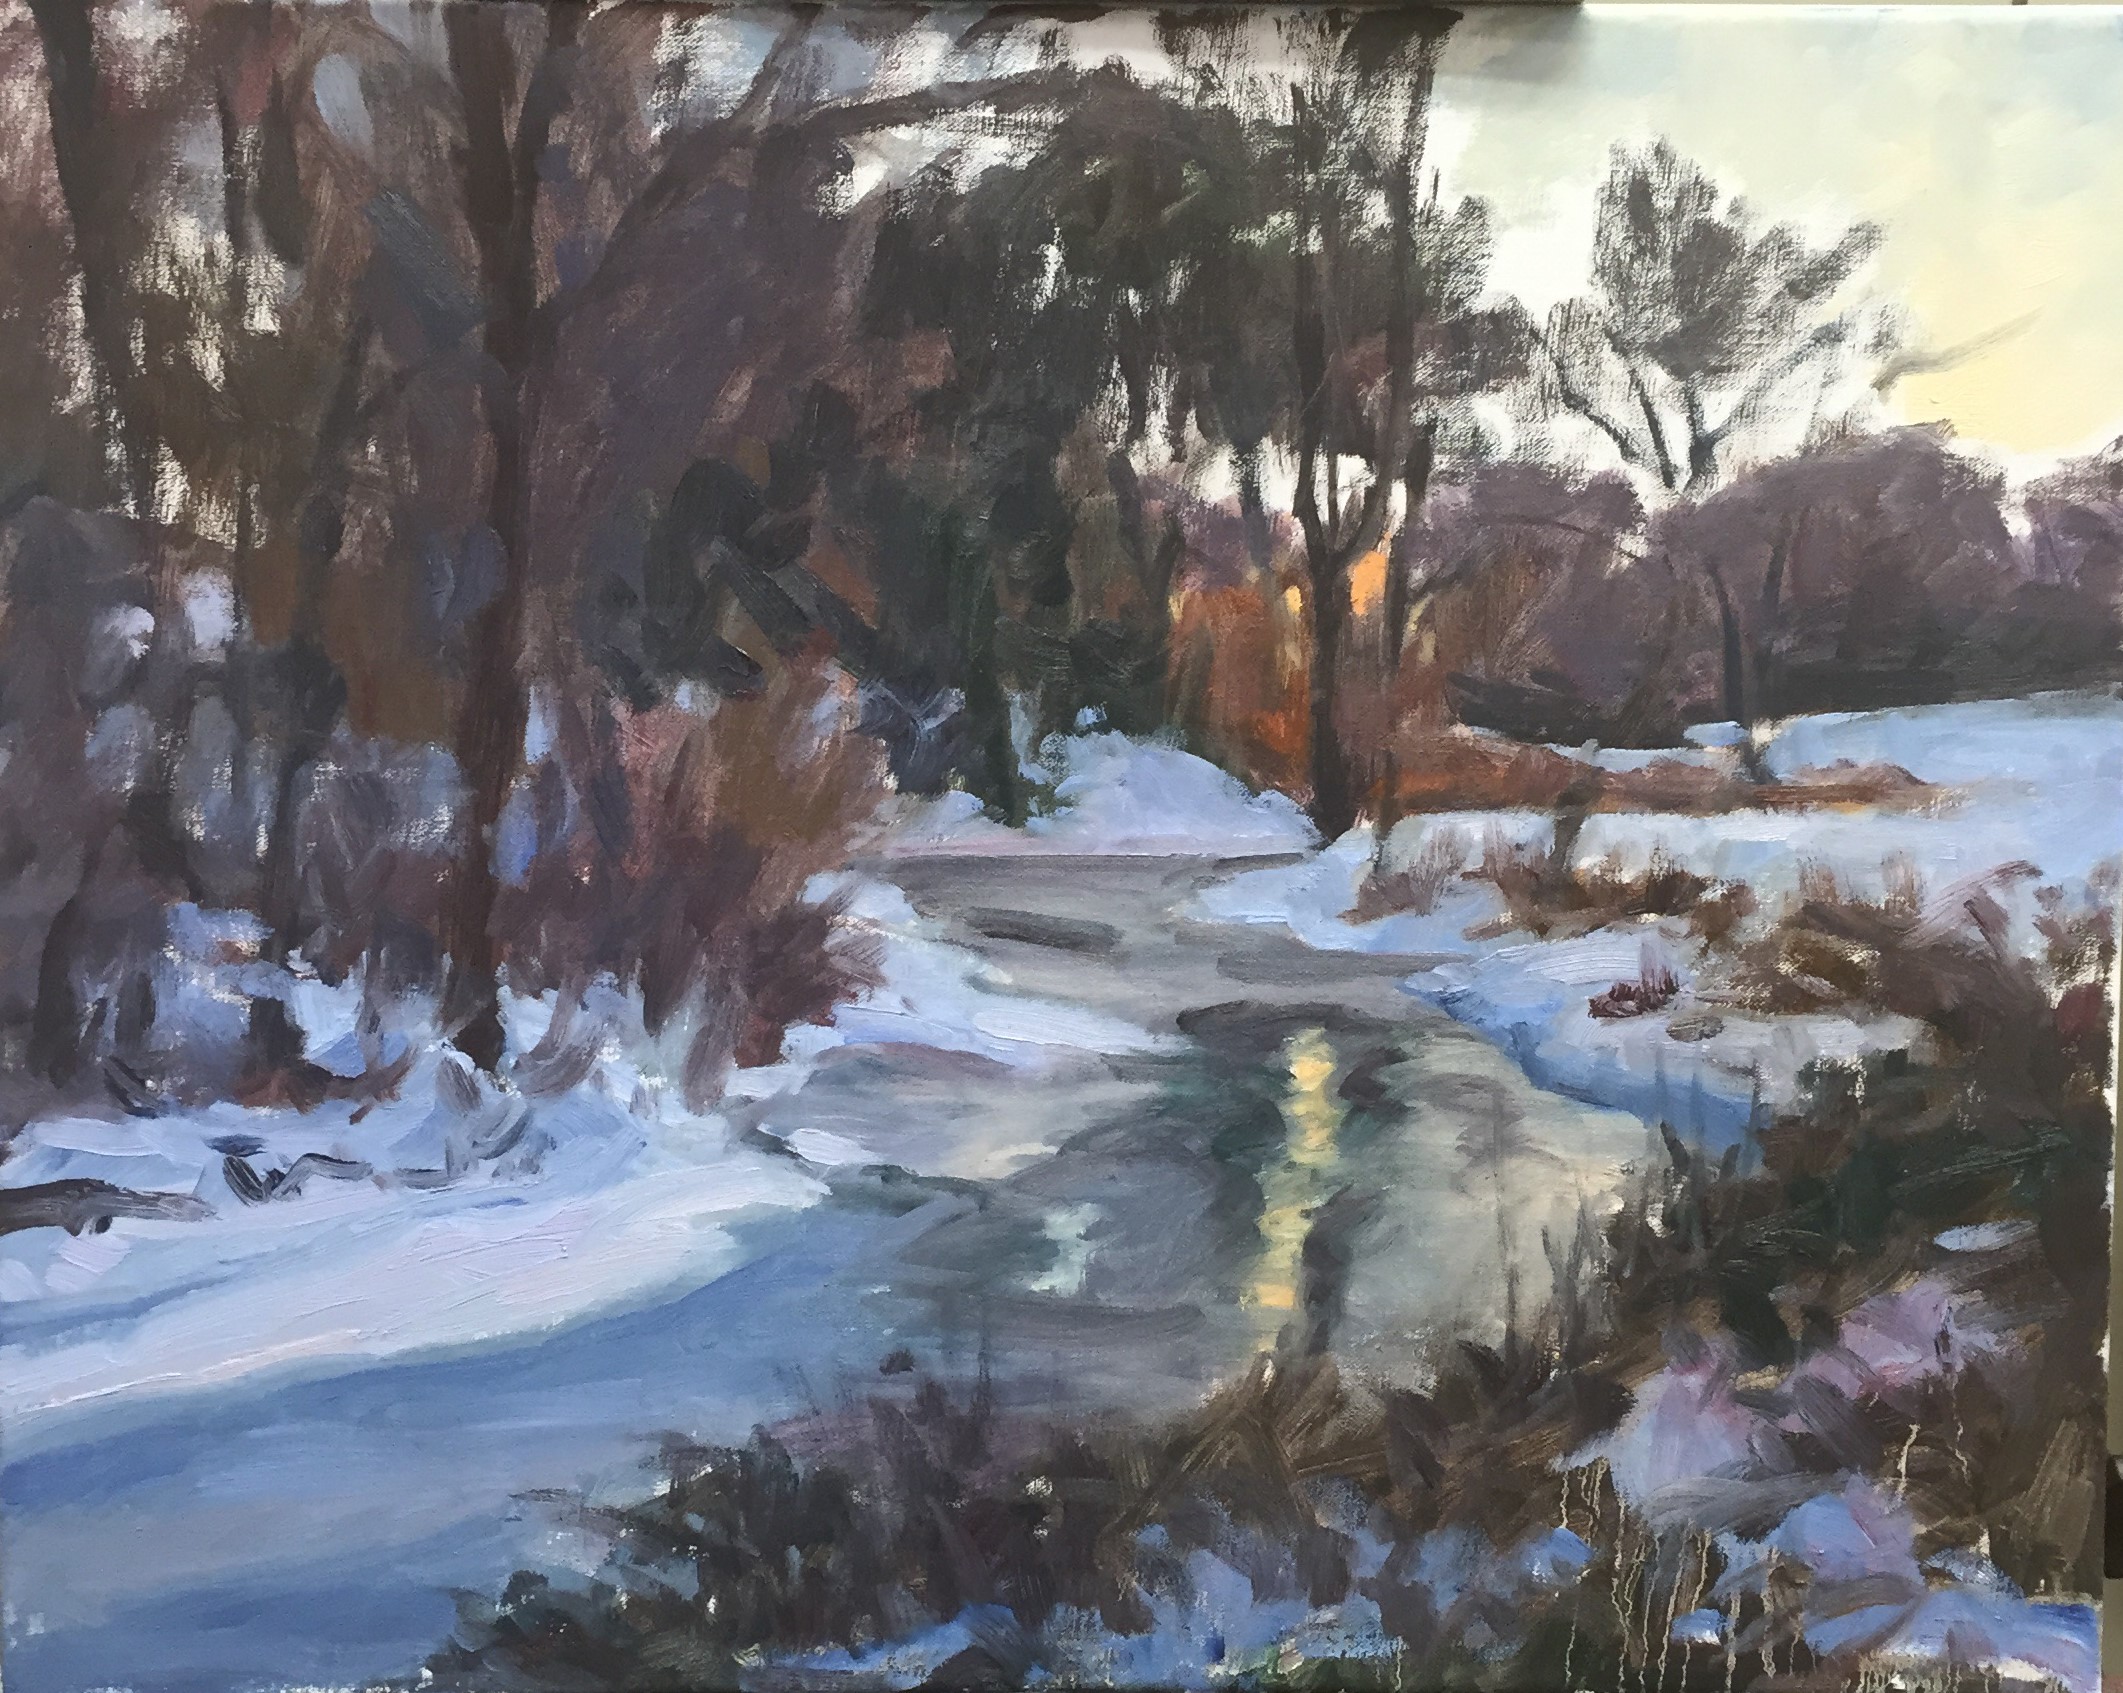
Let it snow

Here in Richmond, VA, we aren't used to getting around in the snow and ice. At the first hint of snow in the forecast, people storm the stores, and stock up on bread, milk, eggs, water,  booze, etc. (you know, all the staples) . In fact, many times the shelves are picked clean.  As for the schools, even a dusting seems to shut them down. In fact, I joke that the whole city shuts down if someone has dandruff. Last week we had about 6 inches, and school closed for the entire week. Granted, there were a few days of below freezing temperatures as well. Everything melted nicely away (finally!) and then this week we had another two days out from snow. Well, the snow might not bother Elsa, (or at least that's what I have heard many, MANY times during our little break) but as much as I love building snowmen, it sure puts a wrench in our routine after a while.

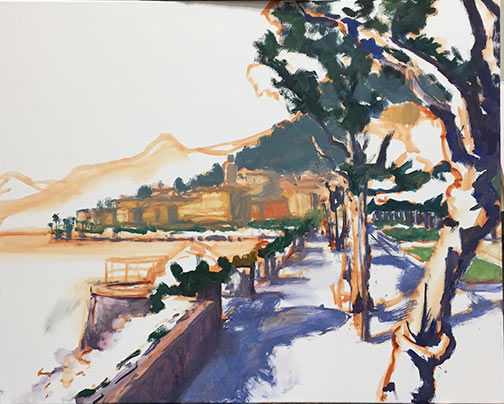
It is pretty though, I'll give it that.  So today I decided to embrace what is instead of wishing for what isn't. And here's the outcome of that shift in mindset. For this 16x20" canvas, I am referencing  photos I took right about sunset during our first round of snow as we were on our way for dinner out (because the roads were totally FINE).

Laying in shadow patterns, WIP by Jennifer E Young

Laying in shadow patterns, WIP by Jennifer E Young

Laying in the lights, WIP by Jennifer E Young

Laying in the lights, WIP by Jennifer E Young

Winter landscape painting in progress by Jennifer E Young

I  apologize for not getting better blow by blow photos of the progress, but I  was on a roll. I almost made this a completely alla prima piece, which felt soooo great,  but (cut to the sound of a needle scraping across a record)  I ran out of time. I think I had a very good start though, so one more session before it sets up too much ought to do me.

Bellagio Promenade

As I mentioned in my last post, I've been working on a large(ish) painting of the Bellagio promenade that leads to the Villa Melzi. It took me a little longer to bring this painting to a conclusion and, because I painted at night, my progress shots were too bad to post. So what I am sharing today is the final piece:

"Bellagio Promenade" Oil on Linen, 24x30" Jennifer E Young

"Bellagio Promenade" Oil on Linen, 24x30" Jennifer E Young

 Because I had to work on this over a succession of days, I worked pretty lean until the last couple of sessions. In the end though, this bad boy has a lot of paint! Of all of the places I have visited so far in Italy, Lake Como in general, and Bellagio in particular, hovers near the top of my list for achieving that dazzling combination of natural and man-made beauty. The trifecta of pre-Alpine mountains, deep blue waters and classic Italian architecture dripping with flowers is pretty hard to beat.

New Lake Como painting in progress

School's out this week due to snow, so my painting time is catch as catch can. Nevertheless, we have been conspiring with other desperate parents to arrange play dates here and there, which allows a little painting and blogging time. So I thought I'd share the Bellagio painting I have my easel this week. This is a promenade on the outskirts of bella Bellagio, leading to the stunning grounds of the Villa Melzi.  This view however, looks back towards the town. Apologies in advance for the poor quality photos and the cast shadow of part of my easel on the painting. I don't have a lot of time to photo edit anything but the final these days, so I hope you will bear with me. I start in the usual fashion, with a loose sketch of my composition in Burnt Sienna:

Lake Como painting demo by Jennifer Young

Next I lay in the shadow family and darkest notes.

Lake Como painting demo by Jennifer Young

At this point I'm laying in some general blocks of color. Still no highlights yet...

Lake Como painting demo by Jennifer Young

And here's my starting point this morning:

Lake Como painting demo by Jennifer Young

Next I will continue blocking in, including the water and distant village. I'm still working up the nerve to paint outside while there's snow on the ground, but we will see. Not much of a fan of the cold, but that snow sure is pretty.

Primrose and Irises

Here's a little celebration of the color violet :-) . I scaled up a bit for this still life. It's still not that big, but given I'm not yet painting these florals at a very fast clip, I felt the difference and it took me a little while to bring it to a conclusion.

"Primrose and Irises" Oil on Canvas, 20x16" © Jennifer E Young

"Primrose and Irises" Oil on Canvas, 20x16" © Jennifer E Young

I am learning to tackle the cut flowers first. Those babies shift and turn and then have the nerve to shrivel up on you long before you're ready to see them go! The irises are now things of the past, but the potted primrose is still going strong.

Still life shadow box

I mentioned in my last post that it's helpful to have some control over the lighting environment when painting the still life. A simple solution is to create a shadow box. This is not a new idea. If you google "still life shadow box", you can find lots of examples. I looked at a number of them, but given my tendency for being definitively un-handy when it comes to building things, I went for the low tech option as described by Lee A. Brown on his blog A Day Not Wasted. The only difference was that I didn't bother with the plastic corner moulding he mentions. Instead I found one of my favorite "building" supplies, some duct tape, (in black- SCORE!) when I was shopping for the foam core. Made this way, the box isn't indestructible, but it's sturdy enough since I don't really foresee needing to move it around all that much. The other difference in my box is that I made two windows for the light, one on top and one on the left side, which I can cover or uncover with the leftover scrap foam core, depending on which direction I want the light.  Here's what mine looks like:

Shadow box for still life painting

All of this is sitting on this Ikea kitchen cart on wheels, which I found on Craigslist for $10 (SCORE! again.) I'm only 5'4", so at my height, this cart brings my objects about as close to eye level as I can manage given the space I have to work with. I've gathered various boxes (gift boxes, jewelry boxes, etc. to help elevate my objects even further, and to provide some variety in the height I can achieve with various objects.  Here's a slightly different angle, with my last still life setup inside:

Still life setup

Still life setup

A simple large cardboard box, open on one end, and a shop light from Home Depot, is an even lower-tech version that would also work perfectly fine.