On gouache

It's been a very long while, but I have decided to give the old blog a go again, even though I am not entirely sure that many people even read blogs any more. I guess I am about to find out!😅

To get the ball rolling, I thought I would revisit some thoughts on gouache. While I love my oils, sometimes I feel like the preparation, heft, and cleanup of carting out my oil painting gear can actually be a deterrent to regular plein air practice. I started playing with gouache some time ago as a way to develop a simpler, more lightweight plein air painting kit that is easier to set up and clean up.

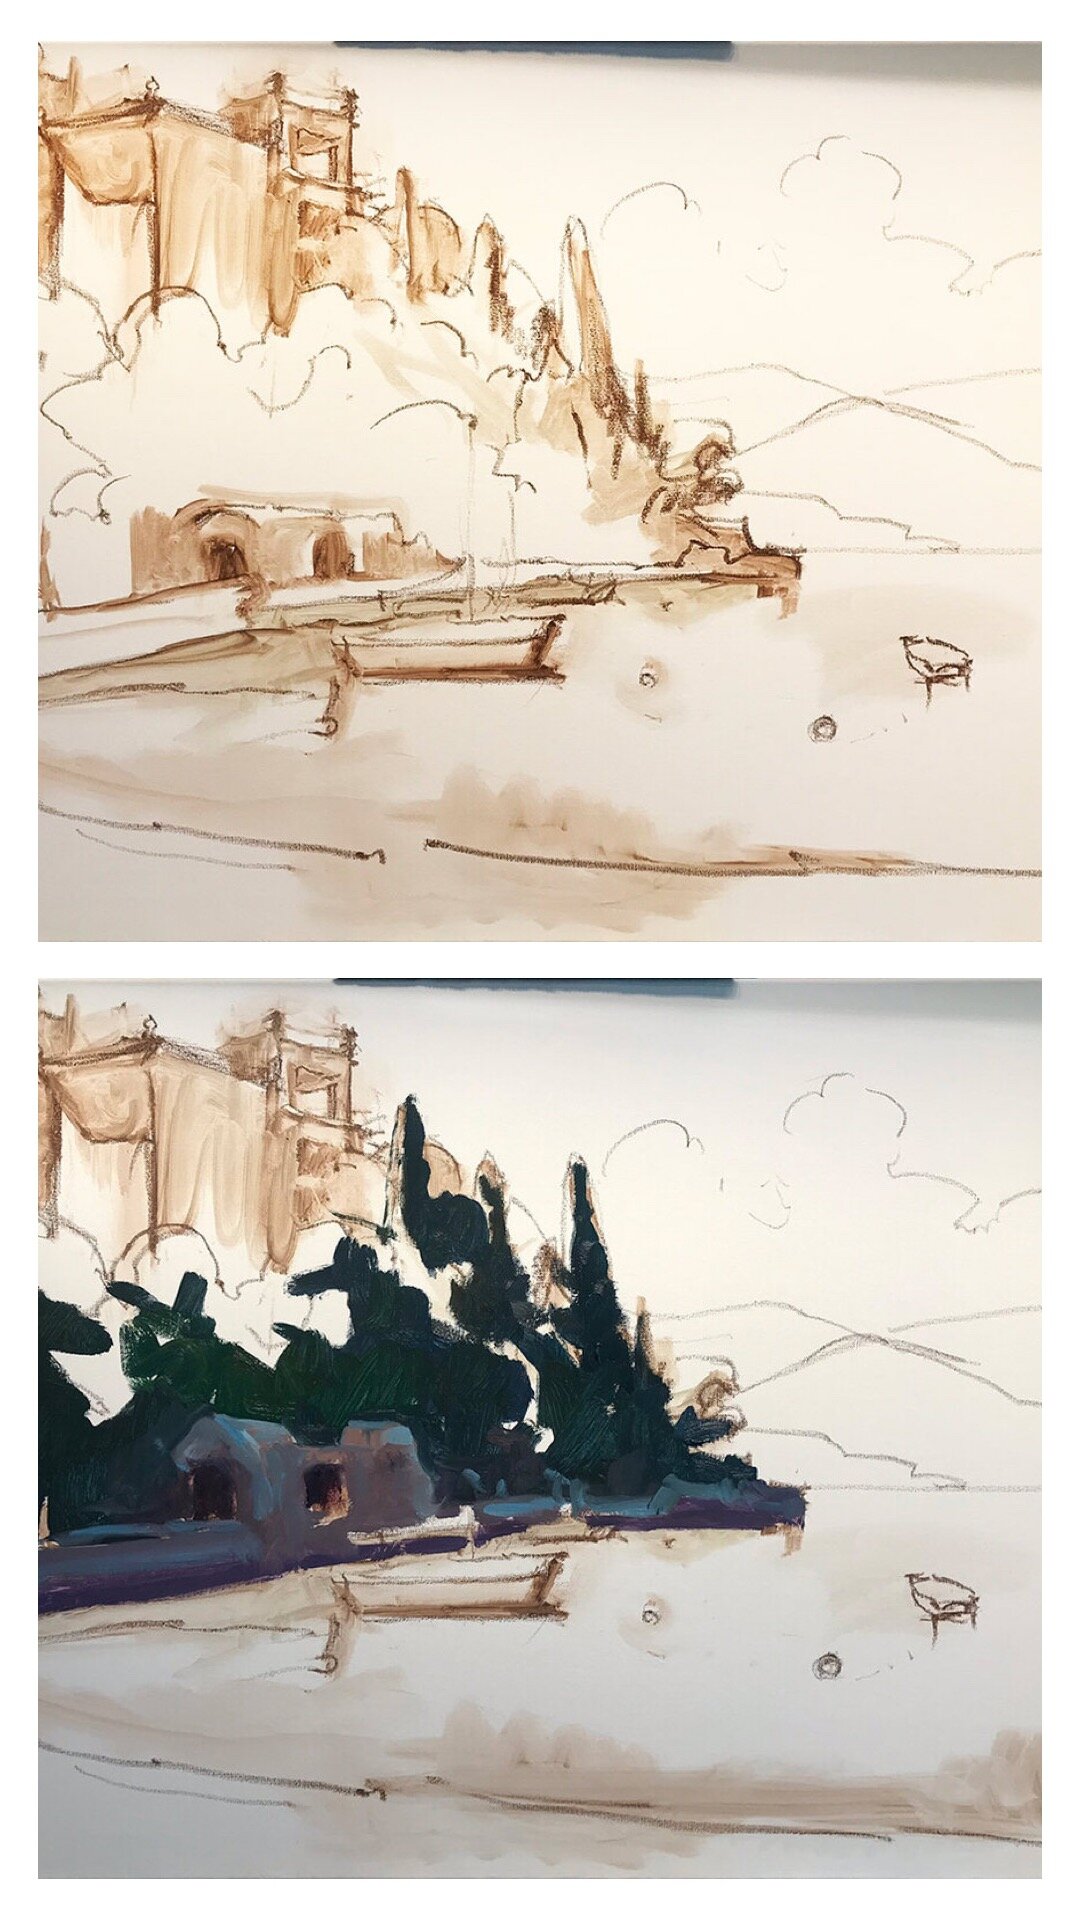
Gouache is basically an opaque watercolor, that can be applied using a direct painting approach similar to the way I paint in oils (dark to light, "thin" to "thick", etc.) It can be applied in thin washes or opaque strokes, though it really doesn't allow for heavy impasto techniques due to its tendency to crack or chip at very thick consistencies. Even so, it has a lovely velvety appearance that, unless varnished, can be reactivated with water for additional painting or adjustments. It is easy to clean up afterwards and lends itself to small formats for studies and low-stress experimentation.

One thing that I have had to adjust to is that there is a color shift as the paints dry that requires a certain amount of regular practice to be able to intutively anticipate. Specifically, light colors appear darker as they dry and dark colors tend to dry a bit duller and lighter.

The other big adjustment is the rapid dry time, which is both an advantage and a handicap for a painter used to the long open times with oil paints. Regular application of water using a spray bottle to re-wet the palette while working helps with this, but it can still be a struggle for me when painting outside in the open air, especially at locations like the beach, where the rapid dry time is intensified by the heat and ocean breeze. As with any skill, practice is key.

Here is a little video my teen daughter put together for me of me finishing up a gouache still life, painted from the convenience of my back porch. I hope to do some longer videos in the future, especially if I can wrangle the kid's help again.

Adding some highlights, “Begonia on the Sill,” Gouache on Illustration board, 6x6”

Commit to the feeling not the photo

So I have been working on this 24x30” canvas off and on for some time. It was actually based on a series of photos I took on a drive not far from my home. I was after a particular feeling I had witnessing a warm, glowing evening sky in Hanover County filled with spectacular clouds.

It is oh too easy though to get lost in the details, and that is exactly what I did! The clouds became too busy. The highlights lacked color. The landscape below needed something. Ultimately I took a big ole squeegee over the whole thing and scraped the paint and blurred a lot of the details out. I took an oil pastel to it. I greatly simplified the clouds and kicked up the color a bit. None of that completed it, but it felt good and liberating, if still unresolved.

At that point I just took it off the easel and faced it against the wall, deciding to just move on to other pastures for a while. I came across it again the other day as I was cleaning my studio, and looked at it with fresh eyes. “Hey that really might be worth another go," I thought. I scoured my photo references for inspiration and found these grazers lit up with a golden light. I thought they would be perfect to lead the eye into the painting without detracting too much from my big sky.

“Gilded Grazers,” Oil on linen, 24x36” (SOLD) ©Jennifer E Young

“Gilded Grazers,” Oil on linen, 24x36” (SOLD) ©Jennifer E Young

When I paint landscapes from photos in the studio, (which is really quite often these days due to my requirements at home) I try to go more for the feeling than the photo(s). This is my chance to play with color and composition and not be a slave to recording what the photograph has already attempted. I really ended up having fun with this piece. I enjoyed the play of colors and painterly energy. I enjoyed being willing to lose what I had done in order to make it better. And finally, I appreciated the cows for bringing it all home.

Reworking and "oiling out"

Each year my family looks forward to our annual beach week on the Outer Banks of North Carolina. I have written a lot about how much I love painting down there. A week never feels like enough time, but this year it feels like a lost luxury because the family made the tough decision to cancel our rental due to the risks of traveling during COVID19.

Needless to say I am feeling very nostalgic for the beach, and have spent a lot of time looking the painting, “Radiant Dawn,” which I painted a couple of years ago during another pivotal time of my life. This was the view from the bedroom balcony of our beach rental, and I hung it up in our living room to transport me back there in spirit. It was an emotional time for me but the awesome beauty of this sunrise lifted me up and gave me a deep sense of connection, hope, and gratitude.

sunrisenagshead.jpg

But of course the artist in me started to analyze the painting each morning as I “enjoyed” it from our breakfast nook. While I love the sky, I found myself really wanting to rework the lower portion of the piece. I found it altogether too green and too dark, and it did not evoke the feeling of “dunes” to me. I remember WHY I painted it this way, (I didn’t want to make the painting too busy and detract from the sky) but it just wasn’t working for me.

Sometimes when I rework a painting I have to sand the area down or even first scrape down some of the built up paint texture ever so gently with a razor blade. Otherwise the previous brushwork underneath is too distracting. In this case the surface was relatively uniform. It was, however, a bit slick and required some “oiling out” to assist in the adhesion of the new paint layers. To rework a dry painting I may use a bit of my painting medium mixed with Gamsol, or even a light spray of retouch-varnish applied to the area. For this piece, just oiling out with Gamsol seemed to be enough.

“Radiant Dawn,” Oil on linen, 24x30” ©Jennifer E Young

“Radiant Dawn,” Oil on linen, 24x30” ©Jennifer E Young

I basically reworked the lower third of this painting, leaving the sky completely alone. (It may look like I did more to the sky, but that’s because I think I did a better job of color correction on my digital image this time around.) Painting everything in a close value range can be a challenge, but an important one to keep the sense of unity I was after from the start. Here is the newly adjusted piece, with changes that my family didn’t even notice 😂. Oh well! I feel happier about it, so I guess that’s what’s important.

P.S. “Oiling out” and reworking are generally not advisable to do over a final varnish unless you can completely remove the varnish layer due to possible problems with cracking that can ensue. I always use retouch varnish though, both for this reason and because personally I don’t find final varnish necessary.

Lake Como Painting Progression (continued)

Well the time has really gotten away from me this week, as we are in the home stretch of my daughter’s “learn from home” work for her last weeks of fourth grade. But I HAVE been making progress on my painting of Varenna, the start of which I shared in my prior post.

First things first… I thought before going any further I would share a little about the colors currently on my palette, and what I’ve been using to work on this piece.

palette2.jpg

I will start by saying that this is a pretty big palette of colors for me, and definitely larger than what I use for my field work. But because I have such limited studio time, it helps to have a few more “convenience colors” to work with so I don’t spend so much time mixing. Plus look at those yummy colors. Sometimes it is just plain fun to indulge in them, as long as I don’t have to carry them around in my backpack! The paints listed with an asterisk* by their name are the kinds of colors I nearly always use. This is basically a double primary palette with the addition of an earth (brown pink) and a “black” (Payne’s Gray, which is really almost a dark blue).

I pretty much always lay my basic palette out the same way in a clockwise fashion. So for instance, starting with my earth colors in the lower left, I move up to white, which is always in my upper left, followed by colors from warm to cool, generally speaking. This palette has varied over time with a few colors added, or removed, or others substituted from time to time when I want to experiment. For instance, my two reds used to be Cadmium Red Light and Alizarin Crimson, but I switched to a cooler Napthol Red for my “warm” because when tinted it makes a cleaner, less orangey pink. I will use Quniacridone Violet in a similar manner to my former Alizarin Crimson for nice dark purples or browns, to modify other colors.

If you are new to painting I would recommend starting out with a double primary palette (a warm and cool of each primary color, yellow, red, and blue) plus white, and then slowly adding new colors over time as you get a good handle of what your primaries can mix. You might be surprised at what even a single primary palette can do.

Okay, enough palette talk for now. Let’s recap;

It’s time to address the rest of that white canvas by adding color to the lit side of the trees

varenna_demo_jenniferyoung

I also start addressing a few of the details of the foreground including boats and walkway to the town of Varenna.

varenna_demo_jenniferyoung

And finally (with a big caveat that this color is off because I was working on the painting at night and photographed it without the benefit of daylight) I start to address the masts, water, and clouds.

varenna8.jpg

At this point I am going to sit with the painting for a day or two and may “tweak” it here and there, but I am close. I will post the finished piece, (photographed in better lighting) when I do. ***UPDATE*** See the final painting here.

Lake Como painting progression

I am working on putting together a video post, but I have to get my 9 year old to help me with some of the technical side first.😅 So today I am relying on the good old fashioned blog post, sharing a step-by-step painting in progress.

I had such a good time with my last Lake Como Painting that thought I’d “laissez les bons temps roule,” (as the Cajun in me likes to say.) I chose a scene in Varenna from my photo archives, one of my favorite memories that now feels like both yesterday and a long time ago. I chose one of my favorite canvas sizes, a 24x30”, and a color scheme of jewel tones that always cheers me up.

My starting approach for the last year or so is to just very casually sketch out my composition lightly in sienna oil pastel. The Sennlier oil pastel is so soft and lovely that it erases my change of mind with a very low stain, and yet allows me to indicate some shading at the same time.

varennasketch_jenniferyoung

Once I am more or less satisfied with my composition, I begin laying in some of the shadow areas of my painting, to get a feeling for the overall value pattern of my painting.

varenna_WIP_Jenniferyoung

I am generally trying to keep things very broad as I lay down the initial color. While not all of the water is “in shadow”, I decided to lay in the general color because I felt it would help me make a decision about the composition ( as you will see in the next photo.)

Varenna_Painting_Demo_JenniferYoung

My initial idea was to include the foreground shoreline with a couple of rowboats, but at the same time I wanted to keep the distant horizon below the middle point, which pushed the shoreline down. After laying in the water I decided the shoreline wasn’t really doing much for me or the composition.

Varenna_Painting_Demo_JenniferYoung

This is better, I think. Even working from photos in the studio, there is still a lot of decision making that goes into the process. You don’t have to be a slave to a photo and paint something in, just because it’s there in the reference. This is my painting, after all, and sometimes the best thing I can do for my work is to simplify. There may be a future painting with the shoreline boats as the feature, you never know, but sometimes it’s better to say one thing with clarity than several things with confusion.

At this point it was time to step away and make dinner, but I felt like I was at a good stopping point so this is where I left off last evening. I will still need to address the rest of that white canvas and make additional adjustments to the water and boats , but now I have a pretty solid idea of where I’m going next.