Super cheap wet panel holder

This week as I am plodding through the daunting task of packing up my studio, I have storage on my mind (as in, where the heck am I going to put all of this stuff?!) Granted, a number of these boxes are my office supplies and files, but let's face it; artists have a lot of stuff.

art studio storage tips

And so we painters are always trying to come up with nifty and cheap storage ideas that will protect our paintings when they are wet and keep them organized when they are dry. With that introduction, meet my cd storage racks turned painting panel holders:

studiorack1

This is about as low tech as you can get. Two CD holders are tied together with twist-ties on either side.

art storage ideas

These are also great to have in the car for plein air paitning trips. I put the whole setup inside of a box lid sized to hold them for added stability and reduced mess. It will hold painting panels up to 12" and keep them neatly separated from each other so that they don't touch.

Granted, CD holders are becoming a little harder to find as we move further into the digital age, but they are still around. If push comes to shove, a letter sorter from an office supply store will do.

art storage tips


Matt Smith workshop

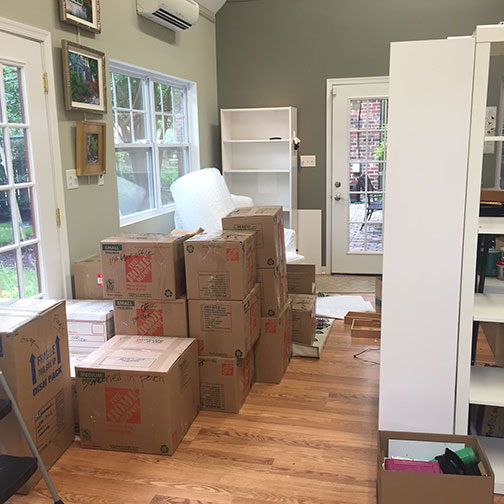
Oh yeah, I have a blog! ;-) Actually, I didn't forget; I've been doing a little traveling up north to the New Hope School of Art to take a workshop from the very talented painter Matt Smith. The trip was noteworthy for a number of reasons. First, it was the first time I have been away from my daughter for more than a night. (That part was hard.) But second, it was also the first time I've had in 4 years to do nothing but paint and immerse myself in "art stuff" for four days straight. (And that part, my friends, was luxurious!) I haven't taken a workshop in a very long time. But now that my daughter is getting a little older, I really feel like it's time to amp up my art life in some significant way and infuse my work with new insights. So when I heard Matt was coming east to teach (he's based out West, so that's something I'd not caught wind of before around here) I knew it would be an excellent opportunity to do just that.

Please excuse the poor photo quality but this was shot with my iPhone in low light. Here you can see the very light way Matt holds his brush to apply paint and manipulate edges.

Matt hails from Arizona, and is best known as a painter of the Sonoran desert near his home, as well as the snow capped Canadian Rockies and other places out west that epitomize the classic western landscape. What initially attracted  me to his work though was not his subject matter, but the sensitivity in the handling of  his brushwork and edges. They are both bold and delicate at the same time.  But after seeing him demo and talk about his approach, I was equally impressed by the purposeful way he composed his paintings and orchestrated his compositions to create  powerful statements. I won't get into a blow by blow description of day 1-4 of class, but I will share some of the significant things I took away from it personally, most likely in more than one post.

The interesting thing about this workshop was that even though Matt is best known among artists as a plein air painter, the class was held entirely inside, in the studio. I'll be perfectly honest here and say that when I signed up for the class I was mildly disappointed that the format would not include at least part plein air painting, especially since Matt himself is a seasoned field painter and the area where the workshop was located was very scenic. (It was the birthplace, in fact, for an entire movement of landscape painters, known as The New Hope School and Pennsylvania Impressionism.) Largely though, that disappointment was entirely personal. My studio is my workhorse, but plein air painting is more exciting to me. Also with my life situation at present, I just don't get the longer stretches of time needed to trek out in the field as often to paint.

When I asked about the reason for the indoor class, Matt's response was that in his years of teaching, he has seen the same problems pop up again and again, whether in the field or in the studio. Maybe he felt it's better to address these fundamental issues in a controlled environment rather than adding another layer of difficulty with the environmental factors that plein air adds. In any event, the format turned out to be fine. In fact, there was plenty I needed to work on just with my studio work,  the studio environment definitely allowed Matt to get to each student several times a day with valuable feedback. As it turned out, the weather was not great any way, and we probably would have needed to seek shelter for at least two of the four days due to rain and wind.

Matt did several very good demos (using his photo references). He used a Strada easel, which I think was a rather new purchase for him. He talked a lot about equipment and painting gear, which, as any regular reader of my blog may have surmised, is a topic of great interest to me. The Strada is made of metal and looked like a neat little box (I think his was the mini, which is presently sold out.)

The Strada Mini Easel

But even without the two winged accessory attachments added to provide more workspace, it was a very heavy box for its size. Matt said he liked it because of its compact size (it easily fits into a backpack) and durability for travel, but personally I could not deal with the heft. A Gitzo travel tripod was also part of his setup, which looked great for its ease of use and small size when folded (also easily fitting into a backpack), but a quick Google search soon told me this item was way out of my price range. (Wowsa!)

Matt, by self-definition is not a colorist. In fact, of the fundamentals he sites as essential to a good painting (Drawing, Value, Design, and Color) the most expendable he says, is color. Even so,  I found his palette fairly wide, with four blues, two earths, two yellows, an orange, one red, a violet, and a couple of greens (plus, of course, white.) He used no medium other than his oil paint and a very tiny amount of Gamsol to thin his paints.

His start consists of a very light sketch, soon followed by masses of color, working broadly to get his main elements and shadows down. He then builds from there, thin to thick, dark to light, broad to more detailed. One thing I found interesting is that he almost always left his sky a white canvas until close to the very end of the process. Obviously this is working to his great advantage, but try as I might, I couldn't resist my normal method of putting the sky in early on. This was especially the case if there was any water in the landscape, as I find  I need that sky information to know what's being reflected.

I've a lot more to say on the subject but I should probably try and paint something now! In my next post I'll share of few of my studies done in the workshop, as well as some valuable take-aways that I received from Matt's feedback.

A good value

If you have been reading my blog long enough, you may find that I obsess a little over art supplies and gear. A few months back a fellow artist mentioned that a great tool for judging values was a Kodak Wratten 90 filter. So for a few months I was on a mission to find one that was A) big enough to comfortably look through (ideally 4x4) and B) low enough in price so as not to break the bank. After searching online and watching the bidding wars on eBay, I found the combination of the two criteria impossible to meet. Then one day it dawned on me that I used to have a little red value viewer tool that I'd picked up in a sewing store. I don't know what happened to it, but I thought I'd poke around on Amazon to see if I could fine something similar. Lo and behold, I stumbled upon this little number:

Like the Wratten filter, this value finder helps neutralize color so that you can more accurately discern the values in your reference. Not only that but it has 3 view finders of different aspect ratios that will work with a range of canvas sizes. It also has optional guidelines that you can overlay to check composition, AND a couple of value scales to check your paint mixtures.

The drawback is that the filters are red rather than the nice grayish neutral of the Wratten filters. This may not appeal to everyone. But with a $14.95 price tag it is a good option and specifically geared toward the painter. I have been using it with studio work and it does a good job at neutralizing color so that I can judge values with more accuracy.  I haven't used it outdoors yet but I think there it would be even more useful when making on the spot judgements, and I look forward to taking it along with me (hopefully this week) now that the weather is warming.

A trip to the Mountains

This past weekend my fabulous husband gave me a wonderful gift of a getaway to the Blue Ridge Mountains. It was just an overnighter, so I didn't have a ton of painting time; but I did have enough to do this little mountain study.

Blue Ridge mountain plein air painting by Jennifer Young

I also spent part of the trip scouting around for future painting sites.I was in the town of Nellysford, VA (near Wintergreen) which has long been a favorite of mine. In the past though, I have always been able to scout while my husband drove. Driving on my own through this gorgeous countryside, I realized how oblivious I have been in the past to what a white-knuckle a drive route 151 can be (sorry honey!)  It wasn't very easy to ogle without also risking driving oneself off a cliff. I did find a few spots to pull over though, and even though the leaves haven't yet made their autumn transformation there, it was still stunningly gorgeous and inspiring.

The above painting is really a study. I was mainly interested in getting a feel for the planes and shadows of the mountain. I struggled with the canvas panels I brought though. They were oil primed linen, which are supposed to be primo, right? But I found them to have a both a heavier weave  and yet to be much slicker than I am accustomed to, at the same time. It might just be a matter of getting used to them, but they gave me problems last weekend and I felt like the surface was a major distraction.

I also learned that my overreliance on my handy dandy rolling bag has caused my plein air painting gear to get a little hefty. I love using the Soltek easel (when it's functioning properly) when I'm around town, but if I am going to get back into traveling I really need a lighter setup for my backpack. I do have a very light setup already, but it has proven almost too light for me, and I find it to be so much less stable-feeling  than my Soltek or other pochade boxes I've used in the past. I also have become extremely reliant on the large paint-mixing surface of the Soltek (which I have expanded even further--more about that in a future post). So the tiny mixing area of my current travel box makes me feel like a giant in Munchkin-land.

Yet again, I may just need to get myself accustomed to the change. But I've been finding myself eyeing another paint box of late (here we go again!). I've had my eye on it for a number of years. It's by Alla Prima Pochade. The models I am considering are either the Bitterroot or the Bitterroot lite. I can always rationalize needing an auxiliary easel  for travel and for use in case my Soltek breaks down again. They seem really well made and are so intelligently designed (I've seen them before in action.) But will either one significantly reduce my setup size while still allowing an adequate paint mixing area? That is the question.

First plein air of autumn!

Happy Friday everyone. Here's a little plein air piece I did this week when the kiddo was in preschool. This was done at one of my fav local spots, Bryan Park. The weather has been gorgeous lately so I was thrilled to finally get back to some good old field painting at last! There were several really good views that I noted, but I settled on this lakeside view with its nice reflections and early autumn foliage. This is totally alla prima, with just a bit of tweaking to the wet paint edges when I returned to the studio. I started it at about 9 a.m.:

Autumn plein air landscape painting by Jennifer Young "Early Color, Autumn" Oil on Linen, 12x9" For more information, click here!

I haven't mentioned plein air painting gear in a while, but it occurred to me on this outing how much I appreciate the simple shopper that I use to cart around my Soltek easel and all of the rest of my gear. Longtime readers may recall that I have a history with the Soltek that goes back about 7 or 8 years. Well, since the one "tune-up" I had, it is still going strong, though my dilemma about an adequately appointed backpack still exists. However, I picked up this little number several years ago on a whim at Burlington Coat Factory (of all places). It has a front and side outer pocket, and  fits my easel, panel carrier, and the rest of my painting gear (as well as a few personal items) perfectly. Most importantly it is on wheels, which, when used in the appropriate setting, is much easier on my back.

plein air painting gear and tips- Jennifer Young

Now this bag won't help much trekking through the mountains or hopping over river rocks. But for city painting (which I do most often now due to time constraints and family obligations) it works great. It does have short straps on the top to carry up stairs, etc., but the bag is so long that with my 5' 4 1/2" frame they are used pretty minimally.  I have to admit that I have dragged this bag on its wheels through a field or two on a number of occasions, as well as a good many cobblestones. Remarkably it has held up great! The money I spent for this bag ($19.99) has served me well.  This I cannot say for the $70 beach cart I attempted to drag over the dunes last summer. After only traversing 10 feet on its virgin expedition, the cart's two front wheels promptly went "kerplunk" in the sand!

Independence Day

It was hot and humid and overcast. Our baby had been sick part of the week prior and through the long weekend with a 102 degree fever and hand, foot and mouth virus. And to top it all off, we woke up on July 4th sticky and without power from a tremendous summer storm the night before. But believe it or not, I had a great morning, as I was allowed the privilege of escaping getting outside early to do this little plein air painting.

 plein air painting of water by Jennifer Young "Pond Reflections" Oil on board, 12"x9" Click here for more info, or just contact me to purchase.

The location is Young's Pond in nearby Bryan Park. I've painted this location before a number of times, and this approximate scene once before, which you can see here. There were a number of nearby spots I could have chosen, but on an overcast day it's nice to paint a water effect, as then you have some luminosity built in, when the light is otherwise fairly flat.

I spent about 3 hours on site working on this piece, which was longer than I normally would do on location. But I think the combination of fairly steady light conditions, and my private glee at having the entire morning completely to myself kept me lingering longer than I would have otherwise.

Here's a shot of my setup right before I started.

plein air painting setup

Next time I would like to get out even earlier than I did, to try and capture that wonderful atmosphere (aka humidity) before it settles into just plain old hot heavy air. But with a baby, you gotta do what you gotta do, and I was happy to get out at all. My setup has remained pretty consistent over the years, with my Soltek easel still being my go to plein air easel due to the ease of use and quick setup time.

The sun made its appearance often enough that shading myself, my painting, and my palette was a concern. I brought my umbrella with me, but it is a pain to set up and doesn't really work that great with the Soltek (one of the easel's down-sides...I've yet to find a really compatible umbrella that can attach to it without falling over.) So If I can get away without, I usually do. This often means avoiding standing in the blazing sun, even if it means forgoing a preferred view. Otherwise my painting ultimately suffers (not to mention my skin.)

In this photo I've set up my painting panel so that the sun (when it peeks out) is behind it, making it shaded. I am relatively shaded by tree branches overhead. Since I am right-handed, my subject is to my left, so that I am not having to reach across my painting when I look/paint. Often times I can shade my palette simply by wedging another panel between it and my painting. In this case I am using a flat wet panel carrier called the Art Cocoon.

This is actually a pretty neat concept for a wet panel carrier, which I read about some time ago on another artist's blog (when I still had time to read them) owned by Ed Terpening . The advantage is that you can use the carrier for different sized paintings with the provided inserts, and it is nice and lightweight and not bulky. But the down side for me is that it is made out of cardboard, which eventually warps (especially in our hot Virginia climate) and when that happens it stops protecting the painting effectively.

For that reason, my go-to wet panel carrier is still the RayMar. It's a little more expensive, and bulkier, but still lightweight. And its coroplast construction means that while it won't last forever, it lasts a good long time and doesn't warp.

Painting again! Plein air @ Lewis Ginter

Well, I think I am back from my "blog break" now. I even took a brief painting break as well to get some much needed rest and physical therapy for my neck/shoulder/arm troubles. But since I'm, also feeling the need to excercise my "plein air painting muscles" for the upcoming Paint Annapolis event, I'm trying to ease back into outdoor painting again.  Here's a happy little vignette I did this week at Lewis Ginter Botanical Garden:

Plein air garden painting by Jennifer Young

"Garden Companions" Oil on board, 12x8" sold

The botanical garden is really gorgeous right now and full of summer blooms. Even so, I had to forgo a lot of really good potential painting opportunities in order to find a spot of shade. The August sun and my fair complexion do not get along for any length of time, so shade is a real must. My painting umbrella does little more than shade my canvas and easel, leaving the rest of me high and dry (or hot and bothered, or whatever!)

I finally managed to tuck myself into a little corner to paint this potted urn surrounded by purple cone-flower, perennial grasses and towering hibiscus. Is it a landscape or a still life? Your call. Any way, it's rather wild and impressionistic. Guess I was happy to be painting again. :-) I'll upload it to the website this weekend, but meanwhile contact me for purchasing inquiries. (Note: It is done. See the link above!)

Wet panel carriers, plus more on pochade boxes

I have a new painting to share, but the rain we're getting is making it hard for me to get good light for a photo. Hopefully I'll get something to show a little later today. Meanwhile, those readers who are "gear-heads" like me might enjoy some light reading on plein air gear: Wet Panel Carriers:

Raymar's wet panel carrier for plein air painting
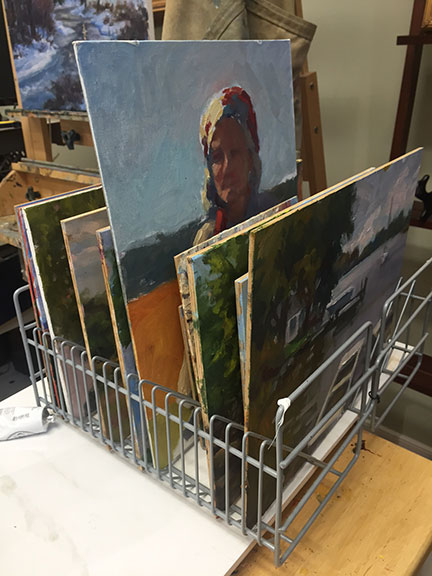
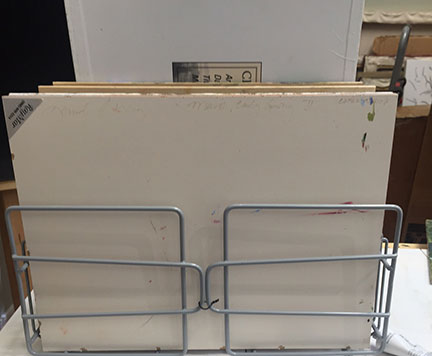
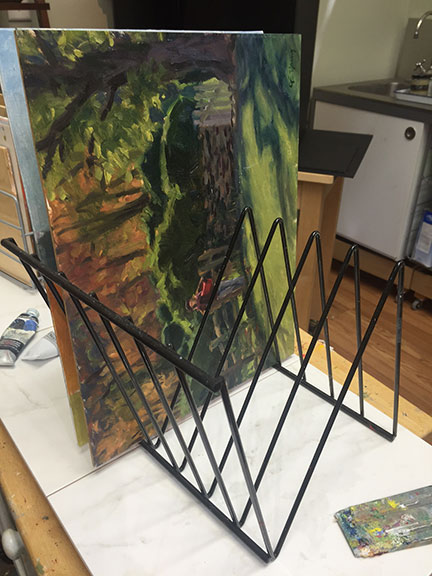
Ever wonder how to carry those wet paintings around after a day of plein air painting? Never fear, that's why wet panel carriers were invented. :-)  There are a number of commercially available boxes designed with interior slots to hold a few wet panels at a time. Raymar is well known  among plein air painters for their lightweight and moderately priced wet panel carrier made out of corrugated plastic.

But with very little time, ingenuity, and even less cash, it's easy to make your own, even if you aren't into gagetry or woodworking. The folks on the WetCanvas plein air forum have discussed this topic endlessly. Here are a few of the solutions I've bookmarked:

  1. Marc Hanson's wet panel carrier, cheap and fast.
  2. Cost Cutter Ideas from Larry Seiler and others- includes wet panel carriers and other home made solutions for some of your plein air painting gadgetry.
  3. And lastly, here's Wayne Gaudon's solution, and the one I've tried myself (with a few modifications.) Easy!  It uses el-cheapo Walmart picture frames and a few very simple tools. I pretty much ditched the tools and came up with the lazy woman's version. As soon as I photograph it I'll write about my own experience with this version of the home made panel carrier.

Pochade boxes

Don't worry, you'll not get another thousand-word dissertation from me on plein air easels (but if you missed it the first time, you can read my thoughts here, here  here and here).

This time, Charlie Parker has taken good care of this task on his most interesting art blog Lines and Colors. If you're in the market for a pochade box and feel overwhelmed by the choices, this post will go a long way towards helping you along in your decision. I was happy to see that he wrote about  a new pochade box I've been lusting after myself- made by Alla Prima Pochade.

I first saw one of these boxes (the Bitterroot Lite)  demo'ed in France by fellow artist-traveler Joyce Gabriel, and I was impressed with the many thoughtful and unique features, and how all of it folded up into one neat little package to fit inside her everyday backpack.

P.S. If you have extra reading time, check out the rest of Charlie's site for lots of great art coverage, including his latest post on a painter I've long admired, Richard Schmid.  This is a timely post for me personally, as this summer I've been re-reading Schmid's wonderful book, "Alla Prima" (also available in a more  affordable paperback) and doing the color charts he recommends (incredibly enlightening!)  You also might enjoy Joyce's posts and pics on her trip to France . I met Joyce at Le Vieux Couvent where I'll be teaching my own workshop next spring.

Plein Air Easels- A pochade box for travel

This is my 4th in a series of posts about artist's easels. You can see the other installments here:Part I: On the quest for the perfect easel Part II: Guerilla Painters' Pochade Box Part III: My Soltek Easel

After having already written extensively about my Soltek love, it may seem curious that I'd have yet another pochade- style easel to write about. But what I've found (and I'm sure other plein air painters can empathize) is that the quest for the most versatile and easy to use plein air easel must be tempered with the quest for the lightest possible plein air setup. This is especially important if you're an artist who likes to travel.

With the airline regulations being what they are, it has become more and more of a challenge trying to figure out what items to check (if any) and what items to carry on in the ever-diminishing size of the acceptable carry on bag. While I may not be able to bring all of my art supplies with me on the plane, I prefer to have my easel in my carry-on. When traveling overseas, this sometimes means carrying my bag while running to make a flight connection, so a lightweight and compact bag becomes all the more important.

While the Soltek is lighter than many other setups, I still found myself wondering, "Can I go lighter?"  The answer is, of course, yes. Surely there are many options for going lighter, but the one I chose was the "Prochade Kit" by EasyL,  referenced in a book I blogged about a while back by Kevin Macpherson;  Landscape Painting Inside & Out.

I had seen other EasyL paint boxes and I was impressed by the setup. In fact, if I hadn't already gotten a Soltek I might have seriously considered the EasyL Versa, which offers a good deal of versatility while still being lightweight, and at a much more wallet-friendly price. But having already made my "primary" plein air easel selection, I honed in on the Prochade Kit for travel.

EasyL Prochade box

At first, I thought I'd only get the little box. After all, I already had a tripod and a couple of bags. But after really examining the Kit, which included a lighter-weight tripod, a GREAT bag, and a number of other nifty add-ons and doo-dads, I justified that it was a decent buy, considering. I really feel like a lot of thought went into the design of the kit, and with everything weighing in at around 10 lbs, I couldn't imagine as detailed a  setup that is much lighter.

When I first got this little box, I was a bit wary. Compared to the other models I'd experienced, the box seemed a little TOO light, and I was concerned about its fragility. The adaptive panel holder appears to raise and lower by the means of some kind of internal spring. I wasn't used to this kind of mechanism and wondered if it would hold up, but after several months of use it has so far worked fine. It does come with a warning, however, not to extend this mechanism beyond the 10" high limit. It holds panel heights from 6 to 10 inches, and any reasonable width. Since I usually paint on the small side out of doors, and particularly when I'm traveling, this was actually fine for me. And while I feel the external latches that close the box are on the flimsy side, the knob and sliding hinge are of a quality that is actually quite good.

But probably what I like most about this kit is the bag. It has a perfect number of slots, pockets, and compartments, making packing and organizing supplies a breeze. While this bag isn't suitable for larger easels or thicker pochade boxes, it is perfect for a true cigar-style pochade box, whether purchased from EasyL or home-made. It is  the right size for the airline carry-on regulations; and while it is lightweight, it is extremely durable and has enough padding to make it comfortable to carry.

Overall I have been quite happy with the kit, for the main reason that it met my specific needs of a travel box that is lightweight, but complete enough so that I can do more than just light sketching. But I don't know that I'd recommend this kit as a primary setup for the every day plein air. Even weighted down,  it does not hold up in the wind--and I've found myself holding on to it for dear life during some unexpected wind gusts.

I'll close this little book on plein air easels with some final thoughts.

  • Do plenty of research before you buy your plein air easel, but beyond that, give some thought to the way you typically paint. If you don't paint large, you probably don't need an easel that accomodates a 30" high canvas. Perhaps even consider writing down the key features that are important to you in a plein air easel before shopping.

  • You don't have to spend a lot of money to paint en plein air. There are a number of options that are quite inexpensive that you can start with before taking the leap of buying a fancier model:

    • One of the most inexpensive commercially available models I've found is the Studio RTA simple tripod steel easel. Nothing fancy, but quite sturdy and lightweight (though because of this it will probably not stay put in strong wind.) With this model, you'll have to hold your palette and find somewhere to put your supplies, but at $40 it's a decent deal. I have a couple of these easels at my studio for workshops and they work quite well.

    • Another option is just to consider making your own plein air setup if you are particularly handy. I've promised my husband that this is going to be my next pochade box . Cost? Under $15! (hand slapping squarely on forehead.) Thank you to Ellie Clemons for the wonderfully detailed instructions, and to artist John Haynes' thoughtful blog  that I just discovered for pointing me to Ellie's page. Also check out artist David Cornelius' hand made work-in-progress "easel pal" for some additional ideas.

  • If your art travels involve flying, be sure to check out the many (and seemingly ever-changing) guidelines and regulations before deciding what to bring and what to leave at home. The Gamblin website has some useful tips about traveling with your paints. Artist Robert Genn had a good discussion going not too long ago on this subject also, on "The Painter's Keys" --a website that offers artists tips on matters both practical and inspirational.

  • Have fun and happy painting!

Soltek- the ultimate plein air easel?

This is part 3 in a series of posts I'm writing about my quests for easels, plein air or otherwise. You can read the saga from the beginning  or jump to another section here:Part I: On the quest for the perfect easel Part II: Guerilla Painters' Pochade Box Part IV: A pochade box for travel

Easel #3: The Soltek. All hail and bow down to the mother of all plein air easels! Okay, my Soltek has had its problems, but I still love this easel. The Soltek is a portable easel that seems to be in a class by itself. The easel is both "space age" in technical design, and extremely flexible in its configuration:

plein air easel

The telescoping legs fold into themselves the same way they do in a camera tripod. But unlike the pochade box/tripod combo, the Soltek is all self contained, making setup lightning fast. The legs and the overall design  also make this easel extremely  resistant in the wind, which is probably one of the most difficult weather conditions of all  for the plein air painter.

Other features  I really love  about the Soltek:

  • The two wings fold out on either side of the palette to allow for additional space to set brushes, paint thinner, etc. This is an especially important feature (as artists always "need" more space) and one that isn't usually acheived on the other paint boxes I've seen without purchasing separate attachments and adding more weight to the setup.
  • The design of the upper and lower canvas holders cover the canvas edges only minimally and flip out indidually so that you can easily cover the edges of your painting without interrupting flow.
  • Versatility--it can be configured in many different ways, at many different angles. The  easel will support a canvas up to 30" high-- a real plus for those who like to paint large outdoors. With this versatility, it can also function as a smaler studio easel or even a table easel if you want.
  • Weight--even though you have a lot more work space, the whole configuration is sleek and weighs just  9 lbs.

Like the French easel models and the bulkier pochade boxes, this easel has space underneath the plastic palette to store brushes and paint tubes, etc (but not the standard brush cleaner containers). It has a carrying strap attached to the easel, but I still find it necessary to have a  backpack or bag  for additional supplies and for hiking or carrying longer distances.

While this model is thinner and sleeker than  the pochade box I blogged about earlier, it is about as long and nearly as wide as a full French easel (though not nearly as deep), and I have found it difficult to locate a good backpack that will accomodate this easel while still meeting the new airline carry-on restrictions. Soltek does sell its own backpack just for this easel. It works, and you can carry it on the plane, though it could stand to be a bit better designed, with additional padding for hiking, and some better thought-out storage compartments.

But  for all of Soltek's largely  wonderful features, I would never recommend that a beginning plein air painter invest in such a product, for the simple reason that it is far too expensive for a casual user. Even for the die-hard, I am hesitant to recommend it without reservation. Not only is it expensive, it's also like a high-tech  car with a lot of fancy  gizmos. It takes  greater care to maintain, and by methods that  can sometimes be  more costly and inconvenient than going to the hardware store for a wingnut.

It is advised that you keep the easel clean and free of paint, particularly in the areas of the  joints and legs. For someone who gets paint in her hair every time she paints on location, this is a real challenge. And while the telescoping legs are wonderful, they also seem to  give people the most problems. Mine tended to either slip (and not remain extended) or stick (unable to easily close) after only about a year or so of moderate use. The Soltek support people suggested that this sometimes occurs when painters take the easel out onto the beach, where grains of sand get up into the legs. Only I had never taken mine to the beach or anywhere near sand.

The other issue I had was that  the plastic hinges that allow the winged flaps to fold outward and remain open  broke on me, also  after only about a year or so. Soltek support says they now have better hinges and they did offer a couple of options. 1.) They could send me replacement hinges or 2.) I could pay $50 plus shipping to get a Soltek "tuneup" which would address both issues I was having.

Yes, you guessed it.  I forked over the $50. Due to my already considerable investment, I justified the expense since I had at least a couple of rather critical things in need of repair. It was back within a couple of weeks, and has since been working fine. But for the price of this easel (which costs as much or more than  some larger studio easels), I still feel these issues are not what I would have expected after 1-2 years of moderate use.

In any event, I still love it, and when working properly, it  is by far the easiest in terms of setup and versatility of all the portable easels I've experienced. I will continue to use it as long as I can reasonably maintain it. So why would I ever need another plein air easel? Well, besides the need for a backup in case of another Soltek break down, I probably don't. But that didn't stop me from one more purchase. (Remember, this was before I admitted I had a problem.) I'll cover that in the next installment.

Plein air easels- the pochade box

*Note: This is the second in a series of posts I am writing about artist's easels. To read the other installments, click on the following links:Part I: On the quest for the perfect easelPart III: My Soltek Easel Part IV: A pochade box for travel

Picking up on my previous post about artist easels, today I'll discuss plein air easel #2; my first pochade box. The word "pochade" comes from the French word "pocher" meaning "to sketch".  Popularized in the 19th century by landscape painters such as the Impressionists, a pochade box was a small wooden sketch box (sometimes called a "thumb box")  with a hinged lid that could be held in the hand, to easily take into the field for small sketches and painting studies (pochades.) Today, what we call a pochade box comes in many different sizes beyond the tiny hand-held variety.

After I developed my "wingnut aversion" the pochade box idea really appealed to me, as the modern boxes are made to attach to a camera tripod, which has telescoping legs. The box I chose was the Guerilla Painter's Pochade Box (9x12")


 pochade box

As you can see here, this particular pochade box has a hinged lid that holds  9x12" panels, and can readily take any panel that is 12" wide. The wood palette slides out to reveal little compartments to hold supplies. Like other pocade boxes, this one has a tripod mount to take any standard camera tripod. The tripod shown above is the Guerilla Painter's brand, but I chose a Bogen Manfrotto Jr. tripod, which I purchased for a steal on eBay. Bogen is a good brand and the "junior" Manfrotto model is sturdy while still being reasonably lightweight.

The Guerilla Painter's box is a fine pochade box that will likely last many years. It is a strudy piece of gear and will withstand frequent use. You could klunk the thing on the ground and not make a dent.  The box is well constructed, and performs as described by the manufacturer.  In many ways, you could do far worse than this box for the quality, and while the price has gone up since I made my purchase, the basic setup seems  comparable to other painting boxes on the market.

This box is certainly more compact and practical than the stodgy El Greco, and also a bit lower in weight. But once you consider the weight of the required tripod, the weight of the basic box is about the same weight as the traditional French half  box easel. However, this changes if you want more versatility. For example, at the time of my purchase, it was necessary to buy various inserts and attachments to best allow for the use of smaller 8x10" and 6x8" canvases, though the company later developed a slip in easel that allowed for a bit more versatility.

Not only are addtional accessories another thing to keep up with, but they added more overall weight to the painting setup (though my wallet soon began to feel lighter). In addition, while I find it far less awkward than the full French easel, the deep boxy shape made it a bit bulky and cumbersome for travel. The manufacturer,  Judson's Art Outfitters does sell compatible backpacks, however, along with many other nifty plein air accessories suitable for any plein air painter, whether using the Guerilla Painter's pochade box or some other brand. 

pochade box

This is a picture of my own Guerilla Painter's Pochade box with the Bogen Manfrotto Jr. tripod. You might be able to make out the insert I'm using to accomodate my 8x10" painting. I use a bungee chord to hold my paper towels and a plastic bag for trash. Beneath the tripod there are two bags. One is a bag that actually goes to a folding portable chair that has a a shoulder strap. I confiscated it to carry my tripod. The box did not fit in any of the backpacks I owned, so I used the large canvas LLBean tote  shown in the background  to carry my pochade box and other supplies.

The  bulk of this box is largely due to the enclosed compartment designed to hold paint tubes and other supplies, which for some could actually be a useful component.  But the storage compartments are an insufficient size to hold long-handled paint brushes without first sawing off a part of the handle. And the little square compartment that logically looks as if it wil be perfect to hold your paint thinner is too shallow for the standard brush washers, so you will either need to pack your brush washer separately, buy one from Judson Art Outfitter's, or find a small jar suitable to fit in the compartment once the lid is closed. (Not a big deal, but still worth noting if you've already invested in a brush washer.) And while it's moderately convenient to have paint tubes right under my palette, the way these compartments were configured seemed to add more bulk than convenience.

So while there is certainly nothing wrong with this box, I found  that along with the bulk, it was a slight annoyance that the accessories necessary to make this box its most versatile added weight and needed to be purchased separately.  I am now thinking of selling my Guerilla Painters Pochade box or just  keeping  it as a backup (Update: It's off the market. I ended up gifting this to my talented niece Molly) in case something happens to.... Plein Air Easel #3. In many ways, #3 is a slice of plein air heaven. But this heaven comes with a couple of caveats, and a pretty hefty price. More on that in the next installment.

*Note: This is the second in a series of posts I am writing about artist's easels. To continue reading the other installments, click on the following links:

Part I: On the quest for the perfect easel Part III: My Soltek Easel Part IV: A pochade box for travel

Plein air easels (or "gotta-have-it-itis")

*Note: This is the first in a series of posts I am writing about artist's easels. To continue reading the other installments, click on the following links: Part II: Guerilla Painter's Pochade Box Part III: My Soltek Easel Part IV: A pochade box for travel

If you're an artist,  (or if you're married to one) you may by now be familiar with a common artist-borne affliction: "gotta-have-it-itis". This is when you see, read, or hear about an item recommended by a fellow artist, and you figure that this thing, whether it be a particular brush, a paint color, easel, or whatever, is THE thing you've been missing all of your life, and THE thing that will make you a much better artist.

Well, while having the right tools can certainly help the creation process along a great deal, a reality check would tell all of us oil painters that in our craft, we are ultimately dealing with the following rather primitive ingredients: a stick with hair on the end, mud mixed with oil, and cloth. And while the greatest investment should be in the time needed to learn and practice our craft, it IS fun to play and experiment with a few new tools...especially ones that help make life a little easier.

However, there's a big difference between investing in "a few" tools and getting caught up in aforementioed affliction. As you will see, I've not been immune to these pitfalls. But I think I  have finally decided it's time to get real and stop the madness. While in recovery, I thought I'd at least share some of my experiences with a few "tools of the trade". Who knows? Maybe it will help a fellow artist or two with their decision-making process.

I'll start with what can be one of the most expensive tools-- the easel. As both a plein air and studio artist, I "gotta have" at least a couple of versions of this item in order to more easily do what I need to do. (That's my story and I'm sticking to it! ) And since the weather keeps teasing me with hints of spring, I will start with easels of the plein-air-kind.  Over the years I have accumulated five easels that fall into the plein air/portable easel category. Good grief. Can this be? I really do need help. The fact that I still have all of these easels actually brings up a related affliction common with many artists, called "pack-rat-itis." (This is usually diagnosed by an onset of weak protests such as "Hey, I might need that for something....someday.")  But that is a subject for another time.

My first plein air easel was the Trident El Greco full French Easel.  I bought this with very good intentions when I first started painting landscapes, based on a recommendation I read in a book about plein air painting. I won't even bother to provide a link to this easel. Sorry, but I really hated this thing, pretty much from the get-go. The first time I used it I lost 2 wing nuts journeying from my car to the painting site, which made  the legs impossible to stand. After that I started packing extra wingnuts with my supplies, for the next ones that would inevitably loosen and  fall off, no matter how carefully they were secured in advance. The other annoyance was the weight. As plein air painters, we are always and forever looking for ways to lighten the load, correct? Well, this easel ain't it! I am a bit of a shrimp, but even so this easel has far more weight and bulk than is necessary for plein air painting.

Here I am in a face-off with my nemesis, El Greco. (I don't really remember the circumstances of this photo, but I believe my haughty look can be attributed to a wrestling match that ensued during setup just prior to the snapshot.)

I might have dealt with the weight and clumsiness at least a little longer if it was a sturdier easel. Maybe my easel was just from a bum lot, but the final annoyance was that the El Greco did not withstand even modest use before it started to fall apart. The nuts began to slip and other screws quickly started to strip. The wood on one leg splilt and cracked to the point where the thing would not stand at all. And no, I didn't abuse it or throw the thing down the stairs, though there were plenty of times that I wanted to!

El Greco is now "La Tavola". Or if we're sticking to Spanish, "La Mesa". It can still work as a table easel or receive a painting that needs to dry, though mostly now it just receives glares and passing insults. IMO, a better alternative would have been a french half-box (from many accounts, the Julian brand seems to be one that is tried and true). This is a smaller version of the French style easel (for those of you who are sticklers for tradition and have a soft spot for wingnuts.) The half box has the same size 12x16" palette as the full French, by the way. Only with the half box it folds in half rather handily to fit in the box.

Overall though, the French easel, while pretty to look at and readily available most anywhere, is too fragile and cumbersome for my taste. After my first foray into this design, I soon decided I was finished with all of that and moved directly on to Easel #2: my first pochade. I will write about that in a future post, so stay tuned for the next installment of this mind-numbing nail biting tale.

*Note: This is the first in a series of posts I am writing about artist's easels. To continue reading the other installments, click on the following links:

Part II: Guerilla Painter's Pochade Box Part III: My Soltek Easel Part IV: A pochade box for travel

Pochade box

Clouds and rain have been rolling in, so no plein air these last couple of mornings. I have plenty to do in my studio as I'm getting some new work together for a show, so it works out fine. In the meantime I thought I'd focus this morning's post on my one of my plein air setups. There are TON of options out there for plein air painters--everything from pochade boxes to classic French easels and beyond. Early on I had a full size French easel, but I found it to be too heavy for me, and I hated all of the wingnuts. Inevitably one would end up falling off during transport and without that wingnut to secure the easel leg, you're pretty much out of luck. If I ever did get another French easel, I would probably go for something like the Julian half box which is much lighter weight and not so cumbersome, in my opinion.

I currently work with two plein air setups for oils. One of them, my pochade box, I use quite often. Here is a picture of my pochade box:

I hang a roll of paper towels from a bungee cord on the front handle, and a grocery bag also to hold my spent paper towels. My paints, thinner, and medium store below the sliding palette, and my canvas stores in the lid.

A pochade is a French term meaning "quick sketch" and refers to the color studies that artists would create in the open air often for later reference in the studio. Original pochades were popular with 18th and 19th century landscape painters. They were small "cigar boxes" with hinged lids. Like my pochade box pictured above, the lid served as an area to hold the canvas or panel, and the bottom part of the box was used to store paints and a palette. It was a very simple affair and small enough to hold in your hand, sometimes with the use of a little thumb hole cut into the bottom of the box.

Currently pochade boxes range in sizes from 6x8" to 12x16". Prices for pochade boxes range widely, but if you are handy it is possible to make your own, as the design is really very simple. As for me, I am NOT handy like that!

I bought this little 9x12" pochade box online and I like it quite a lot. It weighs about 5 1/2 pounds, and with optional accessories can hold canvas panels from 6x8" on up to about 16x20". It has a tripod mounting plate on the bottom side to mount onto a camera tripod. My brand is a Bogen Jr. Manfrotto tripod, which is lightweight but sturdy.

I am constantly trying to find ways to compact and lighten my setup, but right now I carry all of my supplies in a large tote bag that I purchased from LL Bean (shown just behind my tripod). It works okay for short distances and for flat areas where you can just strap it onto a rolling luggage cart, but if I'm hiking in the mountains, probably not. In that case, I'd probably benefit from paring things down a bit.

Tags: art painting landscape painting artist plein air

Preparing for Travel

House guests kept my pretty busy during President's day weekend, so not much time for blogging until now. It has snowed off and on here for the past few days, but nothing really lingers too long. The Key West trip coming up this weekend is seeming even sweeter as I look out my window and see yesterday's cold weather remnants on the ground. All I ask is to just keep the roads and airplane wings clear of ice until I can get down south! Today I am playing with some art supplies so that I can determine what to bring with me down to Key West. If I had no limitations I would just bring my oils and easel, because in my opinion there is just nothing like them! But a plein air painter or sketcher has to consider the most portable and lightweight options when traveling, and especially when dealing with the airlines, and oils don't always fit the bill.

Typical plein air travel gear can include:

  • Easel or pochade box with attached tripod
  • Paints
  • Painting medium
  • Paint Thinner (for oils- best to buy this at the destination if possible)
  • Brushes and palette knives
  • Hat and rubber gloves (optional but I am a messy painter)
  • Canister for paint thinner (for oils) or water (for other water media)
  • Small spray bottle filled with water (for water media)
  • Paper towels
  • Plastic bag for trash
  • Bug spray and sunscreen
  • Bottled water
  • Small sketchbook and pencils (for working out compositions)
  • Camera
  • Painting surfaces (canvas, panels, papers, etc.)
  • Wet panel carrier (for oils)

Other optional supplies might be:

  • View finder (a little tool for determining your composition on the fly)
  • Portable chair or stool
  • Extra bungees and weights (for weighting your easel on a windy day)
  • Umbrella
  • A rolling case or dolly to cart all of this stuff around!

By no means am I saying that all of these supplies are required. Some watercolorists get by with two brushes, a watercolor block, sketch pad, a small container, some pens and pencils, and 3 to 5 paint colors, all stashed in a backpack. I think it is all what one feels comfortable with. A studio painter usually has more "stuff" within arms length, and paring down requires some effort and acclimation. I have done both studio and plein air painting, so I feel pretty comfortable with both. Even so the temptation is to bring more (maybe too much) stuff "just in case I need it". I'll try and post my painting kit here once I've figured it out.

-Jennifer Young; Vibrant Landscapes www.jenniferyoung.com Contact