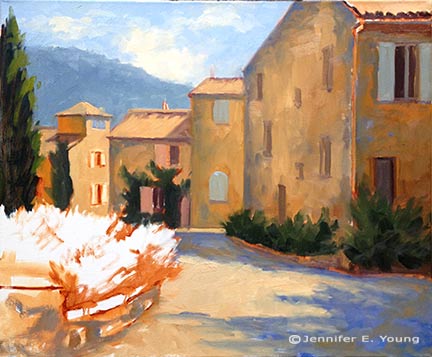
Bellagio Promenade

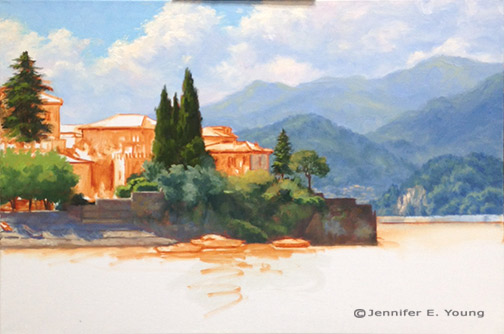
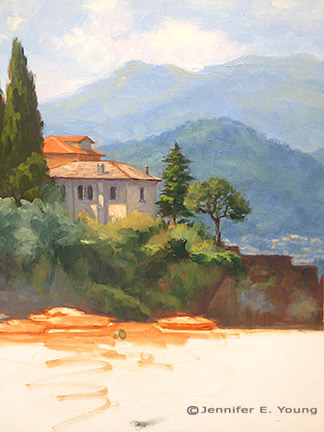
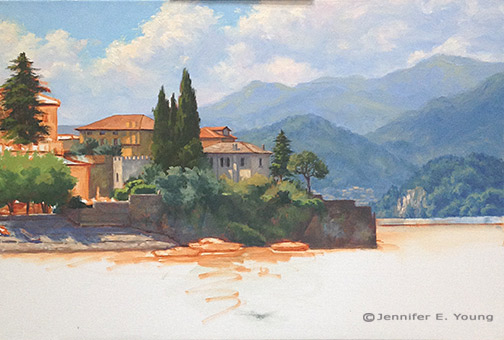
As I mentioned in my last post, I've been working on a large(ish) painting of the Bellagio promenade that leads to the Villa Melzi. It took me a little longer to bring this painting to a conclusion and, because I painted at night, my progress shots were too bad to post. So what I am sharing today is the final piece:

Lake Como Italy landscape painting by Jennifer E Young"Bellagio Promenade" Oil on Linen, 24x30" For more info, click here. To purchase, please contact me!

 Because I had to work on this over a succession of days, I worked pretty lean until the last couple of sessions. In the end though, this bad boy has a lot of paint! Of all of the places I have visited so far in Italy, Lake Como in general, and Bellagio in particular, hovers near the top of my list for achieving that dazzling combination of natural and manmade beauty. The trifecta of pre-Alpine mountains, deep blue waters and classic Italian architecture dripping with flowers is pretty hard to beat.

New Lake Como painting in progress

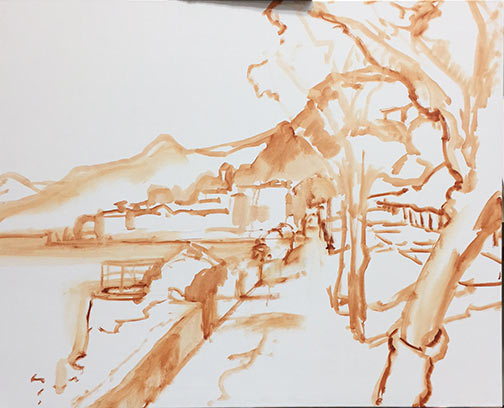
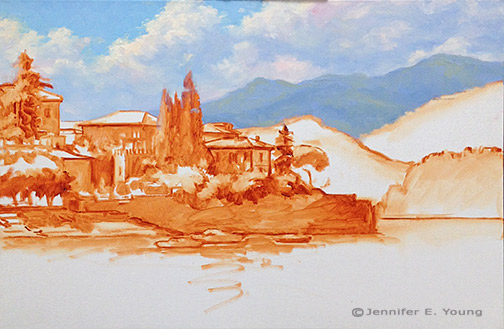
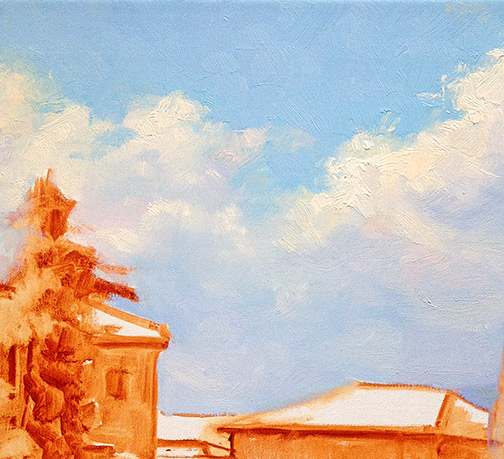
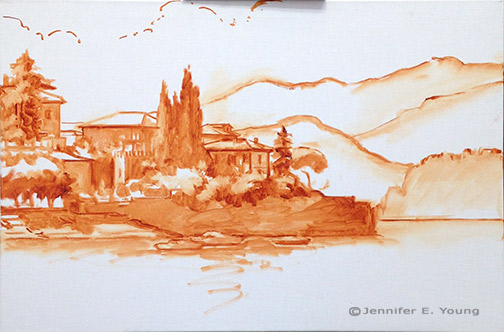
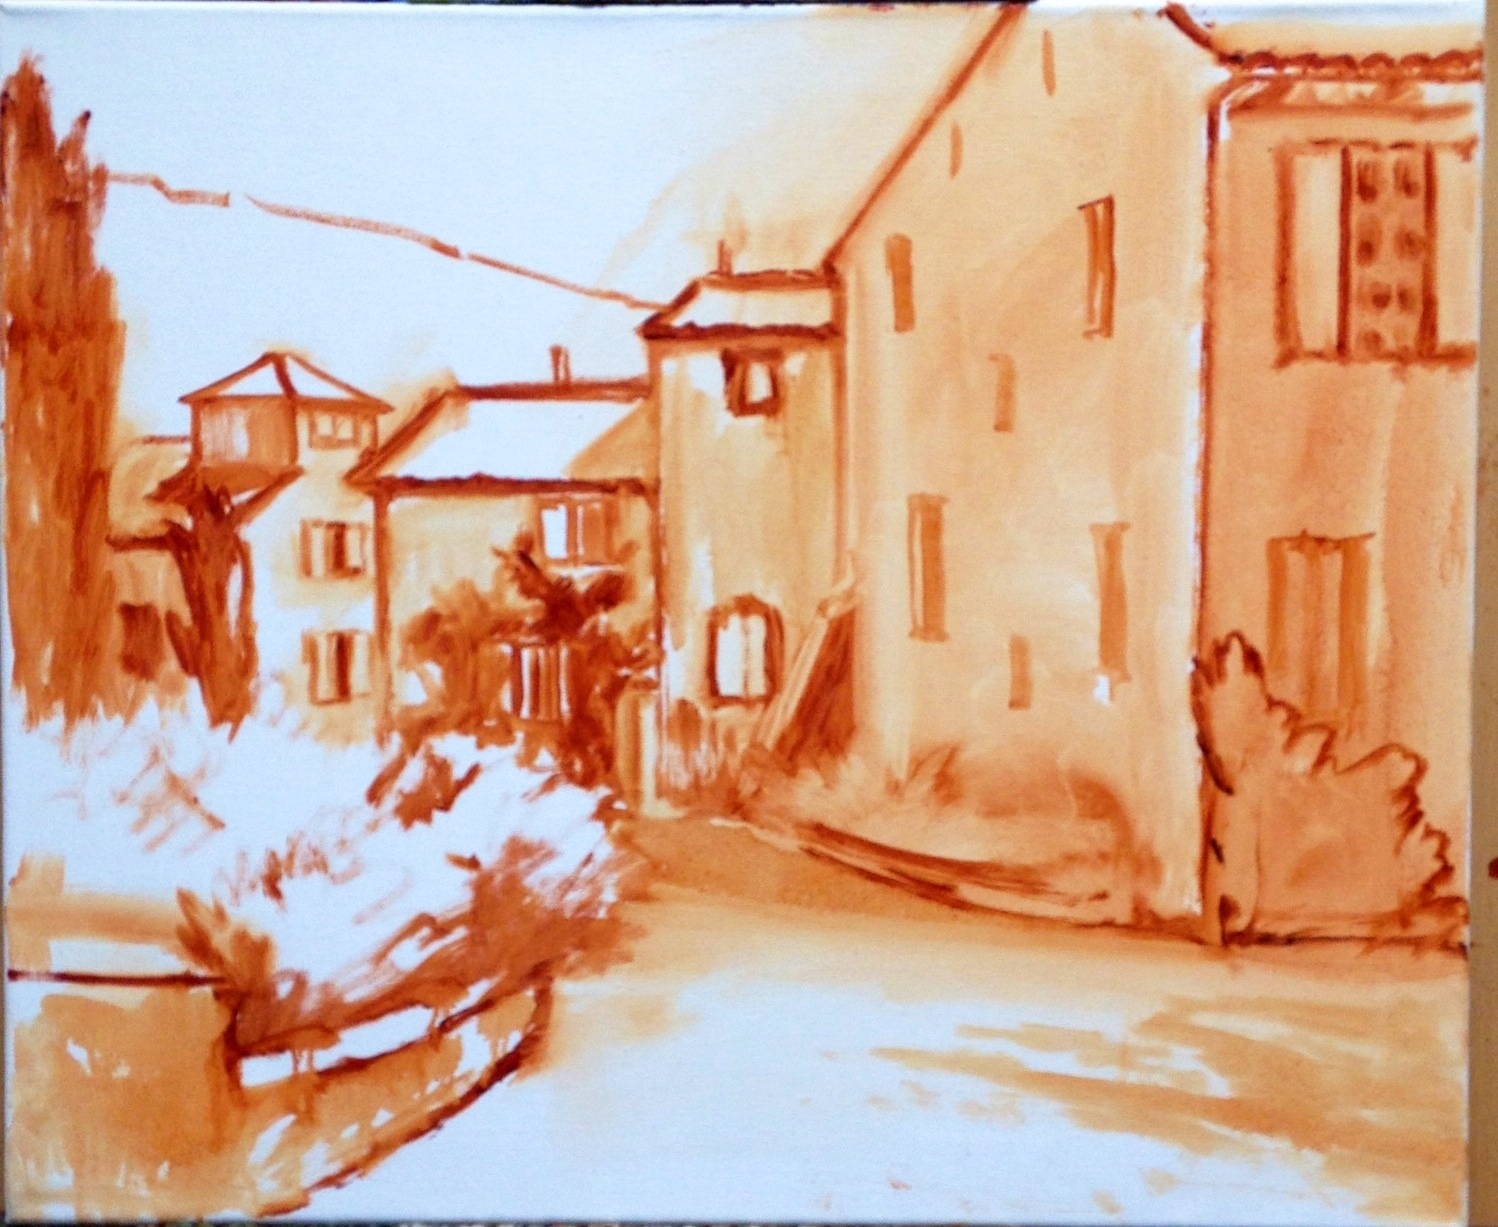
School's out this week due to snow, so my painting time is catch as catch can. Nevertheless, we have been conspiring with other desperate parents to arrange play dates here and there, which allows a little painting and blogging time. So I thought I'd share the Bellagio painting I have my easel this week. This is a promenade on the outskirts of bella Bellagio, leading to the stunning grounds of the Villa Melzi.  This view however, looks back towards the town. Apologies in advance for the poor quality photos and the cast shadow of part of my easel on the painting. I don't have a lot of time to photo edit anything but the final these days, so I hope you will bear with me. I start in the usual fashion, with a loose sketch of my composition in Burnt Sienna:

Lake Como painting demo by Jennifer Young

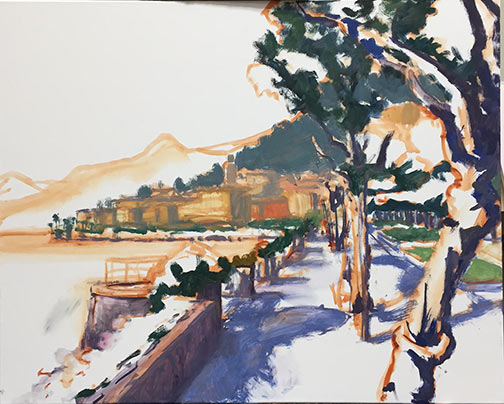
Next I lay in the shadow family and darkest notes.

Lake Como painting demo by Jennifer Young

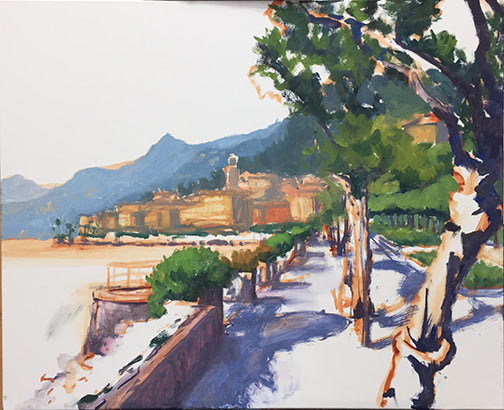
At this point I'm laying in some general blocks of color. Still no highlights yet...

Lake Como painting demo by Jennifer Young

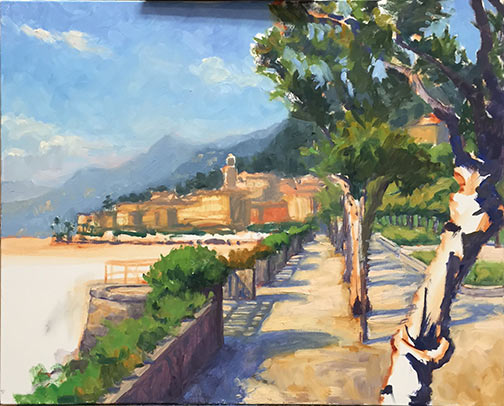
And here's my starting point this morning:

Lake Como painting demo by Jennifer Young

Next I will continue blocking in, including the water and distant village. I'm still working up the nerve to paint outside while there's snow on the ground, but we will see. Not much of a fan of the cold, but that snow sure is pretty.

Still life...trying again

The last time I attempted a floral still life painting, it all went south. But, since I have been wanting to build a more regular practice of painting and drawing from life, and since it is nothing but brown and gray outside right now in Virginia (not to mention that I don't tolerate the cold too well) I decided not to let a little past  failure hold me back. And as they say, it's in the failures where we have great opportunity to learn and grow. It sounds a bit cliché but it's also actually true, especially if you don't let the failures wig you out. I have to admit, at first I did duke it out with the old psyche a bit, but upon reflection I realized that I really did learn a few lessons from my last effort. For one thing I learned that I didn't really set myself up for success to begin with. I basically walked in, put some flowers in a vase, set them on a table and went to it. How hard could it be? Wellll....

The first problem was that there is actually quite a lot that goes into setting up a nice still life. I figured since it had been a very long time I would keep it simple by focusing on just the flowers and a vase, and no other extraneous objects. Only extraneous objects were all around my prior "setup" (if you could call it that.) The utility sink was in the background, as well as pictures hanging on a wall, art supply bins nearby, etc.  It's not impossible to paint that stuff out, but it is pretty distracting.

Secondly, in my previous attempt, the lighting was completely flat and non directional. That's great for studio lighting in general, but it makes it harder to create form and good color without that definitive light and shadow. I felt like it was kind of akin to painting outside on a gray day.

So the first order of business was to remedy these issues, and create an environment where I would be "set up" for success.  Once I found a solution to my setup issues (which I will share in my next post) I felt like I had more control.

Here's how it went down, in various stages:

Initial design in a wash of cobalt blue, burnt sienna, and chromatic black:

Still life floral painting demo by Jennifer E Young

Blocking in; shadows first, then midtones:

Still life floral painting demo by Jennifer E Young

Fleshing it out:

Still life floral painting demo by Jennifer E Young

Still life floral painting demo by Jennifer E Young

And the final:

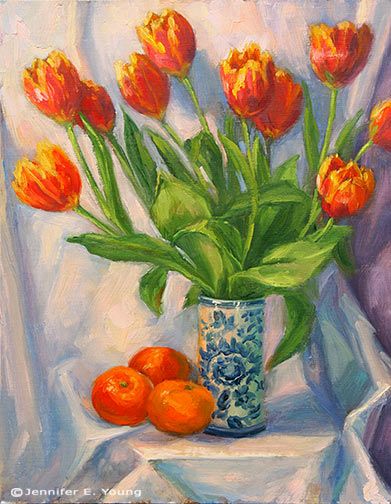
Still life floral painting Tulips and Mandarins by Jennifer E Young"Tulips and Mandarins" Oil on Linen, 14x11" Click here for more info!

Week-long study with Kevin Macpherson

Last week I did something I haven't done in a very long time...devote myself to the art mistress from morning to night for an entire week. And it was a week studying with the talented Kevin Macpherson at that! As you may have read from my previous blog posts,  I am a big fan of his paintings and his books. He is truly one of the best teachers I have encountered so far. Not only is he a highly skilled painter, but he has a way of honing in on and distilling essential information that actually penetrates my rock-hard noggin. JYandKMAC2

The workshop took place in a beautiful new space called Chesapeake Fine Art Studio, run by artist Hai-Ou Hou in Stevensville, MD (great location- about 20 mins. away from Annapolis). If you are an artist on the east coast,  it would behoove you to check out her site. Hai-Ou is quite the painter herself, and also appears to be drawing some of the best and brightest painter/instructors in the plein air and traditional/representational painting movements.

I really wish I had time to delve into all I learned during my workshop experience, but life is slamming me pretty hard right now. This week marked a return to the "real world" (insert the sound of  needle scraping across a record here) with kitchen renovation, school activities, and doctor's appointments commanding most of my time and energy.

But my biggest take aways from Kevin's instruction had to do with value and composition. He spoke a lot about light and shadow, and how one can create much stronger paintings by clearly indicating which elements belong in the light family and which belong in the shadow family. (This sounds simple in theory but it isn't always so easy in practice.) He stressed seeing and painting "shapes, not things", with the idea that if we are too wrapped up in painting a "thing" we lose the ability to really see it accurately and how it relates to the rest of the painting as a whole. We spent a good deal of time really learning how to see the true value of things (er, shapes, that is!) He stressed using a color isolator in the field to identify true value and color, determining and laying down your darkest note of color first, followed by the rest of the shadow family, and finally the values in the light family, keying everything up from that very darkest note, so that you really can get a handle on color and value relationships.

In essence, how dark you key your darks will determine how light you key your lights. I use the analogy of playing "Chopsticks" on the piano. You can play low on the scale or high on the scale, but the arrangement of notes and their relationship to each other are the same no matter how high or low you move along the keyboard.

Kevin Macpherson's workshop

His demos didn't disappoint. In addition to demos in the field, mid-week during his opening he did a remarkable demonstration in the studio (from a photo) on a canvas sized at about 20x24" . During that opening he also presented an inspiring and highly entertaining lecture. This lecture, I understand, was very similar to the one he presented at the Plein Air Convention. Not being able to travel as much as I used to, I really appreciated having the opportunity to see this presentation, in a much more intimate setting.

Though we were meant to work largely out of doors, we had our share of rain and wind. When the weather didn't cooperate, it gave us the opportunity to study (in the gorgeous and spacious studio) some of the more pertinent points Kevin was trying to drive home. We spent a good deal of time studying value relationships among the "light family and shadow family". On another occasion we delved into "The Golden Mean" or "Golden Section" (the informal subdivision of space) and he presented a fascinating slide lecture with many, many inspiring examples of  how it has been used by painters throughout history.

Kevin Macpherson's painting demo

Here are a couple of my plein air paintings done during the workshop that actually reached a level of finish:siloshadows_w

plein air landscape paintings by Jennifer E. Young

At the week's end, I left feeling completely exhausted and totally exhilarated at the same time. I didn't leave with many "finished" pieces, but that wasn't my goal at all any how. What I did leave with was a wealth of knowledge and insight, as well as a good deal of creative spark. Whether that spark ignites a fire, is now totally up to me.

Matt Smith workshop

Oh yeah, I have a blog! ;-) Actually, I didn't forget; I've been doing a little traveling up north to the New Hope School of Art to take a workshop from the very talented painter Matt Smith. The trip was noteworthy for a number of reasons. First, it was the first time I have been away from my daughter for more than a night. (That part was hard.) But second, it was also the first time I've had in 4 years to do nothing but paint and immerse myself in "art stuff" for four days straight. (And that part, my friends, was luxurious!) I haven't taken a workshop in a very long time. But now that my daughter is getting a little older, I really feel like it's time to amp up my art life in some significant way and infuse my work with new insights. So when I heard Matt was coming east to teach (he's based out West, so that's something I'd not caught wind of before around here) I knew it would be an excellent opportunity to do just that.

Please excuse the poor photo quality but this was shot with my iPhone in low light. Here you can see the very light way Matt holds his brush to apply paint and manipulate edges.

Matt hails from Arizona, and is best known as a painter of the Sonoran desert near his home, as well as the snow capped Canadian Rockies and other places out west that epitomize the classic western landscape. What initially attracted  me to his work though was not his subject matter, but the sensitivity in the handling of  his brushwork and edges. They are both bold and delicate at the same time.  But after seeing him demo and talk about his approach, I was equally impressed by the purposeful way he composed his paintings and orchestrated his compositions to create  powerful statements. I won't get into a blow by blow description of day 1-4 of class, but I will share some of the significant things I took away from it personally, most likely in more than one post.

The interesting thing about this workshop was that even though Matt is best known among artists as a plein air painter, the class was held entirely inside, in the studio. I'll be perfectly honest here and say that when I signed up for the class I was mildly disappointed that the format would not include at least part plein air painting, especially since Matt himself is a seasoned field painter and the area where the workshop was located was very scenic. (It was the birthplace, in fact, for an entire movement of landscape painters, known as The New Hope School and Pennsylvania Impressionism.) Largely though, that disappointment was entirely personal. My studio is my workhorse, but plein air painting is more exciting to me. Also with my life situation at present, I just don't get the longer stretches of time needed to trek out in the field as often to paint.

When I asked about the reason for the indoor class, Matt's response was that in his years of teaching, he has seen the same problems pop up again and again, whether in the field or in the studio. Maybe he felt it's better to address these fundamental issues in a controlled environment rather than adding another layer of difficulty with the environmental factors that plein air adds. In any event, the format turned out to be fine. In fact, there was plenty I needed to work on just with my studio work,  the studio environment definitely allowed Matt to get to each student several times a day with valuable feedback. As it turned out, the weather was not great any way, and we probably would have needed to seek shelter for at least two of the four days due to rain and wind.

Matt did several very good demos (using his photo references). He used a Strada easel, which I think was a rather new purchase for him. He talked a lot about equipment and painting gear, which, as any regular reader of my blog may have surmised, is a topic of great interest to me. The Strada is made of metal and looked like a neat little box (I think his was the mini, which is presently sold out.)

The Strada Mini Easel

But even without the two winged accessory attachments added to provide more workspace, it was a very heavy box for its size. Matt said he liked it because of its compact size (it easily fits into a backpack) and durability for travel, but personally I could not deal with the heft. A Gitzo travel tripod was also part of his setup, which looked great for its ease of use and small size when folded (also easily fitting into a backpack), but a quick Google search soon told me this item was way out of my price range. (Wowsa!)

Matt, by self-definition is not a colorist. In fact, of the fundamentals he sites as essential to a good painting (Drawing, Value, Design, and Color) the most expendable he says, is color. Even so,  I found his palette fairly wide, with four blues, two earths, two yellows, an orange, one red, a violet, and a couple of greens (plus, of course, white.) He used no medium other than his oil paint and a very tiny amount of Gamsol to thin his paints.

His start consists of a very light sketch, soon followed by masses of color, working broadly to get his main elements and shadows down. He then builds from there, thin to thick, dark to light, broad to more detailed. One thing I found interesting is that he almost always left his sky a white canvas until close to the very end of the process. Obviously this is working to his great advantage, but try as I might, I couldn't resist my normal method of putting the sky in early on. This was especially the case if there was any water in the landscape, as I find  I need that sky information to know what's being reflected.

I've a lot more to say on the subject but I should probably try and paint something now! In my next post I'll share of few of my studies done in the workshop, as well as some valuable take-aways that I received from Matt's feedback.
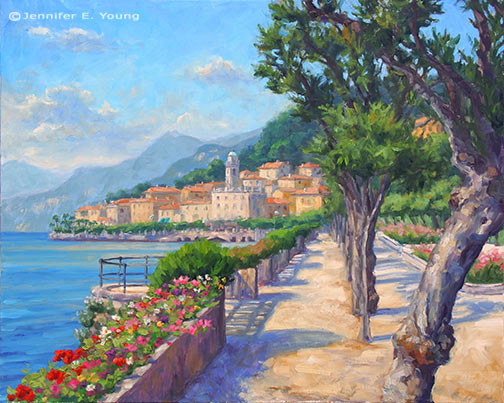
Sunlit Harbor, Varenna (painting complete)

Happy Spring everyone! It's been a looong winter, and I honestly don't think anyone could be much happier about a change of seasons than I am! Any way, to kick off the new season I will wrap up my painting of the Varenna Shoreline. Below you will see I've gotten the buildings of the village fleshed out and am just launching into addressing the water:

Varenna landscape painting in progress by Jennifer E Young

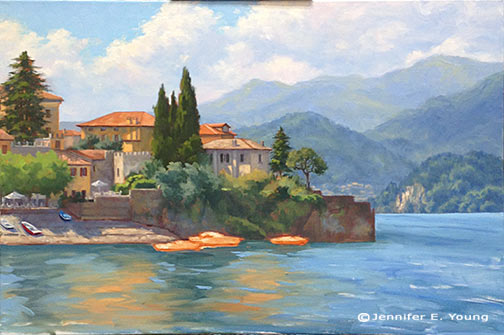
Next I work on getting the boats laid in, and adding a little more detail and highlights to the shrubs and trees perched along that wall.

boats

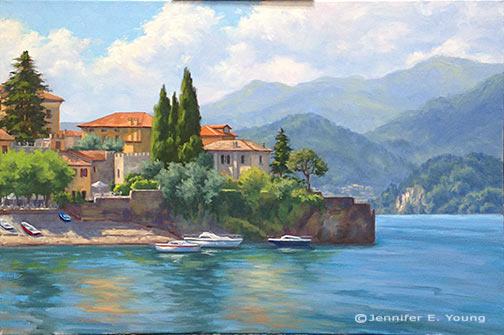
Then the final touches of the masts and buoys are laid down. I use a liner brush to lay in the delicate lines of the masts, starting from bottom to top. A mahl stick really comes in handy here to steady my stroke. At this point I am nearing completion. I may go into it again, but I am going to sit with this a while and start in on something new. If it's not 100% done, it is close.

Lake Como landscape painting by Jennifer E Young "Sunlit Harbor, Varenna" Oil on linen, 24x36" Click here for more info!

Light and Edges; Varenna painting progress (W.I.P.)

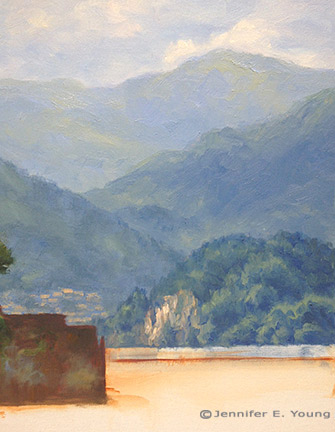
Here is some progress to report on the Varenna painting  I've been working on.  In my last post I had pretty well laid out the background. But when I came back  to the easel again I decided that before jumping into the foreground I should add a little more contrast to the nearest mountains and soften up some edges to the distance overall.

Painting edges by Jennifer E. Young

That done, I address the walled village of Varenna next. I want to establish the village before the water, so that when I get to the water I will be able to properly address the reflections. First, I set about laying in the darkest passages.

Lake Como Italy painting in progress by Jennifer E Young

Next I start in on the buildings. The direction of the light is upper left. This was close to 11 a.m., so the sun is high but not directly overhead. Even so, I think with the movement of those clouds and the way the trees and shrubs are positioned, there are some interesting shadows being cast on the buildings. I hint at this in my study, but in the larger composition it took some time and concentration to get it to look right.

Varenna Italian landscape painting by Jennifer Young

Here's where I am this morning with the painting. I'll be working on this today and again Wednesday, so assuming nobody gets sick and we don't get more snow  I will have some more progress to report this week!

Italain landscape painting in progress by Jennifer Young

Varenna's dramatic skies (W.I.P. continued)

When I traveled to Bellagio and Varenna, one of the things that struck me about the landscape was the dramatic cloud formations that settled over these little lake towns. Possibly this is due to the altitude, or the difference in altitude between the lake and the surrounding mountains. OR, it could have just been my timing. In any event, while they were very beautiful and created spectacular displays, they also made  it pretty tricky to sketch/paint en plein air because the daggone light kept changing from minute to minute. In the studio, of course all of that is much easier to control, and I get to celebrate the beauty of the clouds without at the same time cursing the inconvenience of them ;-). After I sketch in my composition, my most common approach to landscape painting is to lay in the sky and the far distance. Since the sky contains my light source, the highlighted sides of the clouds will hold some of the lightest values in the painting. Probably the only other things that approach this high value is the light bouncing off of the white painted boats.

Landscape painting of Varenna Italy in progress by Jennifer E Young

I am not sure if it's evident in this photo, but I have used an array of colors(cad orange, cad red light, alizarin permanent, ultramarine and sevres blue) to tint the clouds. The blue sky is a combo of ultramarine, sevres blue, and white.

landscape painting clouds detail by Jennifer Young

Next distant mountains progressively deepen in value, but they are still very cool in temperature, so that they will sit back behind what's to come in the foreground. After evaluating my composition further, I decided to raise the distant horizon line, so as to push those cliffs back a bit more, in relation to the foreground town.

Lake Como landscape painting in progress by Jennifer E. Young

 After I get the painting a little further on, I may come back and tweak what I've done here. But for now  it's time to address  the water and the heart of the matter; the town of Varenna.


Varenna Shoreline W.I.P.

I feel a bit like Punxsutawney Phil, poking my head out into the public for a brief moment, only to run back into obscurity and wait out the rest of winter. It's not really fair to blame a pudgy little rodent for my absence and for all of the crazy snow days we've been dealt this winter. But given he's fictional and defenseless and  I've no one else to point a finger at, Phil it is. Nevertheless, I've started a new painting based on the small study I posted in my last entry. This is the tonal lay-in on a 24x36" canvas. Some of the lighter  areas got a little too "tonal" as I made adjustments to the drawing, (most notably the boats) but as I have my study and photos, I will make those corrections when I get into color.

Landscape painting Varenna Italy in progress by Jennifer Young

 There are only slight variations in design at this point-- just a minor reshaping of the distant hills to slow the speed of the downward slope. I also simplified and "skooched" back (sorry for the technical lingo) one building that sat directly behind the villa sitting closest to center to minimize the confusion of these overlapping forms and hopefully  create a more elegant design.

I 'm generally happy with the color plan I used in the study though, so at this point my plan is to follow its lead as I start my next steps of diving into color.

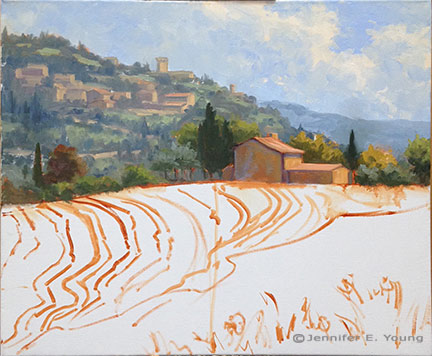
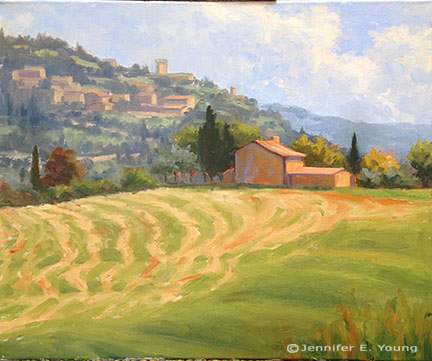
Finally complete- Tuscan Hay painting

I'm taking a break from chopping my vegetables to finally wrap up the latest Tuscany painting I left flapping in the breeze on New Year's Day. After I had my composition established and my canvas covered, it was time to go back in to further develop the background, middle ground, and foreground. It sounds very systematic, but this was really more of a back and forth dance because the value, scale, edges, etc. all have to relate and are interdependent with the other elements in the painting. For instance, in the image below, I thought I had the background fairly finalized...until I took a step back and decided the buildings were too large and too prominent in relation to my foreground house. As I moved forward to the center of interest it became apparent that these two areas of the painting were battling for attention. So I went back and softened the distant village and reduced the size and contrast of the buildings a bit more, and further softened their edges.

Tuscany landscape painting in progress by Jennifer E Young

Here's the final:

Italian landcape painting by Jennifer E Young

"Tuscan Hay" Oil on Linen, 20x24"   

Progress on the Tuscan Hay painting

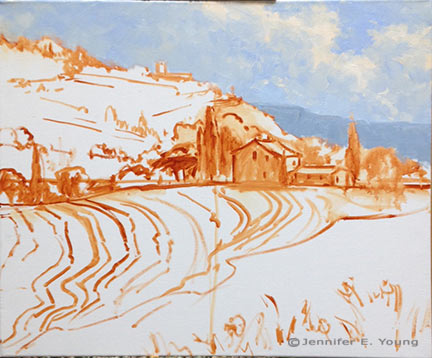
As is typical of my working method, I establish my sky and clouds first on my newly sketched canvas. This helps me to key the rest of my light values in the painting. At this point I also  lay in a first pass on the distant mountain.

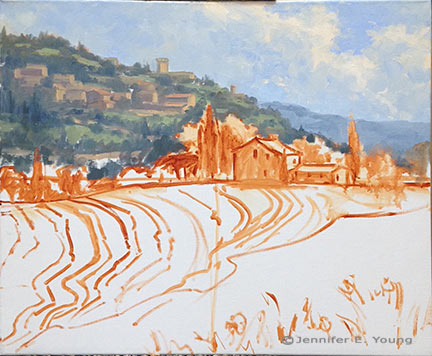
Tuscany landscape painting in progress by Jennifer E. Young Next come the hill town and terraced hillside of the background. At this point I am still establishing the compositional elements so there is not much color or value variation. I will go back into these areas again, but I really want to develop the entire canvas to the same level before it sets up too much, as I'm not sure when my next painting session will be.

Tuscany landscape painting in progress by Jennifer E. Young Now for the middle distance, where my area of interest (the house) resides. I decided to lower the cypress to the right of the house, as I felt there needed to be some height/shape variation in the trees flanking the house.  I'll have to go back into that sky area again where I made this change to clean it up a little more. Good thing I still have plenty of that sky color on my palette! Again, I don't have much in the way of highlights yet...just a few value shifts to give certain objects a little form.

Tuscany landscape painting in progress by Jennifer E. Young Now I'm ready to start laying in the foreground hill and those groovy hay tracks.

Tuscany landscape painting in progress by Jennifer E. Young That was fun! Now I have the whole canvas covered more or less to the same level of finish. There's a good deal more to do, but this feels like a pretty good start for around 4 hours of work.

Summer Blooms, Ansouis (final)

I'm happy to report this post will wrap up the Ansouis painting I have written about in my last couple of entries. In the shot below, I have fleshed out the rooftops and the distant mountain. I am keeping the background fairly plain because there is already a lot going on with the architecture and plants.

French village painting in progress by Jennifer E. Young

The people of Ansouis take loving care of their little village. Not only are there potted flowers gracing nearly every window and doorway, but the public spaces also have beautiful plantings as well. This square in the village had a lovely combination of lavender, yellow roses, and deep pink blooms. I lay the flowers in last after the painting has set up a bit. This allows me to overlap the background buildings and helps to push them further back into the background.

Ansouis France village painting by Jennifer E. Young Summer Blooms, Ansouis Oil on linen, 20x24" SOLD

There, that about wraps it up! I'm glad I was able to finish this up before Christmas week, because the holiday schedule is heating up and I'm not sure when I will be back in the studio again before the new year. In light of that, let me seize this opportunity to wish you all a very Merry Christmas and a joyous holiday season!

Update on the Ansouis painting in progress

Now that we have some real Christmas deadlines looming, I've decided to give the self-hosted auctions a rest for a while. Thanks so much to those who bid and followed my auctions! It's been an interesting little experiment that I might revisit in 2014. But it was a lot more time consuming than I imagined, at a period in my life when it is a challenge just to maintain a normal studio schedule. Meanwhile, the painting of Ansouis is still on the easel (case in point!) Here are the latest progress shots:

Ansouis French village painting in progress by Jennifer E Young

Ansouis French village painting in progress by Jennifer E Young

 Ansouis French village painting in progress by Jennifer E Young So now I have the whole canvas covered. I started in on some of the details sooner than I would have liked, but there were a few breaks in the continuity of my painting sessions that compelled me to tackle certain areas while they were still wet. Over the next session or two I'll be finalizing the background mountains and fleshing out the flowerbeds. I'm going to do my best to finish this up in advance of Christmas. School's out for a couple of weeks for Christmas break so my studio time is about to get a lot more dicey.

Ansouis (W.I.P.- continued)

Here's some progress to report on the composition I sketched out in my last post.

Provence France village painting in progress by Jennifer E Young

After laying in the sky and distant mountains, I set out to establish the broad areas of light and dark in the painting. I'm really trying to think of my composition in terms of underlying masses of light and shadow, and not just a group of individual objects.

Provence France village painting in progress by Jennifer E Young

I'm using a broad palette of colors- my usual red, yellow, and blue, plus cad. orange, cad. red, permanent rose, sevres blue, as well as two earths; gold ochre and burnt sienna (for the tonal sketch) and, of course, white (titanium).

This is as far as I got today- about 2 1/2 - 3 hours' work- before it was time to pick up my daughter from preschool.

Provence France village painting in progress by Jennifer E Young

I'd really rather not allow this to set up, as this is my "first pass," and there is so much more to lay in. I am going to try and work on this again tonight after my little girl falls asleep, but I'm not normally good for much creative work after wearing the "mom hat" in the evenings. We will see. Otherwise my next dedicated painting day will be Friday, and I'm afraid it may be too tacky for my liking by then.

Ansouis/French village painting in the works

Note: I have gotten word that some users are having difficulties placing bids on my auctions. I believe I have fixed the issue now (the bid button was missing!) But if you have attempted to bid unsuccessfully, or if you are having any issues now, can you please contact me and let me know about your issue? Now, on to the new painting! Not a great photo here, but I'm doing a bit of mobile blogging and the image editing options on my phone aren't optimal. Nevertheless, I  thought I'd share the rough sketch I've started on a 20x24" canvas of a French provincial village street scene.  Even though I mapped out the composition more or less to scale in advance, it took a little more editing than usual  to get the layout the way I wanted it (the first pass had things too centered). France village painting sketch by Jennifer E Young

The plan for this painting is to portray a square in the center of the charming village of Ansouis. I have a busy next few days with family, but I hope to be able to get back to this soon. I'll post further developments as they unfold!

The Potted Garden, Pienza (painting complete)

With school out for the Thanksgiving holiday, my studio time has been a little dicey. But now that we are back in session I have managed to wrap up my posting about the Pienza painting from earlier last week. Before I dive into painting the potted plants, I finish up the main architectural features of the painting-- the final touches on the windows and doors, and completing the distant bench.

Tuscany village painting demo by Jennifer Young

 Now let's move onto the flowers!

Pienza Italy painting demo by Jennifer E. Young

Here is the final:

Tuscany Italy street scene by Jennifer E. Young

"The Potted Garden, Pienza" Oil on panel, 12x12" Click here for more info!

The hill town of Pienza is lovely for a number of reasons. First, it overlooks the gorgeous Tuscan valley called the Val d'Orcia. Second, like so many of these small towns,  the whole village is oozing with charm and dripping with flowers, just like the scene I have painted. Third, it is the home of Pecorino cheese! Need I say more?

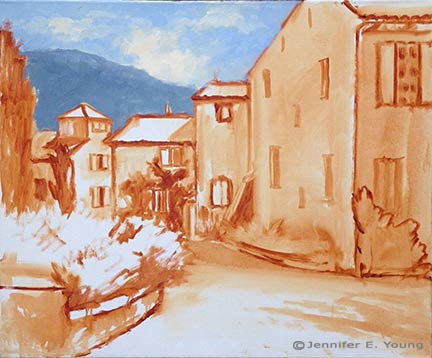
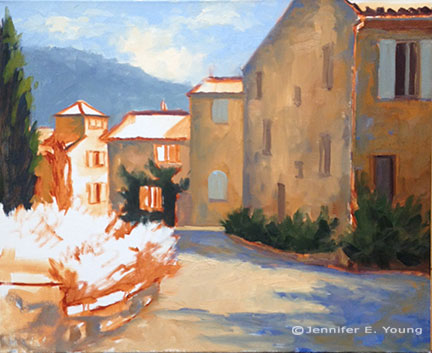
Shadows, doors and floors

Here is a little progress on my painting of the Tuscan street scene I posted a sketch of in my last entry. Now that I have my design, I am ready to start laying in some color. My palette is fairly expansive, which I tend to do in the studio when I am more pressed for time. Here I'm using a few convenience colors in addition to my basic primary palette of red/yellow/blue. My colors for this piece are Titanium White, Cad Yellow light, Cadmium Red Light and Medium, Alizarin Permanent, Ultramarine Blue, Sevres Blue, (Rembrandt- kind of like Cerulean but a bit brighter with more tinting strength),  Gold Ochre (also Rembrandt brand- like Raw Sienna but warmer and more golden; yum) and Burnt Sienna (tonal sketch only). I start by laying in more concretely the pattern of shadow and light. I really love the way the shadows from the potted flowers spill onto the stone wall and red door:

Painting in progress of Tuscan village street scene by Jennifer Young

 I use lots of the Gold Ochre for the wall, mixed with both blues and Alizarin in varying degrees, as the stone has lots of warmth but lots of variation in it too. For the door I started out with pure Cadmium Reds in the sunlit area, but whoa! I then decided to mute this a bit with touches of white and a tiny bit of yellow plus Sevres Blue to give it a more authentic sun-washed look. The door in shadow is a mix of Cad Red Medium, plus Ultramarine and Alizarin.  Next I start to lay in some of stone bench:

Work in progress of Pienza village in Tuscany by Jennifer Young

As you can see, I use violets in the shadows (Ultramarine Blue and Alizarin, plus touches of  white and yellow) to contrast with the bright warmth of the sunlit stone.

Tuscan village street scene in progress by Jennifer E. Young

The bench established, I add a little more texture to the stone wall and then begin to lay some pavers. Even though they are terra cotta- colored pavers, they are still very light in value in relation to the wall. I've cooled them off with a bit of  Sevres Blue as they recede, to send them back and lay them down where they belong. Next I'll start working on the potted plants and add some more color to the scene. Stay tuned!

Ancient Hills, Golden Valley

My latest sunflower landscape painting (the start of which I posted here) has actually been finished for a while. But once again I have been delinquent in posting. To make up for that fact, I offer you a slideshow of this painting, start-to-finish:

This painting measuring 20x24" is entitled "Ancient Hills, Golden Valley". For more information and/or to purchase, click here or contact me!
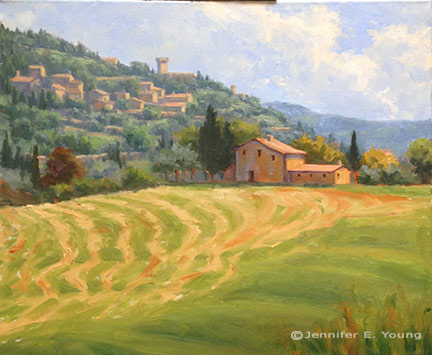
Pescallo cafe complete

We have had a bout of sickness at our house (first me, then my daughter) but I finally had a chance to get back to my Pescallo painting over the holiday weekend. Let's wrap this up! Picking up from my last installment, I am ready to paint in the flowers. Bougainvillea spills over the arbor with mixtures of alizarin crimson, permanent rose and a touch of cadmium red to warm things up. Normally I would block those colors in sooner but I was still trying to decide about the placement of that arbor structure and reds are such high staining colors that I didn't want to put them in until I had the composition pretty well established. Now I guess I am committed! ;)

Pescallo Italy landscape painting in progress by Jennifer E. Young

Geraniums in shades of red fill out the planters using the same colors as the bougainvillea (but in much different ratios).  I also flesh out the columns on the terrace and I am nearly done with the pier.

Now it's time to move down to finish the foreground water and reflections. There is a lot of movement in this water, and with much of this water in semi-shadow, reflections are subtle and broken by waves rather than the strong, mirror-like reflections seen in still water. For the darkest shades I mix Ultramarine and Gold Ochre, warmed or cooled by touches of Cadmium Orange or Sevres blue as the situation allows. Water highlights are deeper shades of the sky color.

Lake Como Italy paitning in progress by Jennifer E. Young

My finale is to include the rest of my vertical lines- the mast on the boat and the railing along the pier. These verticals act as a strong counter-balance to the horizontals of the mountains, boat and pier. I think the railing also serves to further push the background more firmly in the distance.

Lake Como landscape painting by Jennifer E. Young

"Alfresco in Pescallo" Oil on Linen, 24x30" Click here for more info!

This piece was a challenge to me, largely because of all of the interruptions I had, which caused the painting to set up quite a bit more in between sessions. I much prefer painting wet-into-wet, to avoid the extra work of opening the painting back up and scraping the dry paint down off of my palette. But sometimes it just can't be helped. In any event, I hope you like the final piece!

No babysitting this week, so there will be lots of trips to playgrounds and possibly the zoo, and I likely won't have much in the way of new work to post until after my daughter is back in preschool on the 9th.

Moving forward

Before I could really tackle the foreground on my Pescallo painting-in-progress, I needed to establish the background water. It shimmers with a pale sparkling light in the distance, the color becoming deeper and more varied in contrast as it moves in waves toward the viewer.

Lake Como painting in progress by Jennifer E. Young

Lest I got too caught up in the romance of Italy or the gentle waves of Lake Como, my husband brings me back to reality with a screeching halt and a critique of my painting. His opinion is to flip the direction of the boat so that it leads into the painting rather than out. I have to agree with him here, so being the always obedient wife (ha ha) I do as I'm told.

Next, I really need to address what is happening on the pier so that I can paint the reflections in the foreground water. I paint the tires that hang along the pier and serve as a rustic contrast to the elegant beauty of the backdrop. This epitomizes Pescallo to me; it is rustic but beautiful, quaint but elegant, sleepy but exciting, all at the same time. The tires are in higher contrast on the sunny side and in low contrast in the shadows.

Lake Como Italian landscape painting in progress by Jennifer E. Young

Black is not black and white is never white. By this I mean that I don't use a tube black to paint black-colored objects, or a straight out of the tube white for most white-colored objects. This would create very flat, dead color. Instead, I mix my "blacks" with my darkest translucent colors on my palette, ultramarine blue and alizarin crimson, and just the tiniest bit of cad. orange or yellow to neutralize some of that purple undertone.

Lake Como Italy painting in progress by Jennifer E.Young

Flowers and flowering vines grow out of every crack and cranny around these parts, and I paint those in delicately so as not to overpower. The showy flowers will be the geraniums and bougainvillea to come.

School is back in session, which means that our babysitter has become a lot less available now that she's returned to college classes. It also means I will have less time to paint over the next two weeks until my daughter returns to preschool. I didn't get the time to paint outside last week, but my goal is to finish this studio piece with one more session tomorrow, so that I can still fit in a plein air session by week's end. I'm close...wish me luck!