A new thing-a-majig and a new painting

In the wake of the plein air weekend I wrote of in my last post, last week was mostly a recovery week for me. I did manage to get a new studio painting started, however. This is the initial tonal sketch on a 20x24" linen canvas.

Landscape painting tontal sketch by Jennifer E Young

This painting  may prove to be a challenge for me because much of this scene is in shadow. But there are a few pops of light that I am arranging in strategic places that I hope will carry the painting. Hey, you never know unless you try, right?

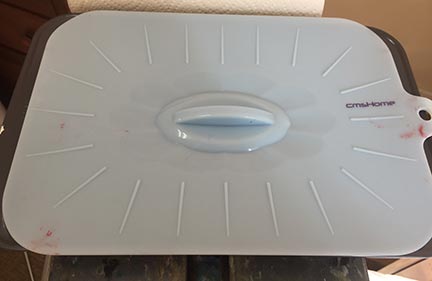
As with the other recent studio oils, I'm working with water miscible paints. One thing I'm noticing with these paints is that the paint blobs on my palette tend to gum up a little quicker once they are laid out, especially when I can't get back to the studio within a day. The manufacturer, Royal Talens recommends in their product info to mist the unused paints with a little water and cover  with foil to keep them moist and reduce the exposure to air. I have never liked putting plastic or foil directly on my paints though, because I feel that it wastes too much in the removal (yes I realize there is a bit of faulty logic in there but we all have our pet peeves).  So I'm experimenting with this:

What you are seeing is a basic 9x13" cake pan covered with a silicone doo-jobby that I found on Amazon. It is supposed to create an airtight seal, and the cake pan is deep enough that this cover-thing doesn't actually touch the paint. Whether it will be sufficient to keep the paint from oxidizing remains to be seen. I haven't been back at the easel since Saturday so I guess I will find out this morning when I go to work. I will report back with my findings, as well as an update on my progress with the painting, in an upcoming post.

Matt Smith workshop

Oh yeah, I have a blog! ;-) Actually, I didn't forget; I've been doing a little traveling up north to the New Hope School of Art to take a workshop from the very talented painter Matt Smith. The trip was noteworthy for a number of reasons. First, it was the first time I have been away from my daughter for more than a night. (That part was hard.) But second, it was also the first time I've had in 4 years to do nothing but paint and immerse myself in "art stuff" for four days straight. (And that part, my friends, was luxurious!) I haven't taken a workshop in a very long time. But now that my daughter is getting a little older, I really feel like it's time to amp up my art life in some significant way and infuse my work with new insights. So when I heard Matt was coming east to teach (he's based out West, so that's something I'd not caught wind of before around here) I knew it would be an excellent opportunity to do just that.

Please excuse the poor photo quality but this was shot with my iPhone in low light. Here you can see the very light way Matt holds his brush to apply paint and manipulate edges.

Matt hails from Arizona, and is best known as a painter of the Sonoran desert near his home, as well as the snow capped Canadian Rockies and other places out west that epitomize the classic western landscape. What initially attracted  me to his work though was not his subject matter, but the sensitivity in the handling of  his brushwork and edges. They are both bold and delicate at the same time.  But after seeing him demo and talk about his approach, I was equally impressed by the purposeful way he composed his paintings and orchestrated his compositions to create  powerful statements. I won't get into a blow by blow description of day 1-4 of class, but I will share some of the significant things I took away from it personally, most likely in more than one post.

The interesting thing about this workshop was that even though Matt is best known among artists as a plein air painter, the class was held entirely inside, in the studio. I'll be perfectly honest here and say that when I signed up for the class I was mildly disappointed that the format would not include at least part plein air painting, especially since Matt himself is a seasoned field painter and the area where the workshop was located was very scenic. (It was the birthplace, in fact, for an entire movement of landscape painters, known as The New Hope School and Pennsylvania Impressionism.) Largely though, that disappointment was entirely personal. My studio is my workhorse, but plein air painting is more exciting to me. Also with my life situation at present, I just don't get the longer stretches of time needed to trek out in the field as often to paint.

When I asked about the reason for the indoor class, Matt's response was that in his years of teaching, he has seen the same problems pop up again and again, whether in the field or in the studio. Maybe he felt it's better to address these fundamental issues in a controlled environment rather than adding another layer of difficulty with the environmental factors that plein air adds. In any event, the format turned out to be fine. In fact, there was plenty I needed to work on just with my studio work,  the studio environment definitely allowed Matt to get to each student several times a day with valuable feedback. As it turned out, the weather was not great any way, and we probably would have needed to seek shelter for at least two of the four days due to rain and wind.

Matt did several very good demos (using his photo references). He used a Strada easel, which I think was a rather new purchase for him. He talked a lot about equipment and painting gear, which, as any regular reader of my blog may have surmised, is a topic of great interest to me. The Strada is made of metal and looked like a neat little box (I think his was the mini, which is presently sold out.)

The Strada Mini Easel

But even without the two winged accessory attachments added to provide more workspace, it was a very heavy box for its size. Matt said he liked it because of its compact size (it easily fits into a backpack) and durability for travel, but personally I could not deal with the heft. A Gitzo travel tripod was also part of his setup, which looked great for its ease of use and small size when folded (also easily fitting into a backpack), but a quick Google search soon told me this item was way out of my price range. (Wowsa!)

Matt, by self-definition is not a colorist. In fact, of the fundamentals he sites as essential to a good painting (Drawing, Value, Design, and Color) the most expendable he says, is color. Even so,  I found his palette fairly wide, with four blues, two earths, two yellows, an orange, one red, a violet, and a couple of greens (plus, of course, white.) He used no medium other than his oil paint and a very tiny amount of Gamsol to thin his paints.

His start consists of a very light sketch, soon followed by masses of color, working broadly to get his main elements and shadows down. He then builds from there, thin to thick, dark to light, broad to more detailed. One thing I found interesting is that he almost always left his sky a white canvas until close to the very end of the process. Obviously this is working to his great advantage, but try as I might, I couldn't resist my normal method of putting the sky in early on. This was especially the case if there was any water in the landscape, as I find  I need that sky information to know what's being reflected.

I've a lot more to say on the subject but I should probably try and paint something now! In my next post I'll share of few of my studies done in the workshop, as well as some valuable take-aways that I received from Matt's feedback.
A spring commission

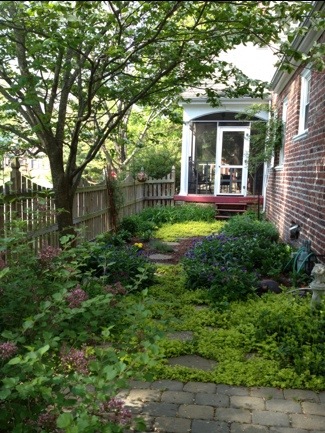
With the spring shows hung and the winter commission complete, I was thinking I would be able to turn next to some plein air painting, or perhaps to develop a couple of my James River plein air paintings into larger studio works. But that will have to wait, as I have gotten another commission! :-) But first, a couple of shots of the garden, which, when last photographed was in a state of sad dishevelment! The gardens around the studio really come into greater color in the summer. But with the rubbish cleared and weeds pulled, things are coming alive in the side garden with Creeping Jenny on the path, flanked by Mountian Bluets (Bachelor's Buttons) and creeping phlox. A flowering Dogwood makes a nice canopy, and the lilac in the fore is just starting to put off its heady scent.

20130427-063451.jpg Here's another shot below of the garden opposite the studio. In summer there are lilies, cone flowers, tall phlox and a butterfly bush. But my big thing lately is succulents. I love that they are water-wise and so marvelously sculptural. In the center is a succulent topiary I made last year. I will need to replenish a few of the tender plants that didn't survive our winter, but it hasn't been quite warm enough here to see much variety in the garden centers yet.

20130427-063539.jpg

Now that my daughter is a toddler, I can usually patch together enough time to noodle in the garden while she plays nearby. Working in the studio is a different story. At just 2 1/2 years old, her attention span is still pretty limited. So while she loves being in the studio, (and I love having her there,) I do have to shoo her out when it comes time to work, amidst howls of protest (and a certain amount of Mommy guilt as well).

...Which leads me to the commission! If you have been a reader for some time, this image might be familiar to you. In fact, I have painted variations of this scene a few times, beginning with the small painting done en plein air in the Blue Ridge mountains, and following with two larger 30x40 versions.

The commission came about as the result of my April show currently taking place at Design Domaine Gallery in Bernardsville, New Jersey. The client loved the painting "Morning Meadow" (click here to read my blog about this painting in the making) but it was much too large for her space. So my task is to recreate this scene in a 16x20 format.

Since a 30x40" painting doesn't exactly scale down to 16x20", we thought it best to start with a sketch of the new painting so that the client could have a visual idea of how it would look compositionally.

20130427-063621.jpg

While on the one hand, it may seem easier to recreate something I have basically already done a number of times, it can sometimes be a challenge to meet client expectations. Sometimes, though not always, a client may, for instance, expect the new painting to be exactly like the first, only smaller. So an effort always has to be made to explain in advance that as an original work of art, a painting can't be recreated stroke-for-stroke like the last.

The client does understand this, though she would like the color of the new piece to be as close as possible to the last. It was, after all, the combination of colors in Morning Meadow that she fell in love with.

Luckily, my prior blog post listed the exact color palette I used to create the larger piece! :) (I can't tell you how often I have referenced my own blog to get this kind of historical information.) So while I won't be able to remember exactly the combinations of color mixtures, I will be able to take some of the guesswork out of the process and use the same palette for this piece.

20130427-063635.jpg

Above is the sketch, reinterpreted onto canvas. At this point in sketch stage, I want to make sure I get an accurate placement for the various elements in the composition, so I've marked off in pencil the horizontal and vertical mid-points in the pencil sketch as well as on the painting to guide me. More to come in an upcoming post, where I will get into some color!

Lake Como W.I.P. & Demo

I mentioned in my last post that I had a new painting in the works, and I thought I'd attempt a little demo with this one. I say "attempt" because my laptop finally gave up the ghost, and these days I tend to do a lot of my writing via my mobile. Not only am I "all thumbs" (literally) but I have to sneak it in before my phone gets snatched away by the chubby little hands of my daughter who wants to "see pictures" whenever she sees it emerge from my pocket. This will be a painting of the beautiful fishing village of Pescallo. Pescallo is a tiny, sleepy  little place that sits just down the slope from Bellagio (also very beautiful). In fact, I could see Pescallo from the balcony of my Bellagio hotel, and the drama of the light as it poured over the mountains and harbor beckoned me to take a stroll down there many mornings before we started the day's touring.

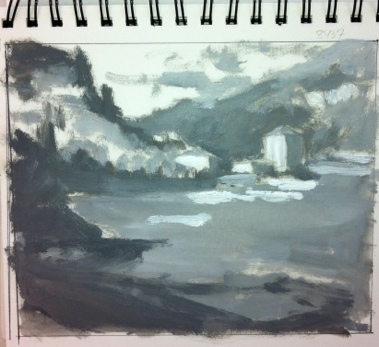
I begin by sketching out a compositional plan that is also a value plan for the painting. I do this using light, middle, and dark value gray oil paints in my sketchbook. I often do a similar thing with Tombo pens (the grayscale ones), but mostly when I am painting outdoors as a way to quickly hone in and get a handle on my composition (in an environment that is bombarded with stimuli). But it is a good practice with studio work too. The oils are mentioned in Kevin Macpherson's book, "Landscape Painting Inside and Out," and I have long wanted to buy these paints so I could give it a try. They are Portland Gray Light, Medium, and Deep, by Gamblin. Hey, if it's good enough for "KMac", (as my husband calls him) it's good enough for me!

notan sketch

The point of this is to see if your painting has a strong underlying structure with a unifying value plan without getting bogged down in details. This is really supposed to be more of a notan sketch at this stage, which is a very simplified thing and addresses more of the armature of the painting rather than the pinpoint accuracy of objects and shapes. It's been a while since I've done this kind of study, and I realized at some point that I had not allowed much for the fourth value I was working with, which was the white of the paper. Oops! So I had to amend my sketch a little and add in some white for the lightest areas.

Still, I feel that my plan is solid and I'm ready to move forward by sketching out a line drawing on my 24x30" canvas.

oil sketch lake como painting by Jennifer Young

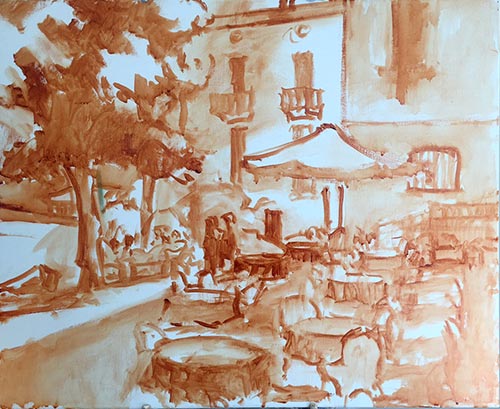
For this I am using burnt sienna (Winsor Newton), thinned with Gamsol mineral spirits. I don't much use this earth color in the rest of my painting stages, and while I could mix up  a good earth for such a job using my standard red, yellow, and blue, it is more of a convenience for me to use a premixed paint at this preliminary stage. I also like it because it lends a nice warm undertone to the canvas as I go along, and it doesn't bleed into my other colors (especially the light ones like the sky) when I move beyond the sketching stage.

Now that I have a plan, I am ready to start painting with color! I'll get into that in the next post .

Back to Tuscany; Vineyard W.I.P.

I think I will just make a deal with you readers (and, for that matter, with myself) to stop making lofty statements like, "I'm finally getting a regular schedule!" because something (like a 9 month-old cutting new teeth or reaching new milestones, for instance!) always seems to come up right afterwards. Still, I know I am fortunate to be able to do anything art-related at all, and  I have finally worked out my compositional pencil sketch for the next studio painting that  I thought I'd at least share. (Incidentally, I just want to say thank you to those of you who have sent me such nice, encouraging comments lately. I am glad to know that these W.I.P.s offer some interest. It's a format that works well for me in that it keeps me posting regularly here on the blog, so I will try to stick to it at least for a while.) This is again a scene of the visually dramatic area in Tuscany known as La Crete.

Tuscany pencil sketch

These little sketches are definitely not meant to be any kind of finished drawings, but with all the stops and starts in studio time nowadays, I am finding them really helpful. They help me to determine whether the composition will work , what I need to  edit out and include, how I might create interest with line,  light and shadow, etc. Though more detailed, they serve a similar purpose to the thumbnail sketches I have used from time to time while plein air painting.

Watercolorists know this approach well, but until recently it has typically not been my way with my studio oils. It takes a little bit more time when some days all I want to do is just dive right on into painting and get ON with it already! But with little sleep and even less free time, it's helped me to feel less disjointed and to backtrack less when I am standing in front of the easel, bleary-eyed with a cuppa jo, trying to get my brain to start.

In case you can't tell what this is to be, it's a vineyard in the fore with a small outbuilding in the middle ground and a little Tuscan hamlet in the distance. What interested me most about this scene is the movement of line from front to back. There is a lot of information in this scene, (maybe too much? We'll see...) and not much sky at all to speak of, so I feel that in order to make my present plan work I should use a canvas of at least 24x30". Well, that's a whole lot of writing for such a simple little sketch, but what can I say? Baby girl has napped well this morning. :-)

Pigeonniere W.I.P.

I am short on time today, so this post will be short on words (rare, I know!) I do have pictures to share, however, of my current 20x24" painting on the easel. The plan is for this to be a larger, more developed version of the plein air piece I did in France (shown here) with more of the sky featured. Compositional sketch:

France painting work-in-progress by Jennifer Young

Tonal sketch:

France landscape painting in progress by Jennifer Young

Sky lay-in (first go):

France landscape painting in progress by Jennifer Young

Ground and shrubs lay-in:

France landscape oil painting by Jennifer Young

France landscape painting in progress by Jennifer Young

Now the fun begins! :-)

A small commission, with just weeks away...

Given how long it has been since I've posted anything new here at all, I am almost embarrassed to write another "yes I'm still here" post. But here goes! The baby is now less than a month away from her due date and I am finally feeling as if I have gotten our household in some kind of order to prepare for her arrival. Unfortunately, now that I'm getting a little respite from the baby books, the shower, the classes, and prepping the nursery, I am, in this final trimester, also feeling my least energetic and creative. In truth, I don't think I was prepared for just how exhausted I'd feel throughout the pregnancy. But now that I'm getting really big, I can't really seem to do any one thing for very long before I start to feel quite uncomfortable. So needless to say, painting has pretty much taken a back seat during most of my pregnancy, and it's hard to say when that will change to any great extent after the baby comes. However, I do have one new little piece to share. It's a small watercolor/pen and ink painting  (8x10" on 11x14" paper) that a client commissioned to commemorate her daughter's upcoming wedding:

watercolor tuscany painting by Jennifer E. Young, all rights reserved.

"Flavor of Fagiolari" Watercolor and Pen & Ink on Paper sold

The scene is of a B&B in the Chianti region, not far from where I myself have traveled a number of times. It's a special place to the betrothed because they met in Italy and stayed at Fagiolari during their travels through Tuscany together.

When I paint from photos, I prefer to work from my own references. I just have a much better feeling for the place if I, myself, have traveled and painted there, and my photos serve as a trigger to call forth those experiences. I also take several different viewpoints of a given scene, plus a number of details, so that I can have as much information as possible when I get to work. So it's always with a bit of reservation when I consider working from a client's photo, which is normally more of a one-off tourist snapshot.

But this commission was actually quite a joy for me. Not only was it great to be doing something in the painting realm again, but the photos provided were excellent. Having also traveled the area fairly extensively myself helped a good deal as well.  Plus I was given much leeway as to how I wanted to interpret them (the photos) and what I wanted to include, rather than being tied to making an exact, literal interpretation  (a.k.a. an illustration) of a scene.

What was most important to the client was that I caputre the "flavor" of the place (hence the painting's title). Luckily, the client was delighted with the finished piece, and I had a good time getting my hands back in some art-making to boot. I tend to feel somewhat more intimidated by watercolors (as opposed to oils) but given its manageable size and the properties of the medium, I was able to stop and start more easily than I can with oils. It's not without reason to think that maybe I can even attempt a few more before "D-day" (or make that B-day) but we'll see. The one thing I can say about my life this past year is that it is anything but predictable!

More alla prima portraits

Following up on my previous post about the Rob Liberace's portrait workshop, I thought I'd start this entry by posting my painting from day 2 of the class. This was a very different model from the one who sat for us on the first day:

alla prima portrait study by Jennifer Young

Portrait study- "The Captain", Oil, 20x16"

I heard quite a few people calling this gentleman the Captain, but I'm not sure if they were doing so because he actually was a captain, or just looked like one! In any event, he was a riot and really seemed to get a kick out of sitting for us. He was an excellent model, able to stay still for an extraordinary amount of time (which he attributed to the fact that he was a long-time turkey hunter.)

I got a little further along with this portrait than I had done on the first day, though I think I had a bit of a handicap to overcome. I had toned this canvas rather too dark. Prior to the class we were sent instructions to tone our canvases in acrylic to a middle value gray. I'm ususally pretty good with my value judgements, but I'd not used acrylics in a long time and they seemed to dry darker than I had expected them to.

This ground had me feeling like I had to do a good deal of extra work to get rid of it so that I could acheive the fair complexion and hair of this gentleman. Normally the middle value gray would be a nice gauge  for judging mid tones, but with this model's coloration especially, the darker than mid gray tone was just not helpful.

This next portrait below was actually not done in the workshop, but comes from a session last week after I returned back home. I met up with a local portrait group that meets weekly here in Richmond. I have actually wanted to meet up with this group for quite a while but for some reason the mid-week evening sessions have not jived with my schedule. Any way, this is Joey:

alla prima portrait study by Jennifer Young

"Joey" (portrait study), 16x12, oil on linen

Since I knew we'd only have this model for a 3 hour segment of time, I thought I'd make it a little easier on myself by choosing a smaller canvas (toned in a light wash of burnt umber, on the spot). As it turned out, I didn't get much farther with my level of finish; which is too bad because Joey had on a great oversized black leather jacket and was holding a guitar.

Nevertheless, I think this is my favorite alla prima portrait so far, as I was very happy with the likeness I was able to acheive. I went about it in the same manner as the two previous studies, using same palette as I'd used in the portrait workshop. But this one just seemed to "click" a little better. Even though that electric blue could use some toning down around his jawline, I like what's happening with the color sense and the brushwork.

I'm missing the portrait group's meeting this week because I'm going to the Shins concert (woo hoo!) but I intend to keep up with them on as regular a basis as I am able. Whether or not I ever "do anything" formally with portraiture, I've made it my goal because I'm convinced that the challenge of working from the live model will improve my abilities to render and to see light and color more accurately overall.

French country garden painting WIP, cont'd

Now that my gardens are right outside my studio doors, I'm finding it far too easy to get distracted with gardening instead of painting--especially now that spring is here. I did do some more work on the painting of the garden passage in St. Cirq Lapopie started earlier in the week though, so I thought I'd continue to post the progression. It's almost there, but I will probably do a bit more work on it before it's all said and done:

France garden landscape oil painting

I've learned something from the last few oils I've done and I'll share it in case it may be of help to other painters. As odd as it seems, I am finding it is actually easier to manipulate the paint and have better effects with my edges if I use a lot more of it. I've never considered myself to be terribly stingy with paint to begin with, (and it may not be all that obvious in this picture,) but lately I've been laying it on pretty thickly and it's like, "Wow, that makes things so much easier!"

When I've taught workshops, I've definitely noticed a certain "stinginess" in beginning painters, both in terms of the amount of the paint colors they'll mix up on their palette, and in the application of the paint onto the canvas. This usually stems from just being uncertain, tentative, and maybe even a little intimidated. But what I try to get across is that in alla prima painting, they are actually creating a lot more work for themselves by mixing up flat little puddles of paint and using skinny, dabby little strokes.

There is a caveat, though (isn't there always when it comes to any kind of painting "rules"?) It helps to have a certain amount of confidence in your drawing and compositional skills if you're going to lay it on thickly (and in fact, this may be part of what's going on with beginners who are feeling tentative and intimidated). Otherwise when painting thickly, you may find yourself needing to do more scraping to make significant changes.

But over all for the kind of direct painting I'm doing, using a lot more paint is helping me to actually have better control AND keep it looser at the same time (if that makes any sense.) Manipulating thicker paint to soften edges and refine shapes does require a light touch though. You aren't moving it around to such an extent that you're smearing it or picking up too much of the underneath and surrounding paint layers. If you do that, there's a danger of having a mud-fest on your hands.

Small figure studies

I haven't written in a while about my return back to the exploration of the figure, but it has been going relatively well. The weekly class I've taken with Robert Liberace has been wonderful, but I must say that the 1.5 + hour commute (each way) has been a little bit of a challenge, and unfortunately I had to miss a class or two in the semester because my car broke down. (That's one of the drawbacks of taking an out of town class--you can't exactly catch a ride if your transportation source goes south!) So while I've felt a little bit disjointed with my schedule glitch, what I've also discovered is that my time in class flies by very quickly, and that my execution with drawing the figure from life is still relatively slow.

figure study ink gesture

Rob did some amazing demonstrations during the course of each class, and I often felt torn about whether I should watch the demos for the duration or work on my own drawings. I tried to acheive a balance of the two as best I could, but since my time with Rob was rather limited (and I can hang out with myself most any time), watching Rob's demos often won out. As a result I've ended up with rather a lot of "beginnings," and nothing from this class really has the feeling of a finished work.

watercolor portrait study

But that is the nature of  learning, I think. And whenever  I teach my own workshops I always try to emphasize to students that in a learning environment, the goal of finishing or making a "framable product" should be subordinate to learning and experiementation.

I took a decent amount of figure drawing in college, so I don't consider myself to be a novice. But I'll say without equivocation that this class was definitely experimental for me. In fact, since it's been such a long time since I've done much if any life drawing, in hindsight I might have been slightly cavalier by signing up for this class. Rob has a lot of devoted followers and it became clear to me early on that many of his students (talented in their own right and some also teachers themselves) were quite familiar both with Rob's teachings and with life drawing in general.

I probably would have done well to have first gained a level of comfort by taking an entire semester of a more basic class in just one or two drawing mediums-- charcoal and chalk, for instance-- to really develop my drawing.  The class was called something like "exploring the figure," which is a hint that it was the next stage beyond just fundamentals. And while all along the way we learned about correct proportion and developing mass and form, there was a little more emphasis in this class on exploring different mediums from drawing to painting, which added a whole new level of learning to an already complicated subject.

figurative painting portrait study watercolor

But neither my car breakdowns nor my cavalier course selection was enough to detract from the class as a whole, thanks wholly to the instructor. I found Rob to be an incredibly energetic, enthusiastic, and helpful instructor. Most of all I found him to be so very inspirational. Beyond his masterful technical acuity, he displays an incredibly beautiful sensitivity and true artistry in his work. So in many ways,  I am glad to have taken this particular class; because not only did it enable me to see the range he is able to acheive in his own work, but I also could see hints and clues about what is possible for myself.

grisaille portrait study Jennifer Young

*Note, scattered throughout this post are a few of my studies from the class. All are pretty small--ranging from 4x6" to 8x10". The small gestural studies (short poses from 3 to 7 minutes) were done in sepia ink. The two subsequent pieces were watercolor, and the final piece was a grisaille on linen, done on the last day of class.

French pastoral WIP and new studio sneak peek

Like everything else these last several months, it has taken longer than I expected to get myself set up in the new studio space. But I love how it has come along; and I'm happy to say that I am at least set up enough where I am working again. I must admit I feel a bit rusty with my painting. At least I've done a little bit of drawing during the chaos, so in that way I have been able to keep my hand in it, so to speak.  But for me, the discipline of painting is a bit like the discipline of physical exercise. It seems to take a while to get "in the flow", but it's oh so easy to get out of shape. (What's up with that?!) The only thing I know to do is just get started and work through the awkwardness.

I thought I'd start up again where I left off--by working on another studio painting based on a plein air study from my trip to the Dordogne. Here is the study:

french countryside plein air painting Jennifer Young

When I originally posted about this piece I called it a "Work-in-Progress", as it was my intention to finish it. But ultimately I would reap greater benefit from it by keeping it as a study. In misty, foggy scenes, the values are so close together and it can be a real challenge to achieve this effect. So even though this is not a "complete" piece, it had a lot of information for me to reference in terms of accurate values and edges captured on site.

Here is the larger piece (24x30") currently under way:

landscape painting of southern France by Jennifer Young

At this point I've kept everything pretty much as flat shapes and used very limited color, as I work out a general pattern and design. I'll need to keep adjusting the values as I know they are stronger than the study overall, but particularly in the middle distance. I also plan to use a lot more paint and more color variations, all the while keeping color subtle and the edges very soft. That's my aim, any way. It was challenging on a small scale and even more-so on a larger one! But I'm game. (I think!)

As for my other "WIP" (my new studio), I do have some more pics to share, as I've begun moving in setting up workstations. But I'll give my readers a break from "construction-speak" and save that for another post. Meanwhile, just a sneak peek at my painting area:

artist's studio setupÂ

Reclining nude II- WIP

I started this drawing on Friday in Robert Liberace's "Exploring the Figure" drawing class at the Art League School:

reclining nude figurative drawing by Jennifer Young

The upper portion is the least resolved so far, but the whole drawing is to be developed further by a kind of push/pull method of adding and subtracting layers of charcoal, followed by highlights in white conte chalk.

Rob started the class with a beautiful demonstration inspired by the techniques of a 19th century French academic artist named Pierre Paul Prud'hon. I had not heard much about this artist, but enjoyed seeing the exquisite reproductions that Rob shared by way of this book:

Rob made particular note of the way in which Prud'hon defined form, and his unique method of shading and highlighting. As this article by artist Rebecca Alzofon  explains very well, Prud'hon had a unique method of shading--in part by creating hatch lines that followed the direction of the form, then stumping and hatching again in a similar manner with highlighting chalks. So in our class, our challenge (should we choose to accept it) is to experiment with working in a similar manner from our model. From my understanding we will work on the same pose for another two or 3 sessions.

In Rob's demonstration he used a Canson gray tinted paper (at about a value #4) which worked well, as it created a light-mid value to contrast with highlighting with white Conte. I again found myself without the proper materials to perform the task. I must have gotten an incomplete or outdated supplies list or something, but all I had was an off-white Rives BFK paper, with which I just made-do by shading with vine charcoal to give me somewhat of a "tone".  I'm not sure at this point how far I can continue developing the current drawing or if it will produce the desired effect. At some point I may just start again with the proper paper, but I'd like to at least take this a little further to see what more I can do.

It has occurred to me that this method of very refined drawing is somewhat more polished than what I'm normally drawn to. Even in the Prud'hon reproductions in the book, I found myself lingering in the passages  of his drawings that were less "finished" and showed more gesture, more of the decision making process, and more of the hand of the artist.

In my own drawing, I notice myself secretly wanting to stop before I lose too much of the gesture. This is probably because in my landscape painting I've set a goal for myself to find ways of stating things more simply...to say "more with less", so to speak and to do it a bit more loosely. At the same time, the whole reason I signed up for this class is to experiment and maybe even learn something new in the process! You can't do that if you are too beholden to your own agenda.

I've been reading a great little book right now by George Leonard called Mastery: The Keys to Success and Long-Term Fulfillment. Leonard is an aikido master so a lot of his analogies in the book are drawn from the martial arts and Zen philosophy. According to the author, one of the keys of mastery is entitled "Surrender":

"The courage of a master is measured by his or her willingness to surrender. This means surrendering to your teacher and to the demands of your discipline. It also means surrendering your own hard-won proficiency from time to time in order to reach a higher or different level of proficiency."

Hmmm. I suspect it probably also means surrendering your own agenda from time to time as well.

Reclining nude sketch

Last night I joined a local figure drawing group. This group met for two hours-- slightly shorter than the usual 2 1/2 to 3 hour sessions I've been to before. The time flew, but I was still there long enough to be reminded again of how out of practice I am! This was my best attempt --a 25 minute pose (one of the longest of the evening).

figurative life drawing reclining nude

I really liked the model...she was very dramatic, which made drawing her lots of fun. She was also quite the trooper, lying on what looked to be a very uncomfortable low bench, with her head supported by a wedge-pillow thingy. I felt happy that I at least started to get some of the weight of her pose. But not much else in the way of detail. I think I'll be sticking to charcoal on newsprint paper until I can get myself to a point of more speed and accuracy, which is only going to come with practice and understanding.

 To that end, I'm studying proportion and human anatomy as best I can on my own for now, through books. I picked up a book by Andrew Loomis at the library called "Figure Drawing for All It's Worth". The book was originally published in 1943, and is one of a series of books by the author on similar topics. Loomis was a well known illustrator back in the day and is still referenced by a lot of figurative artists today as a good source for basic and accessible information on human proportion and figure drawing in general. Sadly, his books are now out of print, but you can still find some of them online (another resource is here  ) and possibly at your local library.

Loomis makes some interesting opening comments in the book about "Beginner's Work". There are several telltale signs he lists, but I took note of this one, as I definitely see this occurring in my own figure drawing:

"An overabundance of small fuzzy line:  Do not "pet" in your line, draw it clearly with a long sweep. Do not shade with a multitude of little "pecky" strokes. "

Ya. So in addition to all of the other stuff on anatomy and proportion, one of the things I want to work on is quality of the contour and line. I think the sketchiness comes in part from a lack of confidence/familiarity with the subject. It's much easier to make sketchy marks as you try to find the right placement and proportion. It's something else altogether to put meaningful, lyrical marks in just the right place!

A beautiful day!

I don't much write about "politics" on this blog (if that's even what you'd call it?) but I couldn't let this momentous day pass without noting my own sense of joy and national pride as we prepare to inaugurate Barack Obama  to the presidency. A big part of me wishes that I could have been there in person on this historic day, in spite of the mobs of people, and in spite of the fact that I will likely see more of the actual inauguration on TV than I would do on the ground. As it is, I'll be celebrating by drawing (as one of my nephews would say) "nekked people" ;-) . I'm attempting to make good on one of my artistic goals this year by working more from life and tackling the challenge of the human form. To get started, I've enrolled in weekly class up in Alexandria, VA studying under the very fine classical figurative painter/portraitist Robert Liberace. Liberace is making a name for himself and he's  been featured a few times in American Artist magazine and other publications.

This class is a big one. Not surprisingly he's a popular teacher and in prior years students were lined up outside the Art League School for a chance to enroll in his drawing and painting classes. In light of that the school has expanded his class size to accomodate two classrooms full of students. So at this point I'm not too sure how much face time I'll really get with the instructor. Outside of the first demonstration, I didn't see him much in our room on the first day of class. But I'm hoping this will change as we all settle in to a routine, so that I'll at least be able get more of his input if even indirectly, by watching him interacting with other students my classroom.

Having said that, it was inspiring to watch our instructor's elegant handling of his drawing. I wish I had thought to get a picture of his demo with my camera phone, but I'll try for it next time. Meanwhile, here's one of my first efforts in life drawing in a verrrry long while. Boy did I feel rusty! I'm posting this drawing not because I think it's great, (actually, it looks pretty tentative, like a cave-man drawing compared to the masterful sketch of my teacher!) But I wanted to mark a starting point to track my progress (hopefully) as I go along.

  life drawing by Jennifer Young

How not to succeed at your goals while really trying ;-)

Happy New Year everyone! This past week, I've taken some time to reflect on the common practice of new year goal-setting, and I've enjoyed browsing around the blogosphere to see what others (and particularly other artists) are writing about the subject. Actually artist Katherine Tyrrell has made this task easy for me with the  great series of year end roundup posts she's provided on her blog Making a Mark--  the topics of which extend far beyond goal-setting (though there is a good deal of that too, including Katherine's own set of goals for the new year.) *Note of thanks to Katherine for foot-noting my blog posts on studio lighting in her "art studios in 2009" subsection of "Who's Made a Mark This Week". For myself, unlike previous years I am taking my time and being a bit more reflective about goal setting. Obviously there is value to goal-setting --otherwise there wouldn't be so many people finding satisfaction in doing it. But why is it that so often goal- setting fails to achieve the desired results? I think that in the past I've sometimes been guilty of goal-setting just for the sake of getting things accomplished, without really examining whether the goals are really worthy ones. Taking this approach  leaves me feeling either unfulfilled even if things get "done" or disappointed  because I didn't accomplish more. It also keeps me so in the mode of wanting to "get there already" that I don't enjoy the process nearly as well. 

So in thinking about how to set more meaningful goals for myself, I've also been thinking about why goal-setting so often doesn't satisfy. There are any number of reasons, of course, but here's a shortlist that I've come up against.

How not to succeed at your goals while really trying:

  • Don't ask "WHY?" Why do I want (or think I want) to do, be, have, or achieve this?  What do I hope to gain? How will this improve my life, my work, or the lives of others? These seem like  obvious questions, but without asking these essential questions first, it's easy to find yourself pursuing goals that aren't meaningful, and sometimes aren't even yours! (see bullet #2) In a nutshell, asking the essential "Why?" helps to get to the heart of what is driving you. 
  •  Set goals that deep down you don't really care about just because you think you should or because others think you should. For an artist, these might include things like setting a goal to get work into a gallery or earn a certain dollar amount from your art, for fear that failing to do so will mean you will be perceived as "unsuccessful". Or setting a goal to paint in a certain manner  or by a certain method because you feel others think it is a more legitimate form or method than some other one. Mind you, none of these are wrong choices as long as they support what you want deep down. But here's a tip; if there are a lot of "shoulds" in your goals, that's worth examining before you commit to them, to see if they really serve you. Otherwise, setting these kinds of goals can often set you up for feelings of "failure". If your heart isn't really in it all the way, you're likely to go for it halfway or not at all. 
  •  Be unrealistic- It's been my personal experience that my trouble has not been the size of the goal, but the timeline I set to achieve it. Setting far greater goals than you can possibly achieve in a given timeline creates more stress than inspiration.
  • Set goals that aren't challenging enough- Being realistic about time and/or resources doesn't mean  you should feel bored. If your goal leaves you feeling flat-lined, are you really going to be inspired to devote the time needed to go for it? In order to motivate myself, my goal has to be beyond my comfort zone. I want any goal I set this year to make my heart go pitter-patter. It should inspire, excite, ignite and sometimes maybe even feel a little scary.
  • Be over-expansive. It has taken me a number of years to get this, (41 to be exact) but I think (I hope) I am finally learning that setting too many goals in a given time-period is not only hard to manage in terms of time, but it also splits my focus too much. I'm finding it's better for me to limit myself to fewer more meaningful goals in order to really give them the proper attention required.   This doesn't mean that I won't break the big stuff down into smaller milestones, but the milestones and activities should support one of my main goals, not set me off in 100 different directions.
  • Set goals without making a plan to go about it.  It does me no good whatsoever to set even meaningful goals without breaking them down into plans of action. In order to track progress, a high level goal could then be broken down into:
    • milestones along the way (these should be measurable)
    • activities needed to reach those milestones
    • a schedule  to carry out those activities (monthly and weekly schedules are good, but for me it has to be daily).
  • Lack balance- This is a very personal matter. Some people do just fine with letting other matters drop for a while in order to hyper-focus on achieving one goal. Not so with me. I'm already an "uber-focuser" and unless I intentionally set goals that address all important aspects of my life, I miss out on fun stuff (like, oh,  sleep, proper diet and exercise, fulfilling relationships,  and time for fun, for instance!) And without those things in balance, soon there is no joy even in the things I dearly want to achieve artistically.

It's easy to jump into a litany of to-do's, but it may take a little longer to step back first and examine the big picture to see if your goals really speak to the greater vision you have for yourself. As I go through my own process I am finding I do have an overarching theme that I want to focus on this year in relationship to my art.

Back to school

Ideally this would include "real-time" instruction and mentoring, and I am hopeful I will be able to find the time and resources to pursue that. But after all, I have a ton of art books to keep me busy and they will help me to commit myself to a regular staple of study through experimentation, self-guided lessons, etc. *Note: For a fascinating and inspiring look at one artist's documented learning processes, check out Paul Foxton's wonderful info-packed site Learning to See.

Also, I love landscape painting and I will continue with this tract, but I'm feeling a great desire to become reacquainted with and develop a greater understanding of the human form. Along those lines, I will make a greater commitment to paint much more often from life--if not daily, nearly so.  Whether this means painting en plein air or still life or portraiture, (or even if it is a 5 minute sketch waiting for my haircut) I continue to see so much benefit to this practice and its time to commit to working from life as a regular discipline.

Obviously all of this will need to be worked out in greater detail into more specific goals and a measurable plan, but this is where I'm heading as for the year ahead. I guess if I had to boil everything down to one word I'd say that what it is I'm after is to achieve a greater level of mastery with my work.

Mastery

Now that's a big, expansive scary word if I ever saw one! And  while it's really too broad to write down as a year long goal,  it can be a guidepost by which my artistic goals can be set. It is said that it takes 10,000 hours to achieve mastery at something. Whether or not this is exact, what it tells me is that it's not something that's likely to be attained in a year!  It's not as if I'm starting from zero, but even so, in truth it may not even be attained in a lifetime, for that matter, even with a disciplined plan.

I do wonder though, as an artist, how do you really know you've arrived? Do you suddenly wake up one day and say, "I'm a master!" It seems a bit of a moving target. Each new level of understanding inevitably leads to new questions, new challenges, and raising the bar ever higher. To quote Gertrude Stein, "There is no there there."

To my mind, arriving really isn't the point. The way I see it, mastery has more to do with a state of being than a state of arriving. It's more about process than it is about product. It's a state of flow. Certainly there is tangible accomplishment produced as well, and I guess the accomplishment part is what we tend to focus on when we think of someone mastering something. But I really see those kinds of results as more of a by-product of something much greater. And yet, it is the by-products that are the most measurable so that's the starting point I'll use to make my plan.  Better get to it. 10000 hours is a long way off.

French village painting back in progress; plus a blog award!

I managed to slip away for a few short hours yesterday to work on the oil painting I'd sketched out before Christmas. I have some real challenges with photography at my temporary painting site, so the photo is not great. But hopefully it can give an idea and I can figure out a better way to photograph as I move further along. Here I'm just trying to establish a good sense of notan in my design (AKA: my pattern of light and shadow):

French village landscape painting WIP

In looking at the digital image of this painting, I am seeing too much busy-ness in the shadow pattern on the ground, so I should probably benefit from simplifying this somewhat. This is where positioning a large mirror across from your painting station really comes in handy. The reverse image in the mirror really helps to provide an alternate view so that you can see errors and make adjustments. I'm lacking a mirror right now in my temporary studio setup. In addition, I have very little room to step back. So it's often not until I get home and download my digital shots that I am able to see the "fresh view" .

In addition to finally getting back to work on this painting, at long last I'd like to thank lovely artist Amy Sullivan for her kind recognition of my blog some time ago with an Art y Pico Award. I am just embarrassed it has taken me so long to respond to this, but I guess it speaks to the sense of overwhelm I've been experiencing during these last couple of months. In any event, I hope it's not too late to pick up the torch.

The Rules:

1. You have to pick 5 blogs that you consider deserve this award through creativity, design, interesting material, and also contributes to the blogger community, no matter of language.

2. Each award should have the name of the author with a link to their blog.

3. Award winners have to post the award with the name and link to the blog of the person who gave them the award.

4. Post a comment on each recipient's blog so they know they've been picked.

5. Show these rules and this paragraph explaining the awards origination. "The Arte y Pico Award" has arisen from the daily visits that I make to many blogs which nourish and enrich me with creativity. In them, I see dedication, creativity, care, comradeship, but mainly, ART, much art. I want to share this prize with all those bloggers that entertain and enrich me day to day. Doubtlessly, there are many and it will be hard to pick just a few." ~Without further ado, please check out these wonderful artists~

~1~ Marilyn King, a wonderful artist whose work and blog has grown by leaps and bounds ~ check her out~

~2~ Rick Nilson, who makes truly unique and imaginative paintings, mostly of the Outer Banks of North Carolina, with cryptic quirky comments to go along with them. I always enjoy my visits to his blog, and I'm sure you will too.

~3~ Dianne Mize, for her wonderful work on her Bagatelles and Meanderings blog. From what I've read on her blog she's run out of "Tag Steam". I can actually understand. This tagging stuff takes time, so in a way I hate to harrass her ;-)  But even if she can't participate I couldn't help but mention her blog any way--I really love her paintings and drawings and the thoughts she shares about her processes are wonderfully interesting.

~4~Keith Wilkinson~I first learned of his blog, The Filbert and Rigger from Marilyn King and I've really enjoyed following his work and seeing his newest, mostly e plein air paintings. Very inspiring!

~5~ Molly Young~my niece. Her blog is relatively new, but every time I visit I am impressed by her growth and her willingness to try new things. Go Molly!

A painting between contractors- St. Cirq La Popie, France

Well, I've stopped fooling myself that I'm going to get away any time soon to work on larger oil paintings. Setting these kinds of impossible goals when we've scheduled back to back contractors for the new studio (painters, hvac, electrician/lighting) just sets me up for frustration. So the last time I stopped by my temporary painting space, I grabbed my watercolors and a few drawing supplies for a little painting at the "kitchen table studio". It's been some time since I've done any watercolor work, so it took me a while to get a feel for it.  But it sure is nice to focus on something other than lighting fixtures, and the great thing about these kinds of pieces is that I can always later develop these compositions into larger oil paintings down the road:

France landscape painting St. Cirq La Popie

"Private Garden, St. Cirq Lapopie" 9x12", Watercolor and Conte Crayon

sold

I had the thrill of driving to the beautiful village of St. Cirq Lapopie (St. Cirq is pronounced something like "San Seer") at the tail end of my trip earlier this year to the Lot and Dordogne in southwestern France. It was a thrill because it was a breathtakingly beautiful location; but as well because my rental car felt not that much bigger (or safer) than a tin can, and  the winding road that leads to the village hugs the cliffside that drops a few hundred feet to the Lot River below. This is a view of the village from the overlook near the parking lot:

St. Cirq Lapopie 

Even though the hike down the near-shoulderless road was also treacherous, I'd have to say it was all well worth the risk. It's a touristed village,  but with good reason. Wonderfully preserved 13th to 16th century Quercy buildings with pitched rooves line narrow streets overflowing with flowers.  Perched high above the ambling Lot river, its "picture-book prettiness" has earned it the well deserved designation of one of France's most beautiful villages. To be sure, I'll be posting more paintings of this village (watercolors and eventually oils) in the days ahead.

French pastoral complete, and another in progress

We've had a lot of rain here this fall, and when it's not been raining, I've been trying to manage the parade of contractors who are working on the new studio . Unfortunately this means I've mostly missed the chance to capture the gorgeous fall colors en plein air. Well, it's a worthwhile tradeoff, I think. Meanwhile, I have the consolation of finally having finished a painting:  

 landscape painting in southern france

Pastoral, St. Germain de Bel Air Oil on Canvas, 20x24" Click here for more info.

I'm also just beginning to lay out a new composition, again of the beautiful part of Southwestern France I visited last spring. To you it may just look like a bunch of scribbles. But trust me, I'm sketching out a street view of Frayssinet, the village where I stayed. I'm attracted to the scene for the sheer beauty of the place, but also by the interesting cast shadow pattern of the afternoon light:

french village painting work in progress

WIP- Frayssinet, 24x30"

What I have  done here is just a pretty transparent wash to figure out my composition and the rythm of the shadows. To do this I've used a mixture of Transparent Red Oxide and just a little Ultramarine Blue.  Transparent Red Oxide is the one earth color that has consistently made itself at home on my palette of late, and I'm finding it such a useful addition. For an underpainting it adds a warm glow, but unlike Cadmium Red light, it is beautifully transparent. It also lacks the high staining properties that Alizarin Crimson does so it is easier to make adjustments in the preliminary stages.

Annapolis Day 2- A fine morning with guidance from Gruppe

Had a few technical difficulties to overcome before I could post again, but I'm picking up where I last left off writing about the Annapolis paint out. Day two of the paint-out started off great, mainly because I had been able to do a little planning the day before. Painting in an unfamiliar place can always be a little overwhelming. It takes a little bit of time to get your bearings and find locations that appeal to you. This task can also be a little more daunting if you are also painting unfamiliar subject matter. (In my case, not living near a harbor or having much boating experience,  that subject matter would be the preponderance of boats.) To tackle the first obstacle, I spent some time on the first day (in between my morning and afternoon paintings) just wandering around scouting out possible painting locations along the many small harbors. One thing to consider is the path the sun will take across the sky throughout the day from sunrise to sunset. Having already done one morning painting the first day, I began to get a feel for which locations would make good morning setups and which would work better for me in the evenings. (I will also sometimes carry a compass with me to accomplish this task.)  As a result, I found a location in Eastport that I knew would be perfect for an early morning sunrise scene. And in contrast to the first morning when I got started late, I was able to arrive early on day 2 and start painting between 7 and 7:30 a.m.

As for the second obstacle.... the first thing I had to do was to recognize that no matter what I am painting, all I really need to do is paint shapes and the play of light on forms. If you can accurately see what is in front of you as abstract shapes and light patterns (and get a good grasp especially on painting the shapes of the negative space between the forms as well,) form naturally happens.  Having said that, the mind plays tricks on the untrained eye--even sometimes on the eye that has had a bit of training. Boats (like trees and the human face) are some of the things that the mind has long tended to see as symbols. They're some of the things that so many of us drew when we were kids --a sort of half-circle topped with two triangles. So one can easily fall into the trap of painting a symbol of a boat (or a tree or a face) instead of painting the actual shape.

While intellectually I know that all of the above is true, for my own peace of mind, I found it also helpful to consult one of my favorite art books of all time by Emile A. Gruppe. Gruppe was a fine New England painter of landscapes, townscapes and most notably to me, marinescapes . He was active in the 30's on up until the 70's and received training at the Art Students League in New York, and from famed American landscape painters Charles Hawthorne and John F. Carlson. Gruppe was also a wonderful teacher in his own right, both through the school that he established, and through his series of books on painting ("Brushwork," "Gruppe on Color" and "Gruppe on Painting; Direct Techniques in Oil" ).   

All three of these books are fabulous. They are also out of print, making the ones that are still available quite pricey and difficult to acquire. I haven't written much about these books before because there is just sooo much I would want to to say. I can't give proper honor to each of them now without making this post even longer than it already is, but suffice it to say that despite the cost and the regardless of sad quality of the painting reproductions within, they are three incredibly worthwhile and inspiring (if not essential) additions to any landscape painter's library.

For my money, Gruppe was a master of brushwork and composition. Living in New England, he was also a frequent painter of harbors and coastal scenes, which made his book, "Gruppe on Painting; Direct Techniques in Oil," a perfect traveling companion on my trip to Annapolis. I'm glad I grabbed it as I was walking out the door, especially since this particular book has a whole section on painting harbor scenes.  This is not a book of formulas, but rather a thoughtful book with a wealth of things to consider. For instance, here is an excerpt on drawing boats:

"...students have  preconceptions about what a boat should look like. They think of boats they drew as children, boats that were shaped like wooden shoes or bananas, curling up at the bow and stern. And that's how they draw them. But probably no shape could be less like that of a real ocean-going dragger; all those concave lines suggest weakness while the character of the dragger is strong and tough......Remember that the gunwhale of the boat is straight as it nears the bow--it doesn't sweep up like a gondola! And the bow goes into the water in a fairly straight line--it doesn't cut under sharply. Use strong lines to suggest a strong subject."

Just that one snippet helped me immensely, and yet there is so much more in this section alone; on cast shadows, masts, rigging, refraction, smaller boats, and docks and wharves. The conversational tone and the passion in Gruppe's writing helped me to internalize his teachings and carry them with me as I addressed the subjects and painted them from life. Here, finally, is the painting that resulted. I may need to touch it up when I return to the studio, but I was pretty happy about it overall:

coastal marine plein air painting annapolis 

Daybreak in Annapolis Oil on Multimedia Artboard, 11x14" SOLD

On this second day of painting, I was happy to meet more of the artist members of the MAPAPA, so I felt a little more connected and a little less lost. In fact, as I was finishing up the above piece, an artist came up to me with a rather dazed and confused look. She said it was her first day at the paint-out, and she'd been driving around for an hour trying to decide what to paint. I had to chuckle (not at her, but with her.) Been there, done that!

Wild Roses (France); and thoughts on painting loose

As mentioned in my previous post, here's a new painting about to come off the easel. Maybe a touch or two yet to go, but mostly it's done. Photographing this painting was a bit of a challenge today due to a lack of good light. It's a pretty decent shot, though I may try a reshoot once the sun comes out:

French landscape painting of the Lot Valley by Jennifer Young "Wild Roses" Oil on Linen, 20x16" Click here for more info.

This is another scene from one of those beautiful misty mornings in southern France that I've written of before.  Even though this was somewhat after the heavy fog had lifted, the moist air remained, and the diffused, cool light kept everything soft but saturated.

One thing I've been learning from my plein air paintings is that even the less successful pieces done on location have a certain freshness to them (if I don't allow myself to work them beyond the point that I should). There are many reasons for this, not the least of which is that I am painting from life.

But I've also noticed that the brush size-to-canvas ratio is much larger due to the smaller plein air canvases. I don't use tiny brushes (unless I need to sign my name) so I'm really forced to simplify. And I must say, by the very nature of the way I have to approach the painting, I often end up saying more with less. 

I try to keep this in mind on days when I'm working on larger paintings in the studio, and to make a more conscious effort to retain that same kind of freshness and looseness. It's a different matter than plein air painting, but it's been helpful for me to consciously reach for the largest possible brushes to do the task at hand, and to *try* to state things as economically as possible rather than overworking.

It's not an overstatement to say that sometimes my greatest motivations are my limitations. And  in the field, time is a built-in task-master due to the ever-changing light. But in my studio, unless my schedule is crammed full of other chores (as it is soon about to become!) there usually isn't that same kind of urgency. Without that, it can really be tempting to noodle around endlessly.

In my studio work, along with relying a lot more on memory, my challenge is to supply my own urgency, and to work more quickly and loosely. All this and still have command of the paint. There's the rub. After all, loose and quick is pretty pointless if the drawing or composition is weak or if the values aren't right.

It's a lot to consider if you think about it, but it is a fun challenge for me, and hopefully in time I can continue to work even more effectively in this manner on larger canvases still.