A new thing-a-majig and a new painting

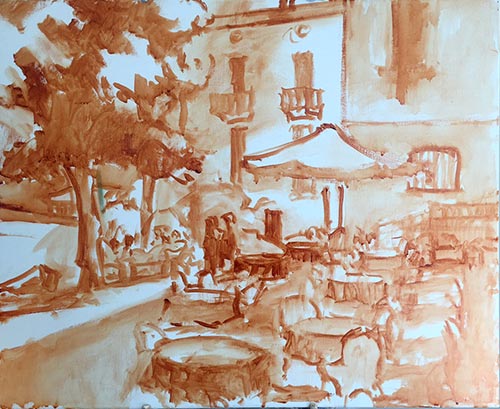
In the wake of the plein air weekend I wrote of in my last post, last week was mostly a recovery week for me. I did manage to get a new studio painting started, however. This is the initial tonal sketch on a 20x24" linen canvas.

Landscape painting tontal sketch by Jennifer E Young

This painting  may prove to be a challenge for me because much of this scene is in shadow. But there are a few pops of light that I am arranging in strategic places that I hope will carry the painting. Hey, you never know unless you try, right?

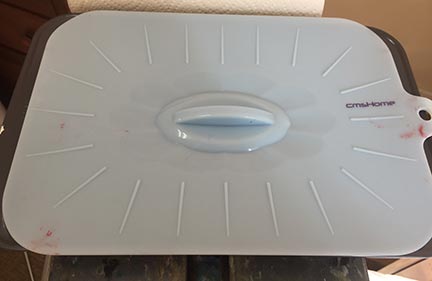
As with the other recent studio oils, I'm working with water miscible paints. One thing I'm noticing with these paints is that the paint blobs on my palette tend to gum up a little quicker once they are laid out, especially when I can't get back to the studio within a day. The manufacturer, Royal Talens recommends in their product info to mist the unused paints with a little water and cover  with foil to keep them moist and reduce the exposure to air. I have never liked putting plastic or foil directly on my paints though, because I feel that it wastes too much in the removal (yes I realize there is a bit of faulty logic in there but we all have our pet peeves).  So I'm experimenting with this:

What you are seeing is a basic 9x13" cake pan covered with a silicone doo-jobby that I found on Amazon. It is supposed to create an airtight seal, and the cake pan is deep enough that this cover-thing doesn't actually touch the paint. Whether it will be sufficient to keep the paint from oxidizing remains to be seen. I haven't been back at the easel since Saturday so I guess I will find out this morning when I go to work. I will report back with my findings, as well as an update on my progress with the painting, in an upcoming post.

Summer by the Shore

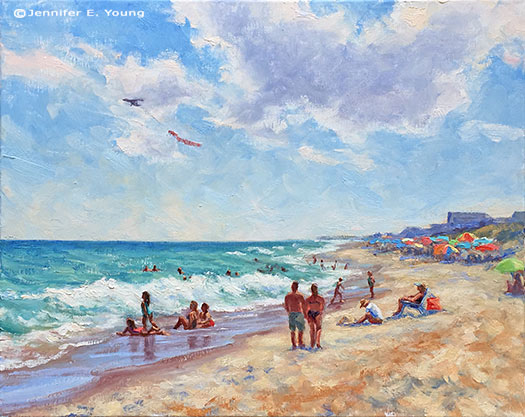
As much as I love the dramatic light of a sunrise or sunset at the beach,  full-on sunshine makes me conjure up lazy days and summer vacations. So as I sent my wee-one off the kindergarten today I guess I can admit that I have been feeling a little nostalgic (already!) for those long duty-free days filled with sandcastle building,  sun and sand between my toes:

Outer banks beach landscape painting ©Jennifer E Young "Summer by the Shore" Water Miscible Oils on Linen, 16x20" To purchase, contact me!

I had such a fun time with this one. It was almost a way of teleporting myself back to the beach. I especially enjoyed painting the figures. Here is a detail  of some of them:

summershore_detail

In fact, I had so much fun that I may even do another painting with just these two girls frolicking in the waves.

As I mentioned in my prior post, I am loving painting in the studio with water miscible oils. I will still work with traditional oils outdoors, mainly because I have quite a large supply of them in my stock. But gradually, in spite of some early struggles, I feel I am getting the hang of painting with the WS variety. I am loving that they are solvent and odor free, and have managed to work with them in a way that creates a lovely rich texture. This is helped greatly by my new Rosemary & Co. brushes, I might add. If you paint, do yourself a favor and check these out!

One of my struggles early on was that the water soluble oils weren't playing too well with my natural bristle brushes. Even after I realized that I shouldn't thin with water and wipe the water out of  my brushes thoroughly  between washing, my bristle brushes would get fairly flabby after a while. I really dislike synthetic brushes because they lack the spring and paint load abilities of a natural hair. Enter Ivory and Eclipse brushes by Rosemary & Co. These are synthetic brushes, but they behave much more like natural hair bristle brushes. Amazing! They really hold the paint and have just the right amount of spring in them. And the prices are quite reasonable as well. If I were to pick just one type ( though why would I want to do that?!) I'd go for the Ivory because they are more like the bristle brushes I normally paint with for my direct painting method. But the Eclipse, which are touted as a "synthetic mongoose" are really nice as well for finer details and soft edges. I really look forward to trying out some of the other styles as time and money allows. Meanwhile, I think I'll head back to the beach soon (by way of the easel!)

Bellagio From Above--Redux

The painting below was completed a while ago and has been sitting in my office since the move to our new home. So  I have had a lot of  opportunity to look at it lately with new eyes:

arielbellagio

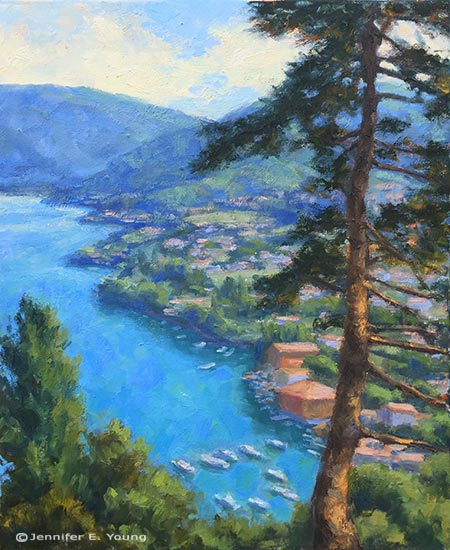
 While I liked the painting before, I felt it could be improved and opened up a bit more to give this view a little more breathing room. So I looked back through my image archives from my trip to the Italian lakes and found several different views from this approximate vantage point. I then followed my own guidance and decided to play around with the composition in Photoshop to see "what would happen if..." I really wanted to capture more of the beauty of the lush blues in the lake and the mountains beyond:

bellagiofromabove "Bellagio From Above" Oil on Linen, 20x16" Click here for more info!

Of course, one change lead to another and my minor edits became quite a re-working. I oiled out the areas I wanted to repaint, and then set to task. This doesn't always work for me, as sometimes the paint layers have too much " skin' or texture, but this time around I guess the paint was more evenly applied.  I really like the way this turned out! It is much more aligned with the concept I had from the start- only now a little better executed.

Morning Surf

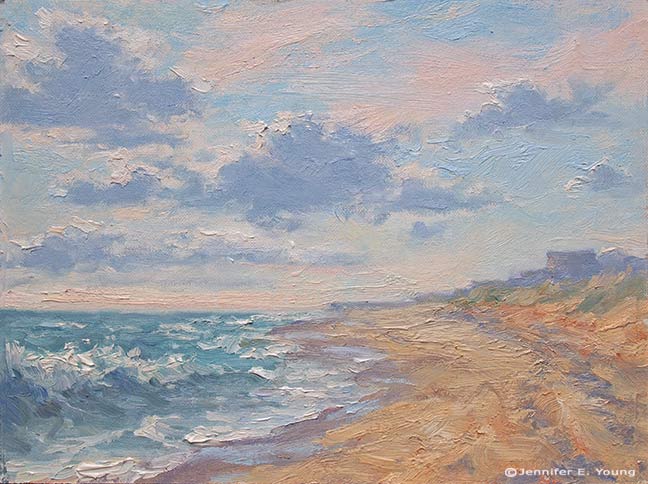
Immediately after I wrapped up painting my sunrise painting, I turned to look up the beach toward the pier and noticed how lovely the waves looked lapping up on the curving shoreline. So since I finally felt like I was getting somewhere with these paints, I decided that this would be a back-to-back session, one piece after another. Here' s the beach in early morning, post sunrise, around 8:30 a.m. or so:

Plein air coastal beach landscape painting of the Outer Banks, NC ©Jennifer E. Young, All rights reserved"Morning Surf" Oil on Canvas, 9x12" Contact me to purchase!

For this painting and the prior sunrise one I had to lay the paint on pretty thickly to manipulate the edges the way I wanted. Also I found the titanium white and cadmium yellow light were much less intense than what I was used to with my traditional oils, so the highlights were painted very thickly indeed. I hadn't noticed this in my first venture with the Water Soluble oils, but it became much more apparent with these beach paintings because they are pretty high key.  Overall the effect seems to me to be closer to a palette knife painting than one done with a brush, though hog bristle brushes were all that I used.

I really enjoy painting the surf. While I have done it before a number of times  in the studio, these pieces were  my first effort done completely from life. What a rush! I feel like I could spend a lifetime studying just this one subject...I should be so lucky.

Back from the beach

Last week my family made our annual trek to the Outer Banks of North Carolina. It is a trip I look forward to all year, and it always seems to be over all too soon. For this trip, I brought along my water soluble oils.  Given all of the moving and excitement we had this spring and summer, I thought I would simplify things a bit with the painting gear I chose to bring with me, and eliminate the need for carrying turpentine. The only problem with my little plan was that, unlike my first foray into this medium, I found myself struggling. A lot. I don't know if it was the humidity, the painting surfaces, my overall fatigue or what. But every painting I did all week was a complete wiper, in spite of my  most valiant efforts.  The paint seemed to completely lack body and intensity. It also seemed to do nothing but smear all over my surfaces when I applied them.

Finally on the night before the last full day, it dawned on me that I should try a more absorbent surface. When I paint with traditional oils my preferred surface is one that is quite smooth --a fine weave linen or a shellacked birch panel. It was my understanding that shellac wasn't going to fly with water soluble oils, and my linen wasn't doing the job at all. So I dug around in my supply of panels and came up with a couple of gessoed birch panels and a Pintura gessoed canvas panel and decided to throw the old Hail Mary on the final day.

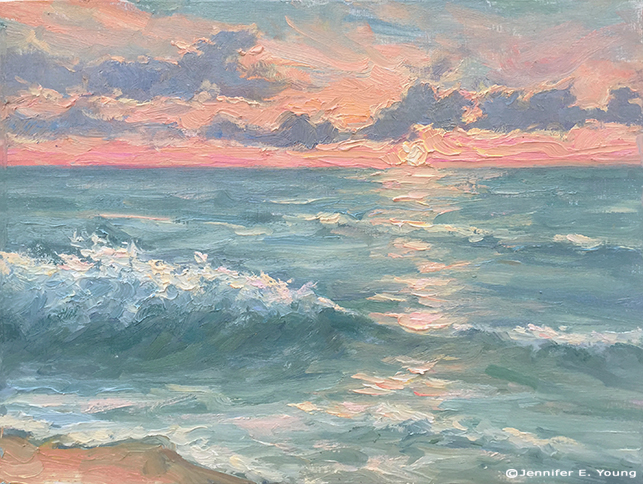
Here is the  first piece I did that last day, at sunrise:

Plein Air painting of the Outer Banks, NC ©Jennifer E Young, All rights reserved

"Sunrise at Nags Head" Water miscible oils on panel, 9x12" Contact me to purchase.

Finally I painted 3 pieces that I actually felt happy with! The paint was still harder to control than my beloved traditional oils, and I had a harder time mixing the colors I was aiming for, but at least the paintings actually looked like something I could show and/or use for reference when painting larger pieces. I will post the other paintings from that day in the coming days. Stay tuned!

Color isolator

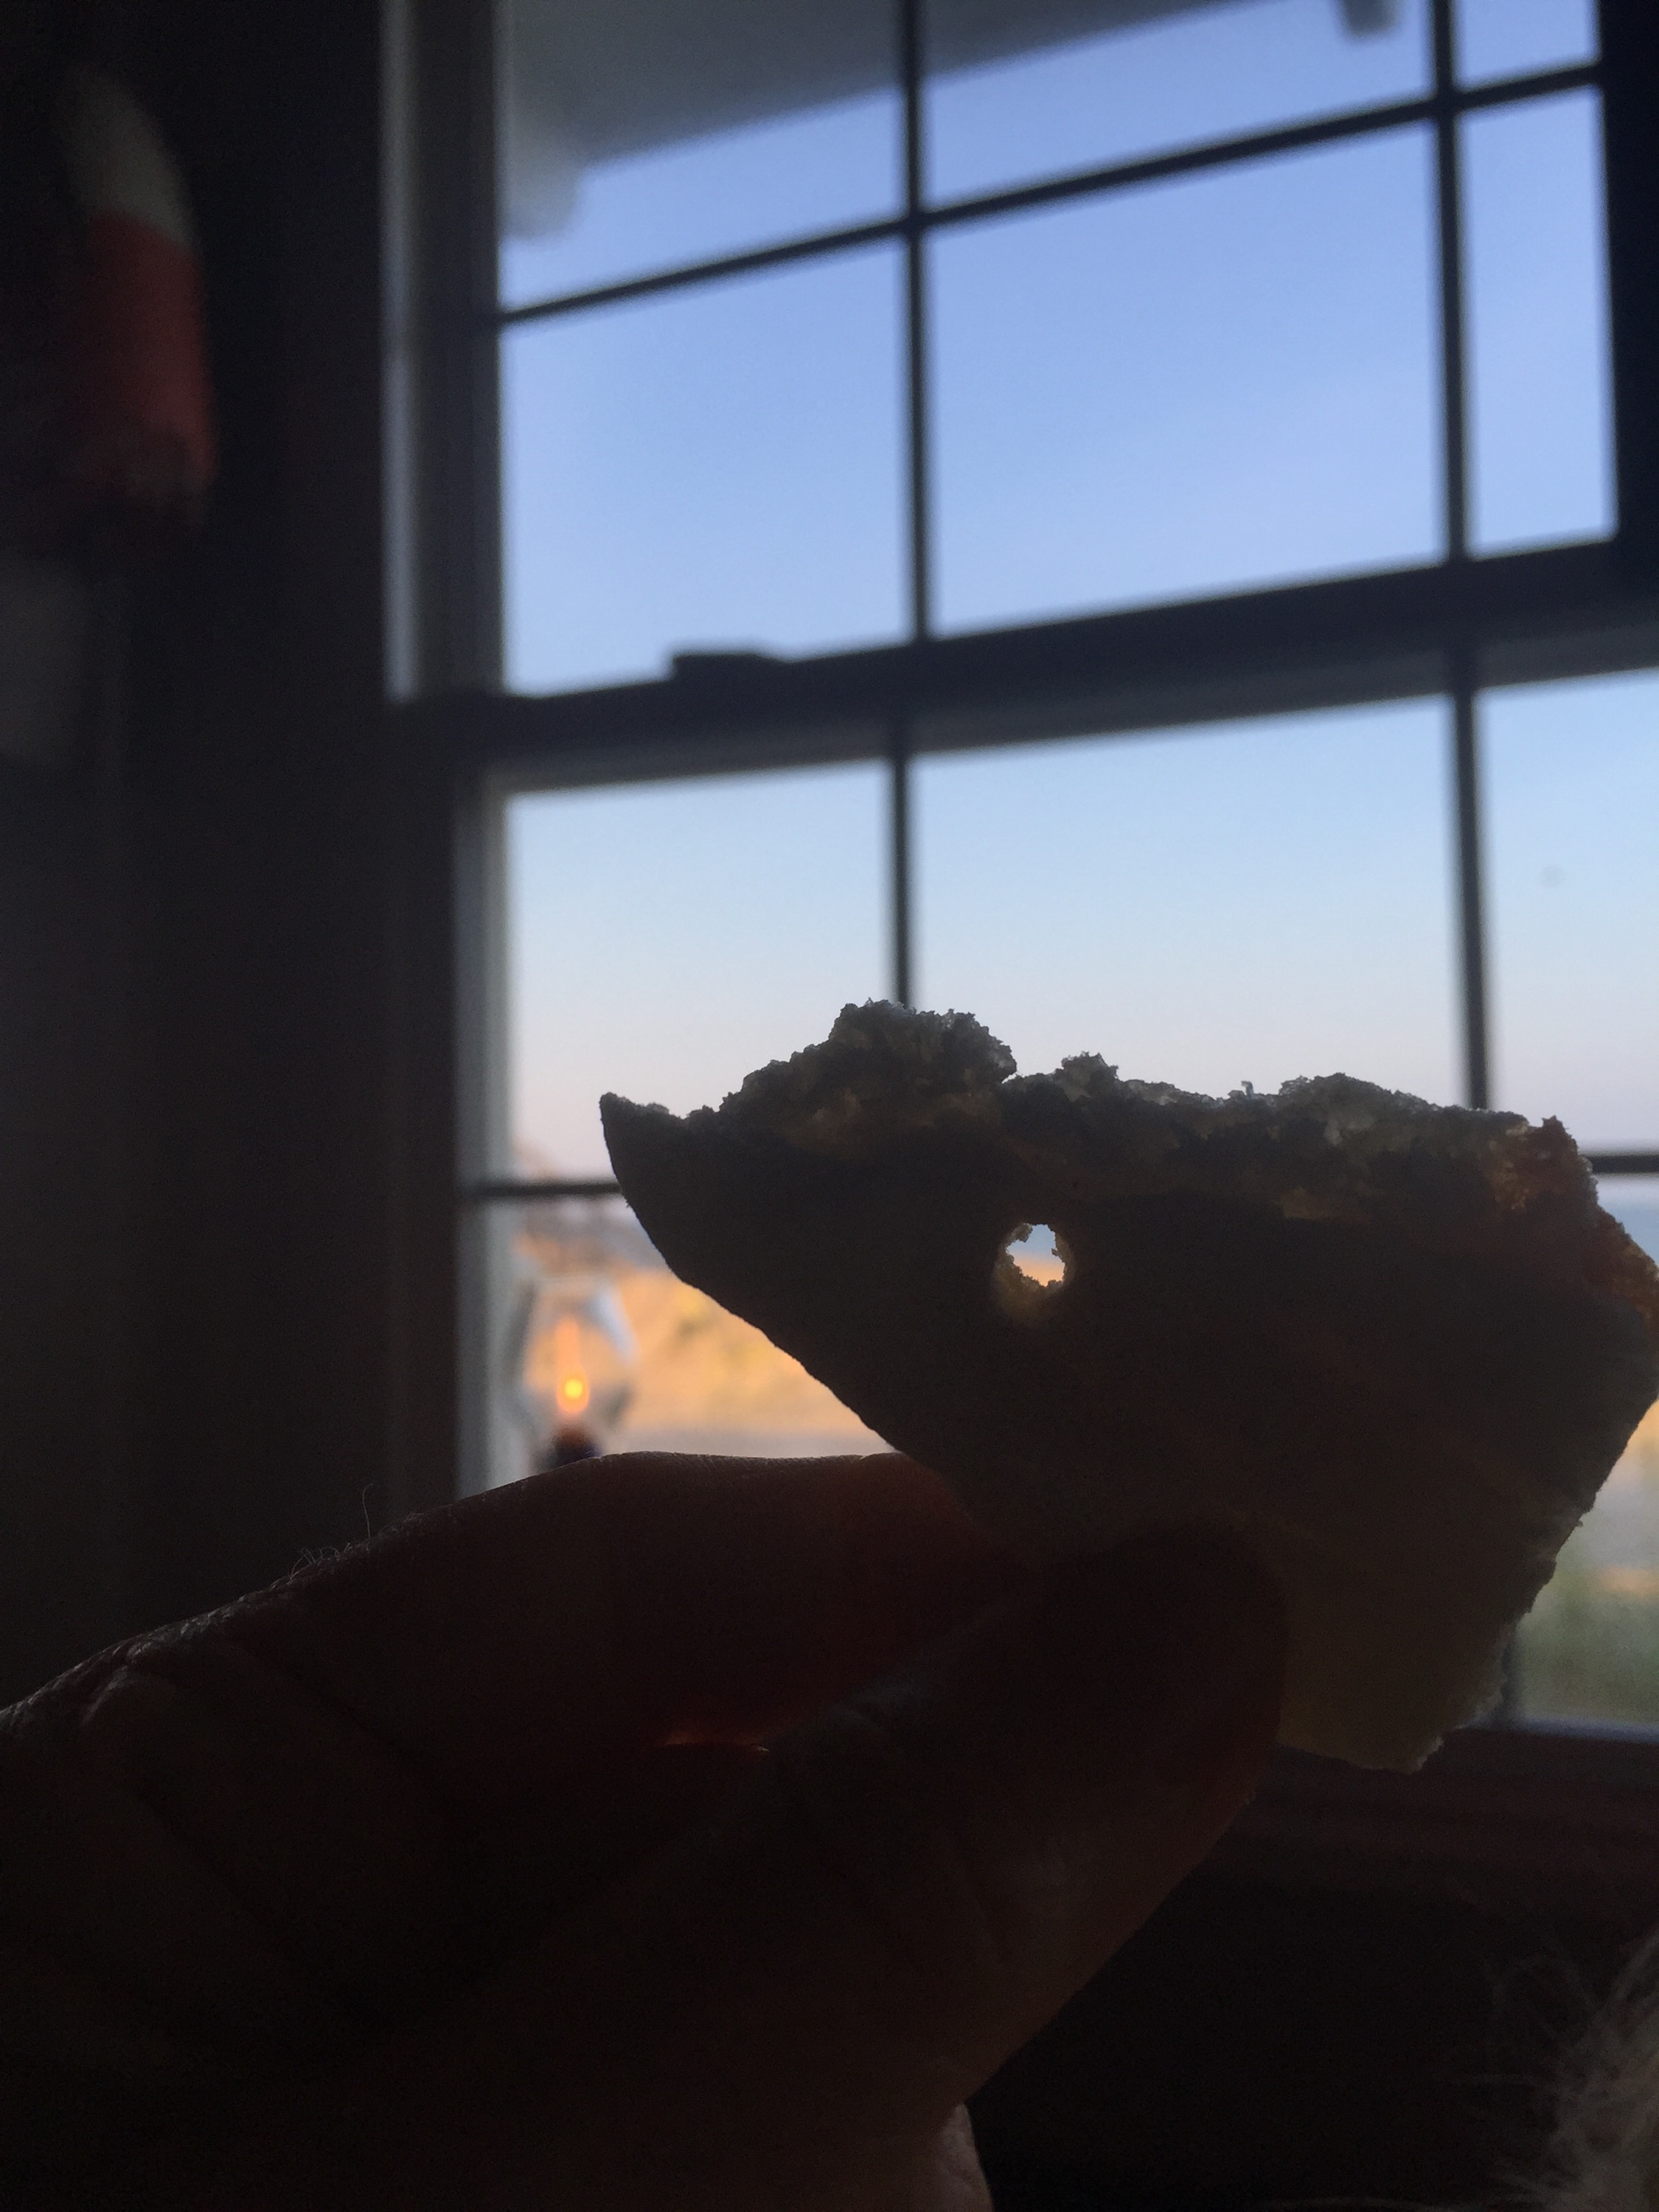
My 5 year old and I have started playing a little color game called, "What color is that exactly?"  I'm trying to show her that colors are not always what they seem. The ocean may seem "blue", but which blue, exactly? And is it all blue? Or is it the same blue, from horizon to shoreline? One way to hone your color discerning skills is by using a color isolator. A color isolator is nothing high tech. It's basically a small hole that one can peer through to "isolate" a particular color from all others in a scene, in order to achieve better color accuracy.

There are little art tools sold to achieve this purpose, or you can peer through the small hole at the end of your palette knife. In a pinch you can concoct a small hole by peering through your curled up fingers. Last night at the restaurant my daughter and I were peering through straws. We even made a hole in a piece of my daughter's pita bread.

  This worked really well, actually, though by this time my husband started trying to disassociate himself from the crazy people peeking at things through their appetizers.

The point is, by isolating a tiny portion of an object you eliminate the information overload that can often happen when painting outdoors, and it is easier to see the color and value more accurately.

Last Blush

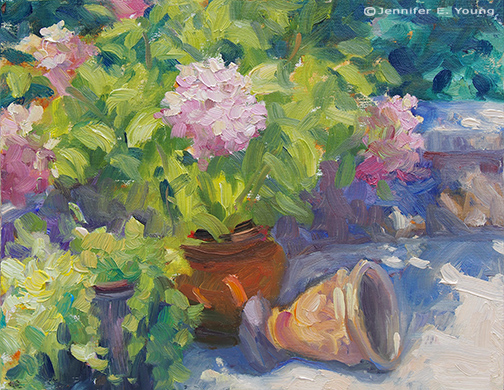
I spent a really fun week visiting with my sister and her kids, so I've been a little silent here on the blog lately. I also find that I post so frequently to my Facebook page via mobile (and I've just started up with Instagram too) that I may miss an update or two on the blog. Silent no more! I  found myself pretty tired today, but since the hubs offered me a free morning of childcare so that I could paint, I couldn't pass it up. Once again,  I opted for a very short commute to the patio:

plein air still life floral painting © Jennifer E Young, All rights reserved "Last Blush" Oil on Linen, 8x10" To purchase, please contact me!

I never know whether to call paintings like these a still life or a plein air painting. I guess they are both! This potted hydrangea is one I carried over from the old house. It is still hanging onto its blooms, but they are fading now, from a bright pink to more of a dusty rose. I went back to traditional oils for this piece, mainly because I still have quite a supply of them and I may need to save the water miscible variety for when I need to paint indoors.

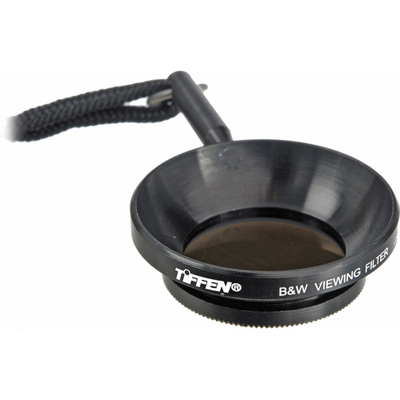
During this painting session I tried out a new little gizmo I've had my eye on for a while. It is the Tiffen #1 black and white viewing filter.

tiffen1

The vendor product info states:

"Often called the "Director's" filter this hand held filter converts color scenes to shades of black and white. It allows the photographer to "see" the black and white contrast and tone before finalizing the exposure."

It's pretty neat because you can wear the thing around your neck and hold it up to your eye with the little handle so as not to smudge the glass. I found it useful to check my values with it, especially the dark passages. But I'm not sure about the highlights. They seemed to appear a bit duller when peering through the filter. I may justI have to get used to using it for a while. I will report back after I have had a chance to use it a little more, but I think it might be a fairly helpful tool to check the value relationships in my work during my process, especially if they are in question.

First painting since the move!

After re-reading my post from yesterday I started to feel like a wimp, complaining about the heat and all. Then I tried it and realized that heat stroke does not improve your art one iota! All kidding aside, it was boiling lava hot outside on my patio. I only lasted about an hour before I decided I'd have to leave it until the next day, and pick up where I left off. And so I painted this piece over two sessions, noting the time of day and returning to wrap up at the same time this morning.

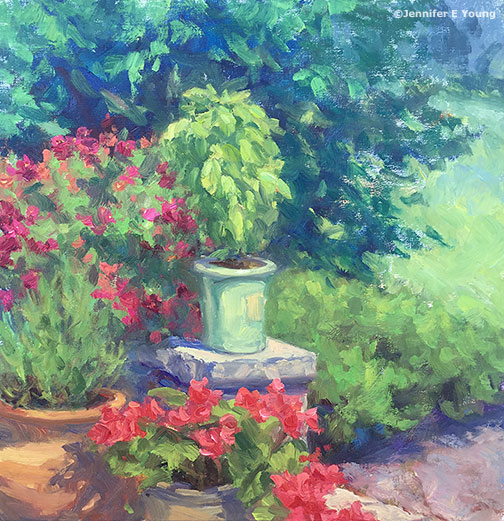
plein air garden painting by Jennifer E Young, All rights reserved "A Taste of Summer" Water soluble oils on Linen, 12x12" To purchase, contact me!

This little outdoor still-life setup includes the herbs and flowers I brought from my old place, as well as a big beautiful housewarming gift from our new neighbors (the pink and orange spray behind the basil). A  marriage of old and new,  I felt it was the perfect subject to kick off this new beginning.

I experimented with this painting using Cobra water-soluble oil paints by Royal Talens . I was inspired to try them when I started following the very talented painter Mark Hanson's discussions about them on Facebook and on his blog. I have friends who use water miscible oils, too, but having tried them before without success I haven't been compelled to try them again. But when Mark suggested that his migraine headaches may have gone away after switching to these oils, I took notice and decided to try this new (to me)  line of paints myself.

I have suffered from insomnia for years, and yet ever since we moved to the new house, I have only had two bad nights. That's pretty incredible! Coincidentally, with the exception of yesterday and today,  I have not painted since we've been here. Is it possible there is some other reason for my newfound improved sleep? Absolutely. But it's also possible the fumes were getting to me and I didn't even realize it. It has also bothered me for a while that I am eating as much organic and natural food as I can afford, I'm also inhaling volatile organic compounds on a daily basis in my work. And if we ultimately decide to set up my studio in our current attached garage, water soaked paper towels are  going to be a lot safer than ones soaked with mineral spirits, odorless or not!

I first tried water-soluble oils several years ago. I believe they were Winsor & Newton's Artisan series. At the time I found the handling too gummy and tacky and not to my liking at all. I may not have given them a fair shake though, because in recent weeks I have read that you really should not thin your paints with water or it will produce that tacky, gummy effect and make the paints rather dull and cloudy looking. Instead, Mark advised not to rinse off your brushes too much with water, but to just wipe off the brushes as much as possible in between color mixtures  instead, and save the water for the final cleanup. If needed, use a water miscible oil painting medium created specifically for these paints rather than water to increase viscosity.

That advice made a world of difference and I found myself painting without fighting with my materials. There was a slight difference in the handling and a few old habits to overcome, but nothing so difficult as to put me off. I would say they did not flow as easily for me as my traditional oils, and the color intensity was a tad weaker, but not by a tremendous amount. On the other hand, they have absolutely no odor and seem like they would be great for travel.

From what I have read so far, the drying time may be a bit longer than what I'm used to. But that should not be an issue for ole' Pokey, here. I do hope they dry well and evenly, without any dull passages or great shifts in color or value. I will report back on this if I notice anything remarkable. I look forward to experimenting more with these paints. I really hope these will be my new go-to paints, and that I can ditch the OMS once and for all!

Winter Sunset complete

This morning I finished up my snow painting, the start of which I blogged about in my last post. Here is the final:

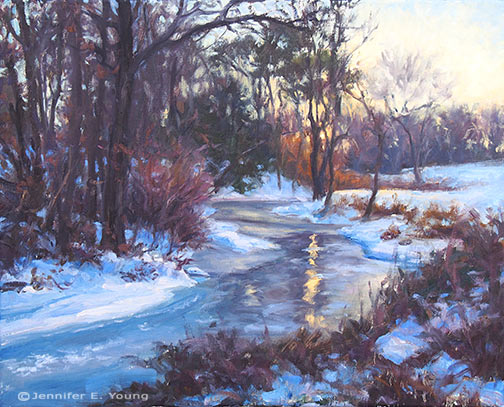
Winter sunset landscape painting by Jennifer Young, All rights reserved"Winter Sunset, North Run Creek" Oil on linen, 16x20" Click here for more info. To purchase, please contact me.

This was one of those paintings that I was excited about from concept to finish. It had the feeling of a sunset, a snow painting, and a nocturne, all in one. I actually didn't want it to end.

I experimented with a new blue on my palette, which I am really enjoying--Indathrone Blue (Grumbacher). It's really a versatile and beautiful color.  It's along the lines of a Pthalo Blue, though not nearly as highly staining. I find that both Pthalo blue and green can easily take over a paint mixture with anything beyond the tiniest touch. (They also seem to have a way of getting all over me very easily!) Indathrone is different. It's transparent, less intense than Pthalo but "cleaner " than Prussian Blue, and very versatile to work with. I used it in various mixtures throughout the painting, but you can see a good bit of it in its purest form (tinted with white), in the frozen section of the creek on the lower left.  I doubt it will take the place of my tried and true Ultramarine, but it's a nice addition to have on the palette, and I can see a lot of potential for its use in still life and nocturnes.

Bellagio Promenade

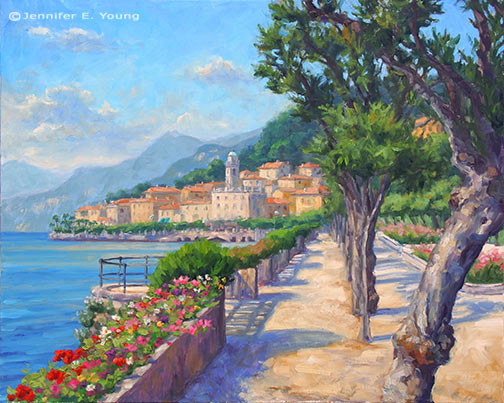
As I mentioned in my last post, I've been working on a large(ish) painting of the Bellagio promenade that leads to the Villa Melzi. It took me a little longer to bring this painting to a conclusion and, because I painted at night, my progress shots were too bad to post. So what I am sharing today is the final piece:

Lake Como Italy landscape painting by Jennifer E Young"Bellagio Promenade" Oil on Linen, 24x30" For more info, click here. To purchase, please contact me!

 Because I had to work on this over a succession of days, I worked pretty lean until the last couple of sessions. In the end though, this bad boy has a lot of paint! Of all of the places I have visited so far in Italy, Lake Como in general, and Bellagio in particular, hovers near the top of my list for achieving that dazzling combination of natural and manmade beauty. The trifecta of pre-Alpine mountains, deep blue waters and classic Italian architecture dripping with flowers is pretty hard to beat.

New Lake Como painting in progress

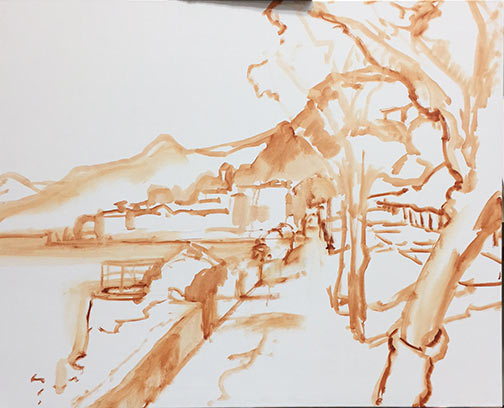
School's out this week due to snow, so my painting time is catch as catch can. Nevertheless, we have been conspiring with other desperate parents to arrange play dates here and there, which allows a little painting and blogging time. So I thought I'd share the Bellagio painting I have my easel this week. This is a promenade on the outskirts of bella Bellagio, leading to the stunning grounds of the Villa Melzi.  This view however, looks back towards the town. Apologies in advance for the poor quality photos and the cast shadow of part of my easel on the painting. I don't have a lot of time to photo edit anything but the final these days, so I hope you will bear with me. I start in the usual fashion, with a loose sketch of my composition in Burnt Sienna:

Lake Como painting demo by Jennifer Young

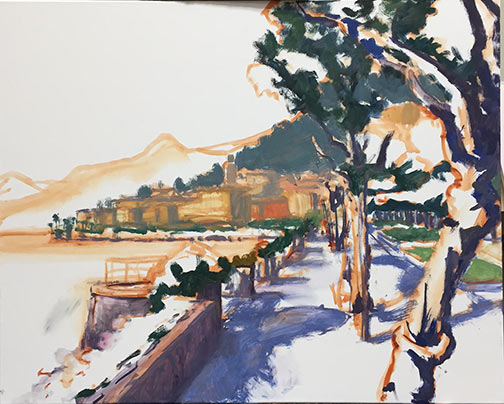
Next I lay in the shadow family and darkest notes.

Lake Como painting demo by Jennifer Young

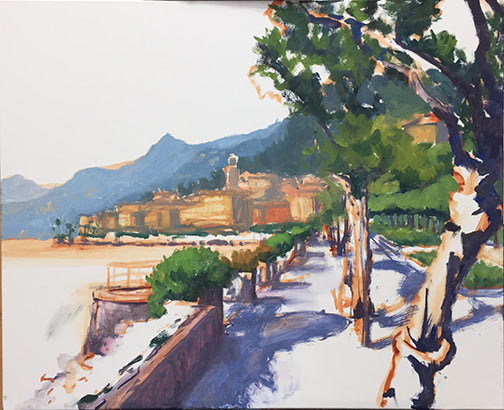
At this point I'm laying in some general blocks of color. Still no highlights yet...

Lake Como painting demo by Jennifer Young

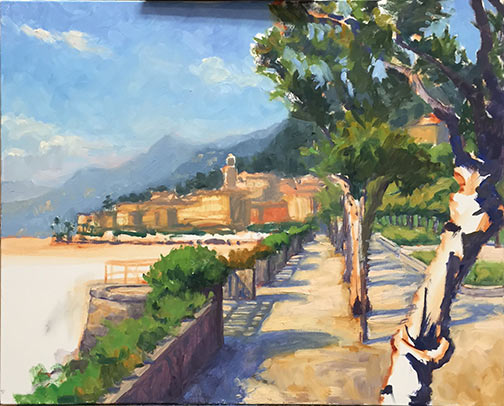
And here's my starting point this morning:

Lake Como painting demo by Jennifer Young

Next I will continue blocking in, including the water and distant village. I'm still working up the nerve to paint outside while there's snow on the ground, but we will see. Not much of a fan of the cold, but that snow sure is pretty.

Still life shadow box

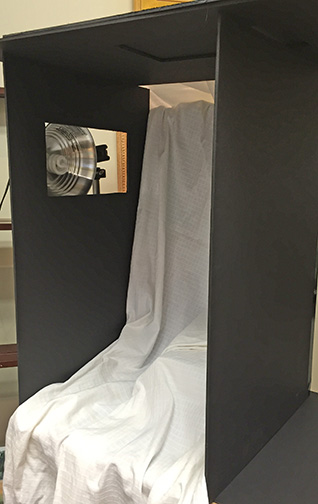
I mentioned in my last post that it's helpful to have some contol over the lighting environment when painting the still life. A simple solution is to create a shadow box. This is not a new idea. If you google "still life shadow box", you can find lots of examples. I looked at a number of them, but given my tendency for being definitively un-handy when it comes to building things, I went for the low tech option as described by Lee A. Brown on his blog A Day Not Wasted. The only difference was that I didn't bother with the plastic corner moulding he mentions. Instead I found one of my favorite "building" supplies, some duct tape, (in black- SCORE!) when I was shopping for the foam core. Made this way, the box isn't indestructible, but it's sturdy enough since I don't really foresee needing to move it around all that much. The other difference in my box is that I made two windows for the light, one on top and one on the left side, which I can cover or uncover with the leftover scrap foam core, depending on which direction I want the light.  Here's what mine looks like:

Shadow box for still life painting

All of this is sitting on this Ikea kitchen cart on wheels, which I found on Craigslist for $10 (SCORE! again.) I'm only 5'4", so at my height, this cart brings my objects about as close to eye level as I can manage given the space I have to work with. I've gathered various boxes (gift boxes, jewelry boxes, etc. to help elevate my objects even further, and to provide some variety in the height I can achieve with various objects.  Here's a slightly different angle, with my last still life setup inside:

shadowbox

A simple large cardboard box, open on one end, and a shop light from Home Depot, is an even lower-tech version that would also work perfectly fine.

Still life...trying again

The last time I attempted a floral still life painting, it all went south. But, since I have been wanting to build a more regular practice of painting and drawing from life, and since it is nothing but brown and gray outside right now in Virginia (not to mention that I don't tolerate the cold too well) I decided not to let a little past  failure hold me back. And as they say, it's in the failures where we have great opportunity to learn and grow. It sounds a bit cliché but it's also actually true, especially if you don't let the failures wig you out. I have to admit, at first I did duke it out with the old psyche a bit, but upon reflection I realized that I really did learn a few lessons from my last effort. For one thing I learned that I didn't really set myself up for success to begin with. I basically walked in, put some flowers in a vase, set them on a table and went to it. How hard could it be? Wellll....

The first problem was that there is actually quite a lot that goes into setting up a nice still life. I figured since it had been a very long time I would keep it simple by focusing on just the flowers and a vase, and no other extraneous objects. Only extraneous objects were all around my prior "setup" (if you could call it that.) The utility sink was in the background, as well as pictures hanging on a wall, art supply bins nearby, etc.  It's not impossible to paint that stuff out, but it is pretty distracting.

Secondly, in my previous attempt, the lighting was completely flat and non directional. That's great for studio lighting in general, but it makes it harder to create form and good color without that definitive light and shadow. I felt like it was kind of akin to painting outside on a gray day.

So the first order of business was to remedy these issues, and create an environment where I would be "set up" for success.  Once I found a solution to my setup issues (which I will share in my next post) I felt like I had more control.

Here's how it went down, in various stages:

Initial design in a wash of cobalt blue, burnt sienna, and chromatic black:

Still life floral painting demo by Jennifer E Young

Blocking in; shadows first, then midtones:

Still life floral painting demo by Jennifer E Young

Fleshing it out:

Still life floral painting demo by Jennifer E Young

Still life floral painting demo by Jennifer E Young

And the final:

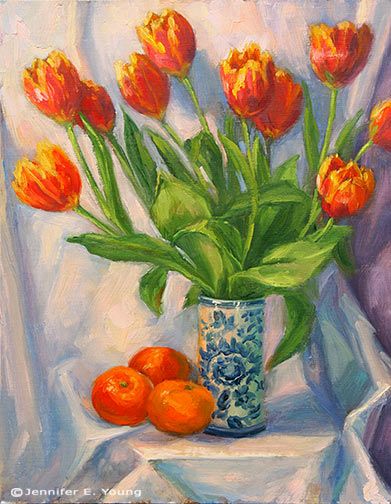
Still life floral painting Tulips and Mandarins by Jennifer E Young"Tulips and Mandarins" Oil on Linen, 14x11" Click here for more info!

A new year, a new painting

Welcome to 2015! I will spare you the laundry list of lofty goals or resolutions, mainly because I don't have one! Seriously though, my one overarching goal for this year is to paint more often and more consistently. That shouldn't be too hard to obtain, right? I've had some obstacles lately but they are not insurmountable, and to prove it, here is a new studio piece I've been blocking in:

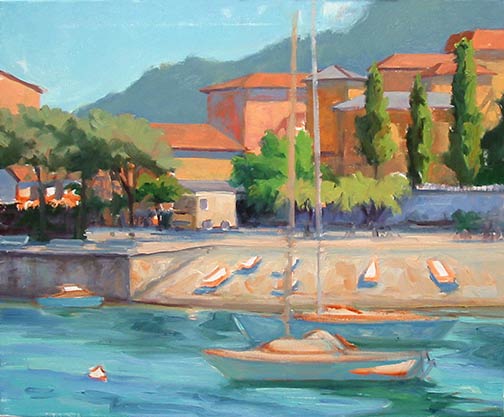
Lake Como Italy landscape painting in progress by Jennfier E Young

This composition might look familiar to you. And there's a reason for that! It's based on a little gouache study I did not too long ago, only scaled up considerably (from 4x5" to 20x24") and in oils. Much more to go on this, but it's a decent start, and the year is young.  ;-)

Varenna mini gouache study

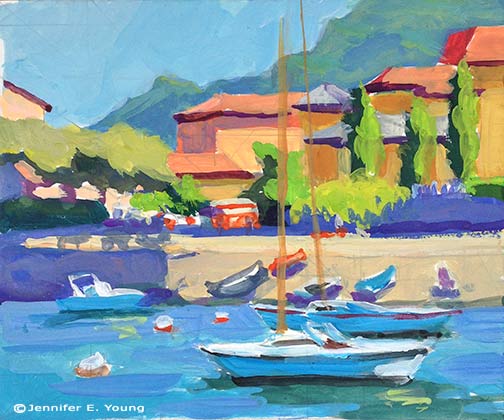
Thought I'd do a little experimenting with this fun little 5x6" study in gouache.

Varenna gouache landscape painting by Jennifer YoungColors of Varenna (study) Gouache on Cottonwood Arts Coldpress paper, 5x6"

Here I'm just trying to get an idea about my lights and shadows and the basic shapes, so I've not much detail. For this composition I experimented with using a compositional grid that we studied during Kevin Macpherson's workshop (you can probably make out some of it in pencil beneath the gouache. I mentioned it briefly in my last post, but basically this is a method to achieve an informal subdivision of space, as discussed in Andrew Loomis' book called Creative Illustration:

loomisgoldensection

After I learned more about this "grid thing", I realized that I had often been using this kind of subdivision intuitively. But it is good to have a tool handy to be more deliberate about it when one wants to, or if you are dealing with a complicated subject and are trying to decide what to leave in, what to edit out, and how to arrange a painting for the most pleasing effects.

It's been a while since I have worked with gouache and had forgotten that the colors shift a bit when they dry. Nevertheless I had a good time and really look forward to working with them again.

Week-long study with Kevin Macpherson

Last week I did something I haven't done in a very long time...devote myself to the art mistress from morning to night for an entire week. And it was a week studying with the talented Kevin Macpherson at that! As you may have read from my previous blog posts,  I am a big fan of his paintings and his books. He is truly one of the best teachers I have encountered so far. Not only is he a highly skilled painter, but he has a way of honing in on and distilling essential information that actually penetrates my rock-hard noggin. JYandKMAC2

The workshop took place in a beautiful new space called Chesapeake Fine Art Studio, run by artist Hai-Ou Hou in Stevensville, MD (great location- about 20 mins. away from Annapolis). If you are an artist on the east coast,  it would behoove you to check out her site. Hai-Ou is quite the painter herself, and also appears to be drawing some of the best and brightest painter/instructors in the plein air and traditional/representational painting movements.

I really wish I had time to delve into all I learned during my workshop experience, but life is slamming me pretty hard right now. This week marked a return to the "real world" (insert the sound of  needle scraping across a record here) with kitchen renovation, school activities, and doctor's appointments commanding most of my time and energy.

But my biggest take aways from Kevin's instruction had to do with value and composition. He spoke a lot about light and shadow, and how one can create much stronger paintings by clearly indicating which elements belong in the light family and which belong in the shadow family. (This sounds simple in theory but it isn't always so easy in practice.) He stressed seeing and painting "shapes, not things", with the idea that if we are too wrapped up in painting a "thing" we lose the ability to really see it accurately and how it relates to the rest of the painting as a whole. We spent a good deal of time really learning how to see the true value of things (er, shapes, that is!) He stressed using a color isolator in the field to identify true value and color, determining and laying down your darkest note of color first, followed by the rest of the shadow family, and finally the values in the light family, keying everything up from that very darkest note, so that you really can get a handle on color and value relationships.

In essence, how dark you key your darks will determine how light you key your lights. I use the analogy of playing "Chopsticks" on the piano. You can play low on the scale or high on the scale, but the arrangement of notes and their relationship to each other are the same no matter how high or low you move along the keyboard.

Kevin Macpherson's workshop

His demos didn't disappoint. In addition to demos in the field, mid-week during his opening he did a remarkable demonstration in the studio (from a photo) on a canvas sized at about 20x24" . During that opening he also presented an inspiring and highly entertaining lecture. This lecture, I understand, was very similar to the one he presented at the Plein Air Convention. Not being able to travel as much as I used to, I really appreciated having the opportunity to see this presentation, in a much more intimate setting.

Though we were meant to work largely out of doors, we had our share of rain and wind. When the weather didn't cooperate, it gave us the opportunity to study (in the gorgeous and spacious studio) some of the more pertinent points Kevin was trying to drive home. We spent a good deal of time studying value relationships among the "light family and shadow family". On another occasion we delved into "The Golden Mean" or "Golden Section" (the informal subdivision of space) and he presented a fascinating slide lecture with many, many inspiring examples of  how it has been used by painters throughout history.

Kevin Macpherson's painting demo

Here are a couple of my plein air paintings done during the workshop that actually reached a level of finish:siloshadows_w

plein air landscape paintings by Jennifer E. Young

At the week's end, I left feeling completely exhausted and totally exhilarated at the same time. I didn't leave with many "finished" pieces, but that wasn't my goal at all any how. What I did leave with was a wealth of knowledge and insight, as well as a good deal of creative spark. Whether that spark ignites a fire, is now totally up to me.

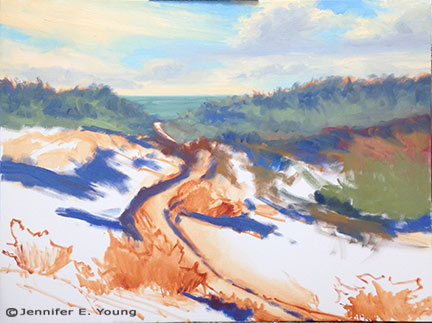
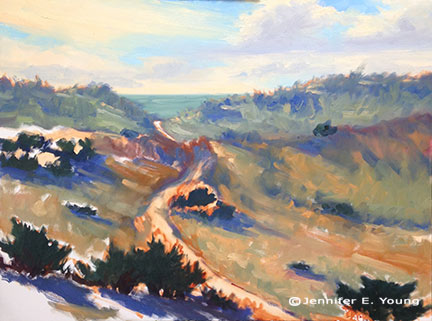
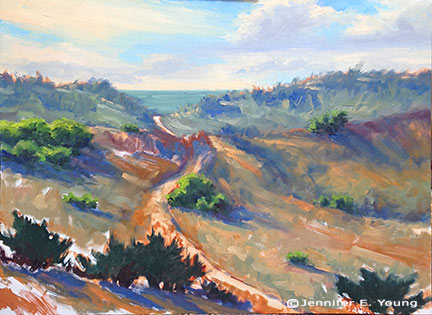
Progress on the large Hatteras painting

Here are a few progress shots on the Hatteras Island Dunes painting I last blogged about:

Work in progress landscape painting by Jennifer E. YoungWork in progress landscape painting by Jennifer E. YoungWork in progress landscape painting by Jennifer E. Young

Though I am trying hard to address the picture as a whole, it is some kind of work just getting the canvas covered. I have been painting pretty small lately so I am kind of shocked at the amount of paint I'm mixing and using. I think this is especially true because I'm not used to using such an absorbent surface.

In the process of working solely from my painted studies, I've noticed that one of the main reasons I love the smaller alla prima pieces is the amount of broken color in the painting. Color is laid next to color, sometimes within the same stroke, and brush strokes aren't overly licked or blended. The result is that you can achieve a really fresh look with the little ones. It's not impossible to do this with the larger paintings, but you do have to really work wet-into-wet the whole time, and start loading on the paint to get that kind of effect. To have that kind of expectation with a painting of this size may very well be an exercise in futility, especially since I am not able to paint on it every day. On the other hand it is really impossible to replicate stroke-for-stroke what I have done in the smaller studies, as the brush size-to-canvas ratio would mean I'd likely have to turn to using house paint brushes!

So with these "reality checks" in mind, I am still striving to capture that fresh, breezy, beachy essence, even if the nature of this beast is very different from the original. I find myself working more background to foreground on the bigger paintings (rather than strictly dark to light) in order to keep the paint surface workable. Nevertheless, I am saving most of the lightest highlights toward the end because they are the most opaque and have the thickest application.

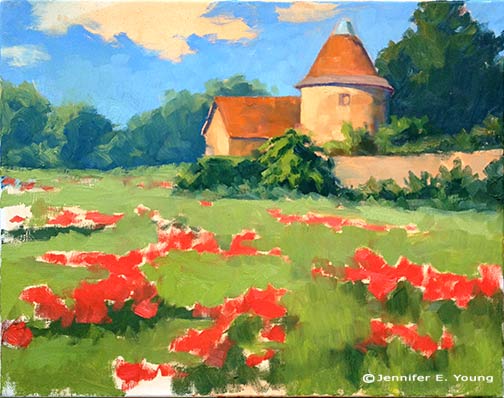
French landscape painting in progress

School's out for summer today so over the next couple of weeks we will be in transition mode as we settle into a new summer schedule.  I'm painting this French 16x20" landscape IBKT,  (in-between kid time) and I forgot to photograph this as a step by step.

French landscape with poppies in progress © Jennifer E Young

I started this late yesterday and today I'm trying to address the  whole canvas in a general way first,  so that when I return to the easel I can jump right in to the next level of detail. I really hope I can work on this wet into wet the whole time though, as it's so much easier to manipulate edges when the painting remains open. It needs a lot more work, obviously, but I'm enjoying the simplicity of this composition so far.

Lessons from the workshop

I thought I'd share a few of the studies I worked on during the Matt Smith workshop I posted about earlier this week. I will first preface by saying that my haste in preparing for this class came back to haunt me, so while I was well prepared in terms of my art supplies, I misunderstood what I was supposed to bring in the way of reference materials. The support documentation said to bring plein air studies and/or photos, and for some reason I took that to mean that plein air studies were preferred (maybe I was just hooked on the idea of plein air!) I probably should have asked beforehand about this because I did feel a little puzzled when I was packing about referencing a small scale plein air to make another small scale painting. (I usually translate small plein airs to larger works in the studio, but the recommended canvas sizes were all under 12x16"). In any event, I packed a number of my plein air pieces for reference, and then as a total afterthought printed off a few of my photos "just in case."

After seeing one demo and hearing the discussion though, I realized the error of my ways. I talked to Matt about what I should work from and he said he would rather see what I could do with my photo references for this class. Matt did bring a number of his own photo references for people to use, but I really dislike using other people's references. Even though we are composing with light and form, I want references that reflect my real experience of having seen (and felt) a place.  So I did what I could with what I had, but I really wished I had brought a more extensive selection of my hundreds upon hundreds of photos I have in my personal archive.

This  first painting is also the most incomplete:

poplars

In all of my paintings the common feedback from Matt was to take my brush and "knock back" some of my brushwork that competed with my statement or focal area. For instance, in this painting, our conversation went something like this:

MS:  "Is this painting about the light or shadows?" JY: "Well, I like the highlights on the edges of the poplar trees the best". And with that he took my brush and blended back the rather boisterous brushwork that was beginning to take shape in the shadow passages. MS: "You're giving equal weight to both." Next he mixed a bold tree highlight and swept it upwards on the edge of one of my poplar trees calligraphically, making the highlight really jump out. JY: "Ah, I see! But...I wouldn't just leave it like that...would I? It looks pretty unfinished." MS: "No, not necessarily. But you may restate and knock back several times before you get it right."

 I have such a love of brushwork, but it probably can work to my disadvantage sometimes. The hard part, I think, is figuring out what, exactly, is "right", and what is too little or too much. It's all about finding that balance, where active areas are juxtaposed with quiet passages. It's the quiet passages that play a supporting role and allow the more active ones to take center stage. To paraphrase something Matt said in one of his talks, it can't all be "important". Filter the noise and find the important elements.

I soon abandoned the first study, deciding to just keep that as an annotated lesson.  The second 8x10" painting below is more complete, and may look familiar to some long time blog readers. That is because I painted this scene before en plein air, and blogged about it here. The photo in the link is too dark overall but even so, I think this second study is much more infused with light. (So this exercise will be very helpful to me when I translate the concept to a larger painting, which I really am excited to do now! ) For the painting below, though,  I thought I'd try it again using just my photo reference and see what kind of feedback I could get, and whether it would look decidedly different as a result.

rooted2

I really loved the composition as it was, so it remains relatively the same in this second attempt. But in terms of paint application,  I got some helpful hands-on feedback from Matt again. Again he took my brush and knocked back the brushwork of the distant trees to make them sit back more and look less stylized.  Fair enough. He then demonstrated "opening up the shadows, using reflected light cast from nearby objects to cast color into the shadows. He put a touch of blue, for instance, on the shadow side of the tree trunks reflecting the water, and the warmer tones reflecting warmth from the stones or earth. That was awesome. After that he showed me how an assertive hand used to apply just a few intense highlights could suddenly make the painting pop. I reworked some of what he put in but played with those general ideas. But that rim light of his along the trunk and the 3 or 4 dabs of bright green paint on the tree leaves remain just as they were applied. (And don't they just sing?)

I felt I was finally getting somewhere on this final painting (below), though we had some helpful discussion early on about using perspective to direct the viewer to the focal point. He again knocked back the distant mountains with no paint, just several swift blending strokes (sigh.)  I don't consider this painting really finished either but I love the composition and I think I would like to try this again on a larger scale. It's the Dordogne as seen from the top of the Chateau de Beynac.

dordogne

I think overall his main critique of my work was that he wanted to see both more paint and a more deliberate, assertive handling of paint. And it's really hard to do the latter without the former. As he put it, you need to have enough paint there so that it expresses the character of the medium. Otherwise you need to ask yourself, "Why are you painting in oils?"

The class was listed as an intermediate-advanced class and I felt the instruction and the students lived up to that. I left the class pretty exhausted but with a lot to think about on my 6 hour drive back home. It will be interesting to see how I can apply Matt's feedback and insights to my work, while still making my paintings "mine". Once or twice the feedback was hard, but I soon realized, as with any class, it's important to leave your ego at the door and come with an open mind if you really want to learn.

Matt Smith workshop

Oh yeah, I have a blog! ;-) Actually, I didn't forget; I've been doing a little traveling up north to the New Hope School of Art to take a workshop from the very talented painter Matt Smith. The trip was noteworthy for a number of reasons. First, it was the first time I have been away from my daughter for more than a night. (That part was hard.) But second, it was also the first time I've had in 4 years to do nothing but paint and immerse myself in "art stuff" for four days straight. (And that part, my friends, was luxurious!) I haven't taken a workshop in a very long time. But now that my daughter is getting a little older, I really feel like it's time to amp up my art life in some significant way and infuse my work with new insights. So when I heard Matt was coming east to teach (he's based out West, so that's something I'd not caught wind of before around here) I knew it would be an excellent opportunity to do just that.

Please excuse the poor photo quality but this was shot with my iPhone in low light. Here you can see the very light way Matt holds his brush to apply paint and manipulate edges.

Matt hails from Arizona, and is best known as a painter of the Sonoran desert near his home, as well as the snow capped Canadian Rockies and other places out west that epitomize the classic western landscape. What initially attracted  me to his work though was not his subject matter, but the sensitivity in the handling of  his brushwork and edges. They are both bold and delicate at the same time.  But after seeing him demo and talk about his approach, I was equally impressed by the purposeful way he composed his paintings and orchestrated his compositions to create  powerful statements. I won't get into a blow by blow description of day 1-4 of class, but I will share some of the significant things I took away from it personally, most likely in more than one post.

The interesting thing about this workshop was that even though Matt is best known among artists as a plein air painter, the class was held entirely inside, in the studio. I'll be perfectly honest here and say that when I signed up for the class I was mildly disappointed that the format would not include at least part plein air painting, especially since Matt himself is a seasoned field painter and the area where the workshop was located was very scenic. (It was the birthplace, in fact, for an entire movement of landscape painters, known as The New Hope School and Pennsylvania Impressionism.) Largely though, that disappointment was entirely personal. My studio is my workhorse, but plein air painting is more exciting to me. Also with my life situation at present, I just don't get the longer stretches of time needed to trek out in the field as often to paint.

When I asked about the reason for the indoor class, Matt's response was that in his years of teaching, he has seen the same problems pop up again and again, whether in the field or in the studio. Maybe he felt it's better to address these fundamental issues in a controlled environment rather than adding another layer of difficulty with the environmental factors that plein air adds. In any event, the format turned out to be fine. In fact, there was plenty I needed to work on just with my studio work,  the studio environment definitely allowed Matt to get to each student several times a day with valuable feedback. As it turned out, the weather was not great any way, and we probably would have needed to seek shelter for at least two of the four days due to rain and wind.

Matt did several very good demos (using his photo references). He used a Strada easel, which I think was a rather new purchase for him. He talked a lot about equipment and painting gear, which, as any regular reader of my blog may have surmised, is a topic of great interest to me. The Strada is made of metal and looked like a neat little box (I think his was the mini, which is presently sold out.)

The Strada Mini Easel

But even without the two winged accessory attachments added to provide more workspace, it was a very heavy box for its size. Matt said he liked it because of its compact size (it easily fits into a backpack) and durability for travel, but personally I could not deal with the heft. A Gitzo travel tripod was also part of his setup, which looked great for its ease of use and small size when folded (also easily fitting into a backpack), but a quick Google search soon told me this item was way out of my price range. (Wowsa!)

Matt, by self-definition is not a colorist. In fact, of the fundamentals he sites as essential to a good painting (Drawing, Value, Design, and Color) the most expendable he says, is color. Even so,  I found his palette fairly wide, with four blues, two earths, two yellows, an orange, one red, a violet, and a couple of greens (plus, of course, white.) He used no medium other than his oil paint and a very tiny amount of Gamsol to thin his paints.

His start consists of a very light sketch, soon followed by masses of color, working broadly to get his main elements and shadows down. He then builds from there, thin to thick, dark to light, broad to more detailed. One thing I found interesting is that he almost always left his sky a white canvas until close to the very end of the process. Obviously this is working to his great advantage, but try as I might, I couldn't resist my normal method of putting the sky in early on. This was especially the case if there was any water in the landscape, as I find  I need that sky information to know what's being reflected.

I've a lot more to say on the subject but I should probably try and paint something now! In my next post I'll share of few of my studies done in the workshop, as well as some valuable take-aways that I received from Matt's feedback.