On gouache

It's been a very long while, but I have decided to give the old blog a go again, even though I am not entirely sure that many people even read blogs any more. I guess I am about to find out!😅

To get the ball rolling, I thought I would revisit some thoughts on gouache. While I love my oils, sometimes I feel like the preparation, heft, and cleanup of carting out my oil painting gear can actually be a deterrent to regular plein air practice. I started playing with gouache some time ago as a way to develop a simpler, more lightweight plein air painting kit that is easier to set up and clean up.

Gouache is basically an opaque watercolor, that can be applied using a direct painting approach similar to the way I paint in oils (dark to light, "thin" to "thick", etc.) It can be applied in thin washes or opaque strokes, though it really doesn't allow for heavy impasto techniques due to its tendency to crack or chip at very thick consistencies. Even so, it has a lovely velvety appearance that, unless varnished, can be reactivated with water for additional painting or adjustments. It is easy to clean up afterwards and lends itself to small formats for studies and low-stress experimentation.

One thing that I have had to adjust to is that there is a color shift as the paints dry that requires a certain amount of regular practice to be able to intutively anticipate. Specifically, light colors appear darker as they dry and dark colors tend to dry a bit duller and lighter.

The other big adjustment is the rapid dry time, which is both an advantage and a handicap for a painter used to the long open times with oil paints. Regular application of water using a spray bottle to re-wet the palette while working helps with this, but it can still be a struggle for me when painting outside in the open air, especially at locations like the beach, where the rapid dry time is intensified by the heat and ocean breeze. As with any skill, practice is key.

Here is a little video my teen daughter put together for me of me finishing up a gouache still life, painted from the convenience of my back porch. I hope to do some longer videos in the future, especially if I can wrangle the kid's help again.

Adding some highlights, “Begonia on the Sill,” Gouache on Illustration board, 6x6”

Plein air in the garden

As I mentioned in my last post, I participated last week in a “call for artists” from Lewis Ginter Botanical Gardens to celebrate National Public Gardens week. You may know from reading previous blogs that I have painted in these gardens many times as a resident of Central Virginia. But somehow, painting in this context, constructed around an “official event,” helped me to see this place with new eyes and renewed excitement.

I decided to challenge myself by painting some gardens that I hadn’t tackled before. The first day I went it was AWASH with tours and school groups. There were so many kids there stopping to give their input. All of it was actually very positive, but also a bit distracting. Now, I love kids quite a lot, (and even have one those cuties myself) but on this day they were messing with my mojo and I had a hard time concentrating on what I was doing😅.

The architectural elements were minimal, but even so, required some concentrated drawing, some sense of proportion and placement to get right, especially since I was fairly close up to my subject and didn’t have a lot of room to manuver. I moved my entire setup several times and wiped it all down, before finally settling on a view that satisfied. It left me less time than I had planned to get everything down before I had to head back to my house in Ashland, but I did a pretty decent job, with only the need for a few final touches in the studio.

“Illuminated Courtyard, Lewis Ginter Botanical Gardens”, Oil on linen, 12x16” ©Jennifer E Young

“Illuminated Courtyard, Lewis Ginter Botanical Gardens”, Oil on linen, 12x16” ©Jennifer E Young

When I was (finally) in a pretty good place with my painting, a kid came by to examine my progress. I estimate he was around my daughter’s age (3rd or 4th grade) . He studied my effort with seriousness, alternately looking at my painting and the scene, my painting and the scene. Finally he gave me a decisive and approving nod. “You’ve done your homework,” he said.

And that, my friends, is the beauty of painting outdoors. It’s filled with its share of frustrations to be sure, but the moments of spontaneity are pure gold.

Plein air odds and ends

In this post I thought I'd share a little about some of the tools I carry with me in my plein air pack. Some are specifically designed for the plein air artist, and some I have co-opted for my own nefarious purposes. ;-) This first photo shows a picture of my current setup: 

55C537F3-E39E-415D-BB8B-0EB07B466242.JPG

My paint box is one I have mentioned before, but I love it so much I will say it again! It's the Coulter Easel. It is so quick to set up and simple to use. It has lots of work space for color mixing as well. Mine is the Compact model. Coulter's site offers other sizes as well, but I felt that this model was the most versatile for me as while it is lightweight, it doesn't compromise valuable workspace. As for the other items in this photo, I will list them in a clockwise manner. 

  • A mini sun shield that closes up flat into a small circle. I use this to cast a shade on my palette so that I don't get the glare of sunlight on it. I do have an umbrella, but many times depending on how I position myself, this little shade is all I need. When I do find the need for an umbrella, the model I use is Bestbrella. It works great for me.  
  • An envelope-style brush holder.  Called a "brush wallet", this style brush holder comes with a loop at the top, which I loop onto my tripod handle. I like this brush holder because I can tuck this in behind my palette and have my brushes handy without taking up space on my paint box. (*Note- I couldn't find a source for my brush holder. I bought it a number of years ago and I am thinking I bought it from
  • A couple of zip-up pencil bags to carry my paints. In one I carry my large tube of white, my mediums (more about that in a minute) my paint scraper, and palette knife. In another I carry all of my other oil colors.  
  • A bungee cord to hold my paper towels. The hooks on the bungee loop right over the lip of the paint box.  
  • A mini trash can. This is something I picked up in the automotive section of a big box store. Like the sun shield it also twists down into a little circle. It stays closed with an elastic band that is attached to the plastic rim. A plastic shopping bag will work in a pinch, but I prefer this style holder over the plastic bag because it doesn't blow around in the wind and remains open as I'm working. This little model came with a plastic loop on the top that I used to thread the bungee cord through, eliminating the need for clips or clamps.
  • Protective gloves for my hands. As you can see, by my brush handles, I'm not the neatest painter around, so gloves are a must for me. I became allergic to both latex and nitrile gloves, so the gloves I use are actually food grade gloves by Platex. They are the only semi-sturdy gloves that I don't react to. They actually hold up great. One benefit to these gloves is that I can get them in the grocery store when I'm grocery shopping, so I don't have to make a special trip to the hardware store when I run out. 
  • A small cat food can. I use this little can to hold a small amount of  Gamsol that I use to thin my paint in the very beginning stages of painting. I just pour in a little amount at a time, so when I'm done painting for the day I can just wipe out the can and pack it away.
  • A small eyedropper for holding the Gamsol. I'm using an eye dropper because it's small and it's what I had on hand, but any small solvent-safe container will do. Gone are my days of carrying around those heavy metal turp containers.  Check the next photo to find out why. 


0373A855-E584-47C9-9E73-CB049F8AC3D2.JPG
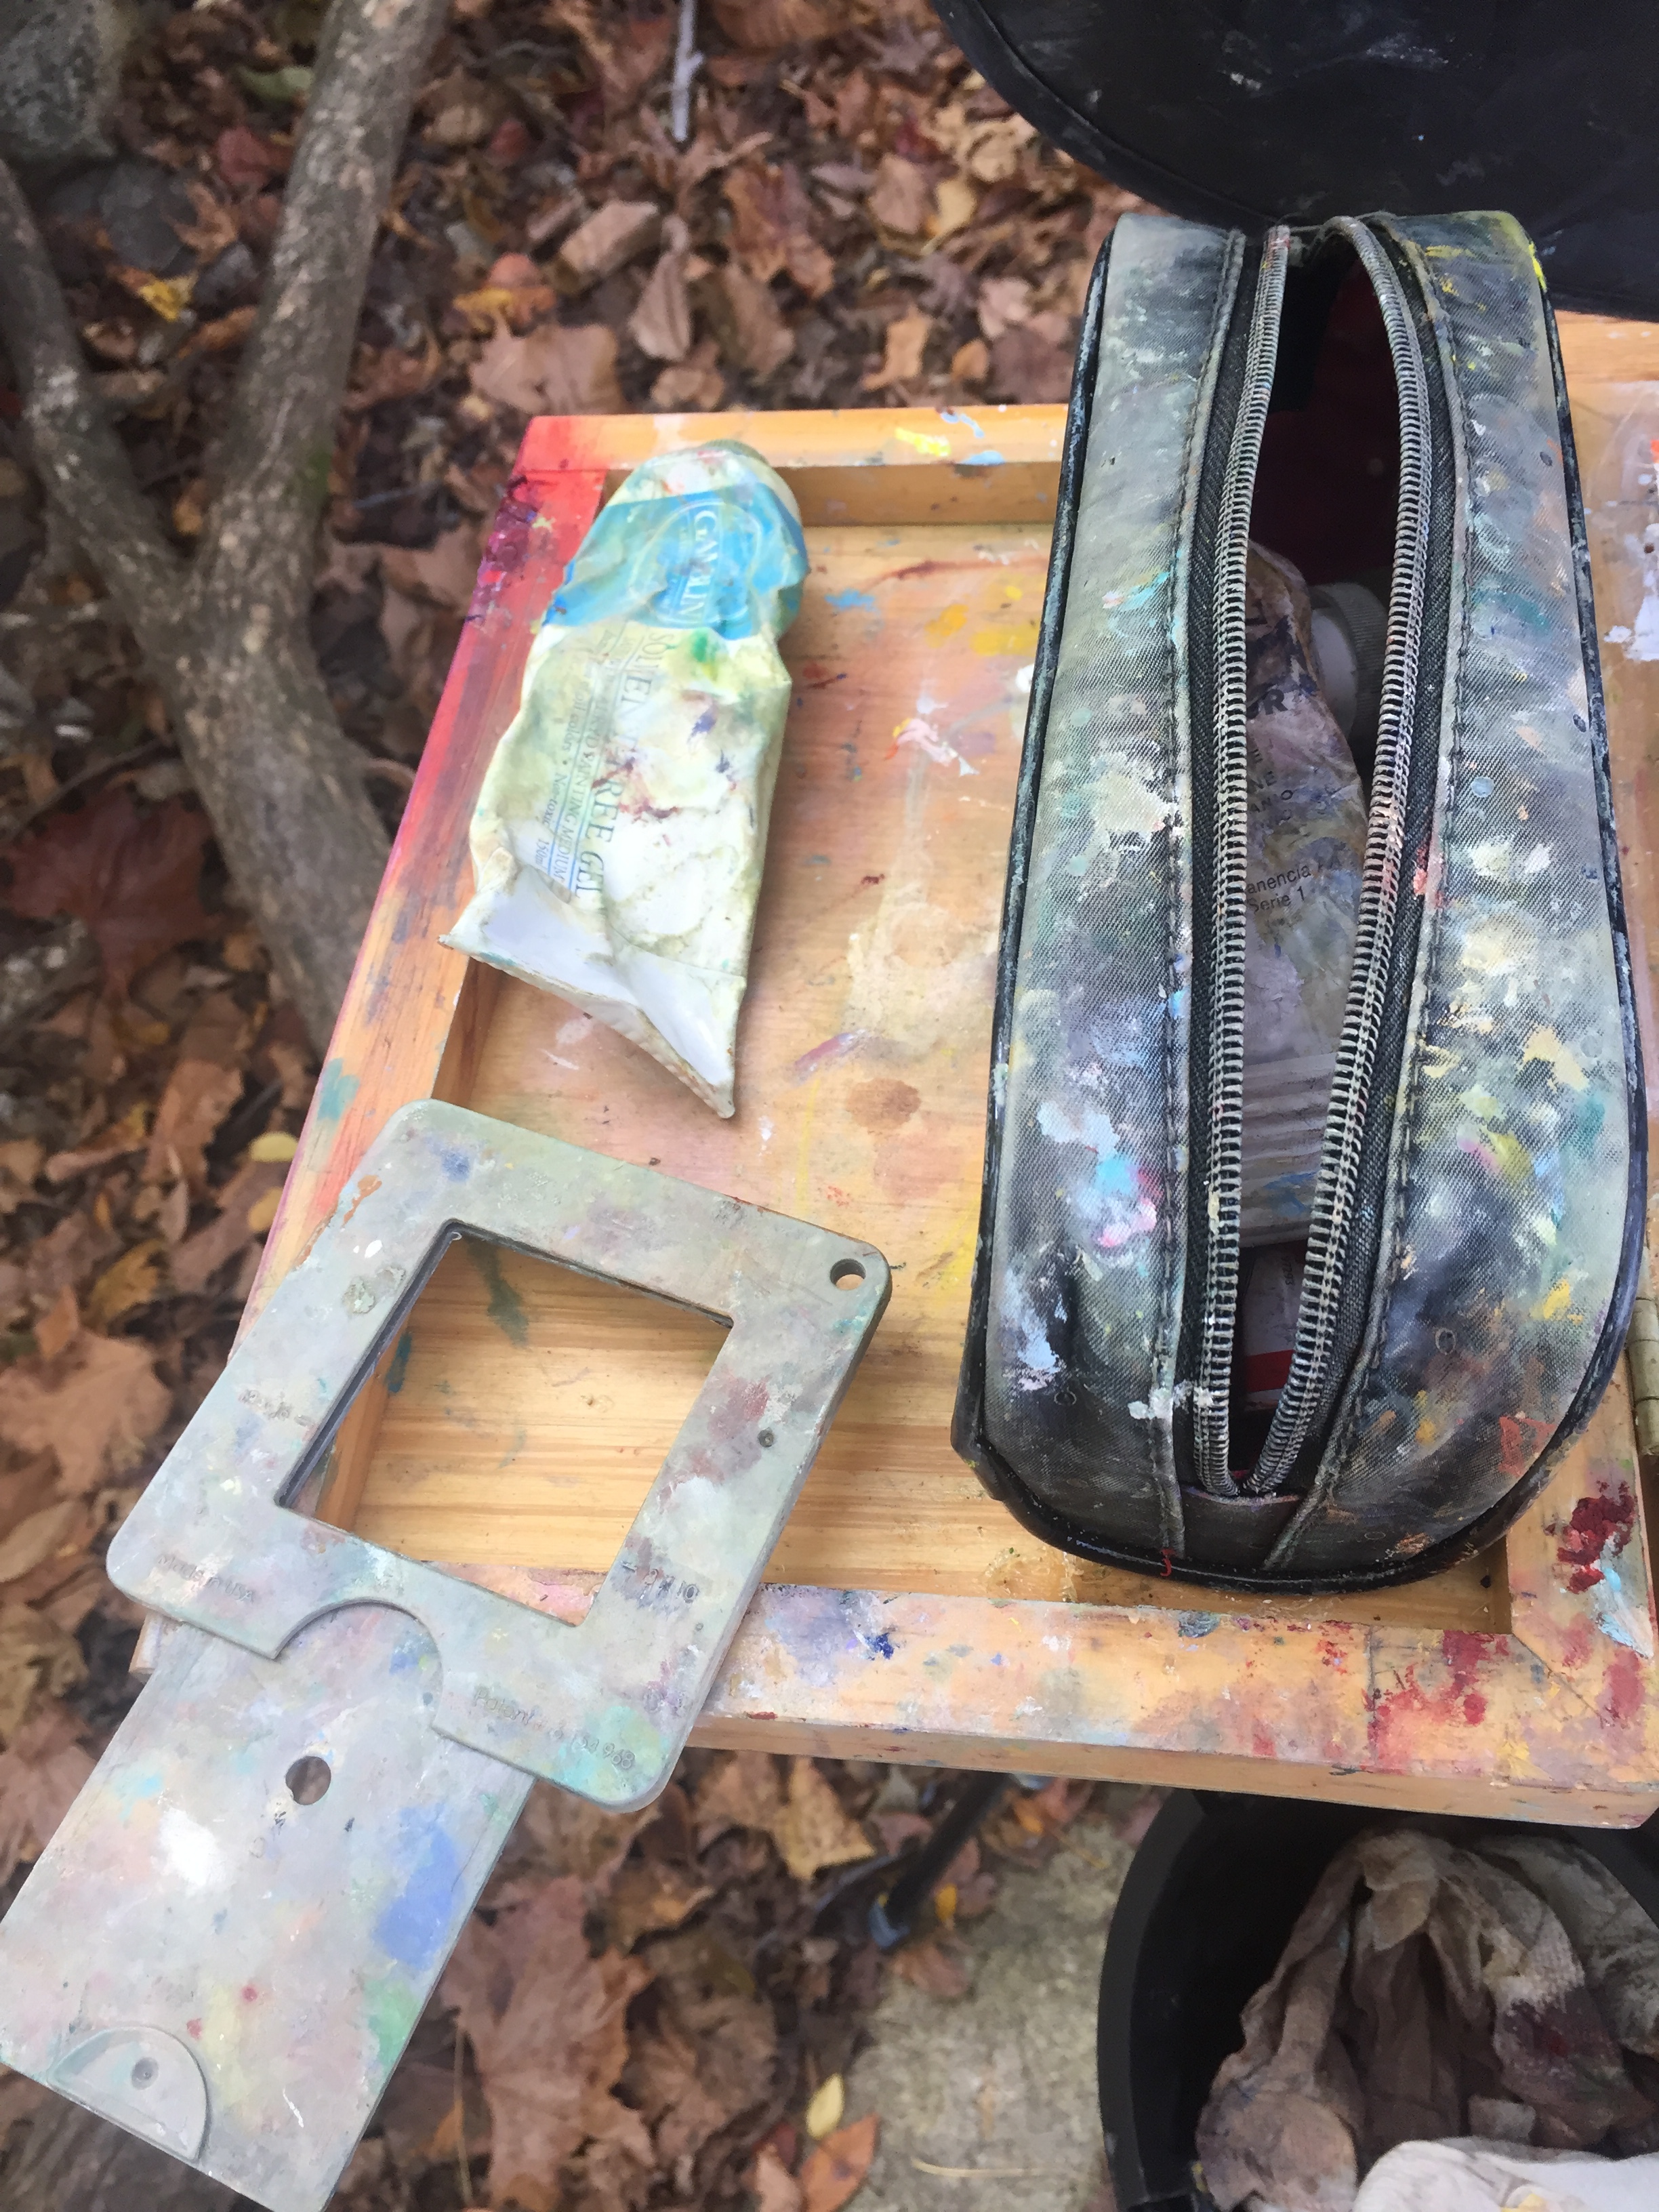
  • Gamblin Solvent-free Gel. Okay, I am not painting completely solvent-free, as I prefer a thinned-down , lean application in the beginning for my preliminary drawing. I use Gamblin's Solvent-free Fluid in the studio, but I prefer the gel in my plein air pack as the fewer liquids I have to worry about spilling the better. You can even use this stuff to clean off your brushes between colors and just wash them all up with soap and water back home in the studio. 
  • A view finder. There are various offerings on the market, but I prefer this simple model. The little lever moves up and down to change the proportions. Several popular sizes are marked on the view finder (9x12, 8x10, 12x16, Etc.) The little holes in the view finder also serve as color isolators as well. 

This is not a comprehensive list but it covers most things. There may be a few other odds and ends to discuss, and if I come across them I will definitely share them here on the blog. 

Rassawek Vineyard (plein air to studio)

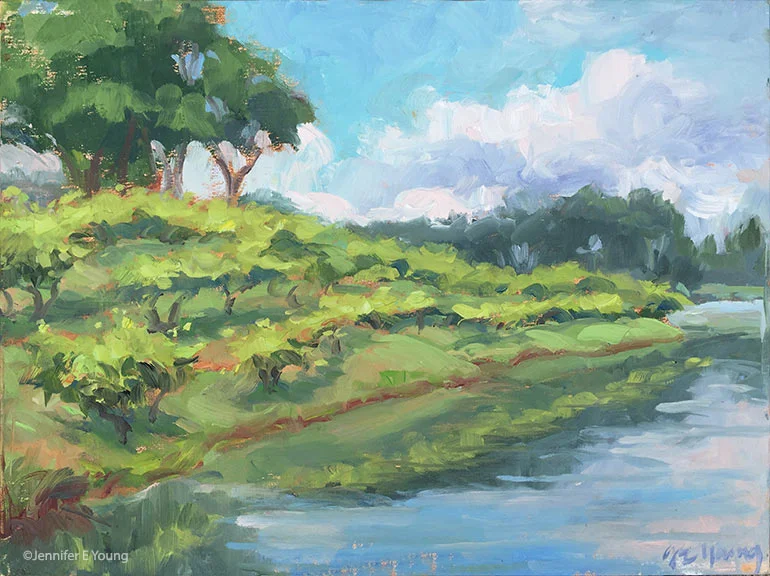
There have been a number of occasions where my plein air paintings get stashed away for a while, only to be discovered when I can't stand the mess of my studio space any longer and (finally!) decide to instill some order. Such was the case with this little plein air study I did this past May at Rassawek Vineyard during its annual Spring Jubilee:

"Rassawek Vineyard, Study", oil on panel, 9x12" ©Jennifer E Young

"Rassawek Vineyard, Study", oil on panel, 9x12" ©Jennifer E Young

It was a challenging session, as I recall, because those clouds kept morphing and changing the light and becoming more ominous as time advanced. In fact, I had to close up before I intended, in order to make a dash for my car before the sky opened up (and indeed, it WAS just in time.)

Nevertheless, there was something nice about this that I wanted to explore further, as it was such a lovely setting. For the larger painting I was planning however, I wanted to zoom out a bit to show the expansiveness of the landscape. So I searched my photo archives to see if I could find the view I had in mind. Voila! I found what I was looking for, which also  included the roses marking the end of each row on the vineyard, (something I failed to note in the study.) I didn't get any progress shots of this painting because it has (ironically) been raining non-stop here for over a week, making the lighting insufficient for photography. In any event, I took a shot of the final studio piece outside during an all-too-brief pause in the rainfall.

"Rassawek Vineyard", Oil on linen, 30x40". ©Jennifer E Young

"Rassawek Vineyard", Oil on linen, 30x40". ©Jennifer E Young

More Plein Air to Studio

Last week I continued my quest to mine some of my favorite plein air paintings for larger studio pieces.  The inspiration piece was a little 9x12" Plein air painting I did in the spring down at Maymont Park in Richmond, VA:

"Spring Renewal", Oil on panel, 9x12" ©Jennifer E Young

"Spring Renewal", Oil on panel, 9x12" ©Jennifer E Young

I really wanted to keep the same freshness in the larger 24x30" painting, so aside from referencing my photos for some of the branch formations, I used my Plein air piece as my main reference. Here is my setup, with the large and small side by side: 

renewal_wip_jenniferyoung

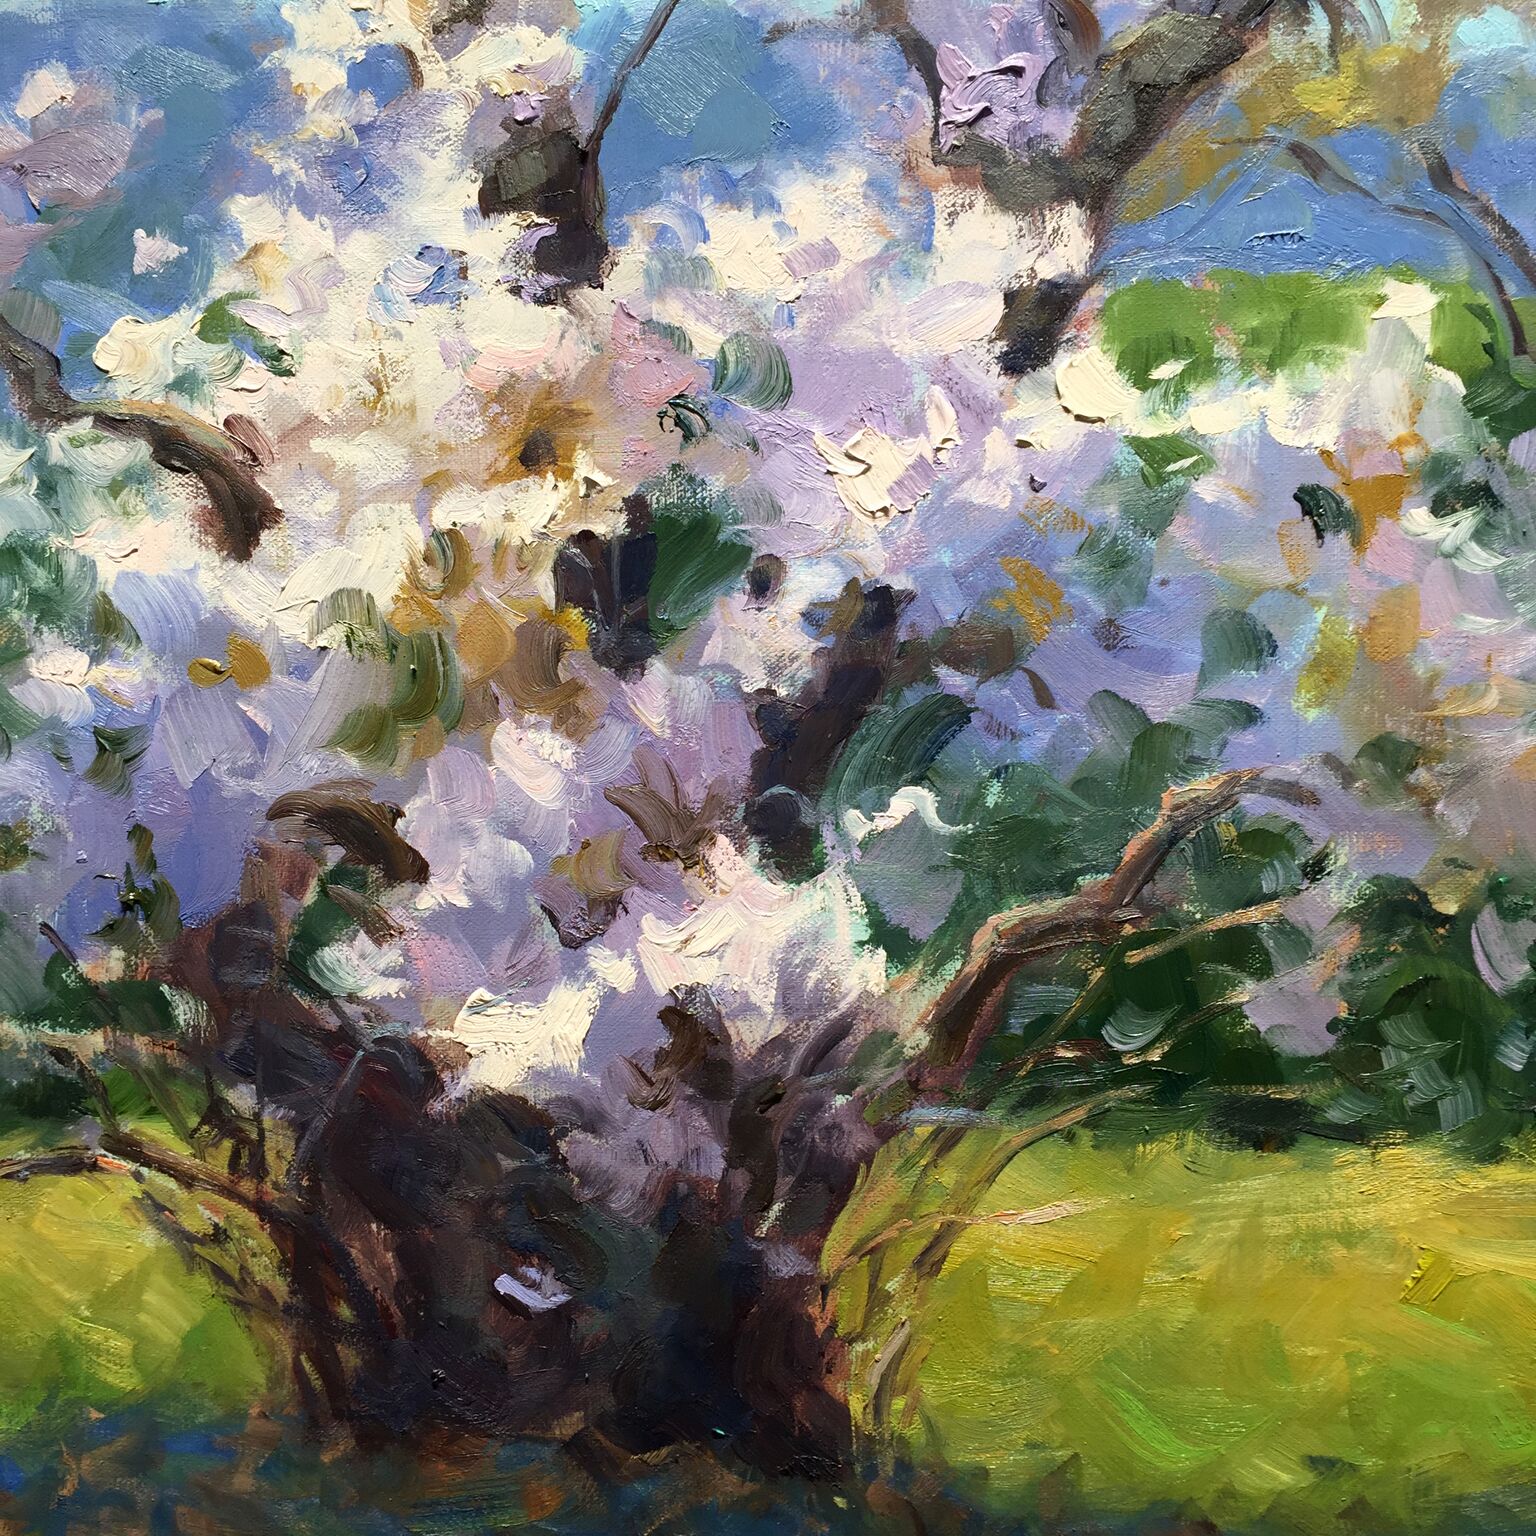
If it appears that I'm using a toned canvas, it is because I am painting on one that was a false start for a painting that turned into a wiper. I will often reuse canvases as long as there is just a thin, non-textured base. Anything with too much of a texture is distracting to me and can sometimes create adhesion issues. There is a good deal of impasto (thick paint)  passages on this canvas. Here is a detail in progress:

renewal_detail_jenniferyoung

And finally, here is the completed studio painting:

"Renewal", Oil on linen, 24x30" ©Jennifer E Young

"Renewal", Oil on linen, 24x30" ©Jennifer E Young