Sharpening the Saw: The value of a quick study

Last month I completed a weekly class with David Tanner, a painter well-known locally for his portraiture. I believe the best artists, and especially the best teachers, are also lifelong students. Thus I am a true believer in the periodic practice of focused study to “sharpen the saw” and to discover new ways of seeing and working.

My current obligations and time constraints make it difficult to invest in a week-long workshop out of town. So I was really interested when a fellow painter-friend recommended David’s class down at the Visual Art Center in Richmond. I have known and enjoyed David’s paintings for his sensitive portraits, his impressionist style and beautiful color sense, so I was delighted when his class, “Increase Your Speed & Capture the Color in Oil” jived with my daughter’s school and after-school schedule.

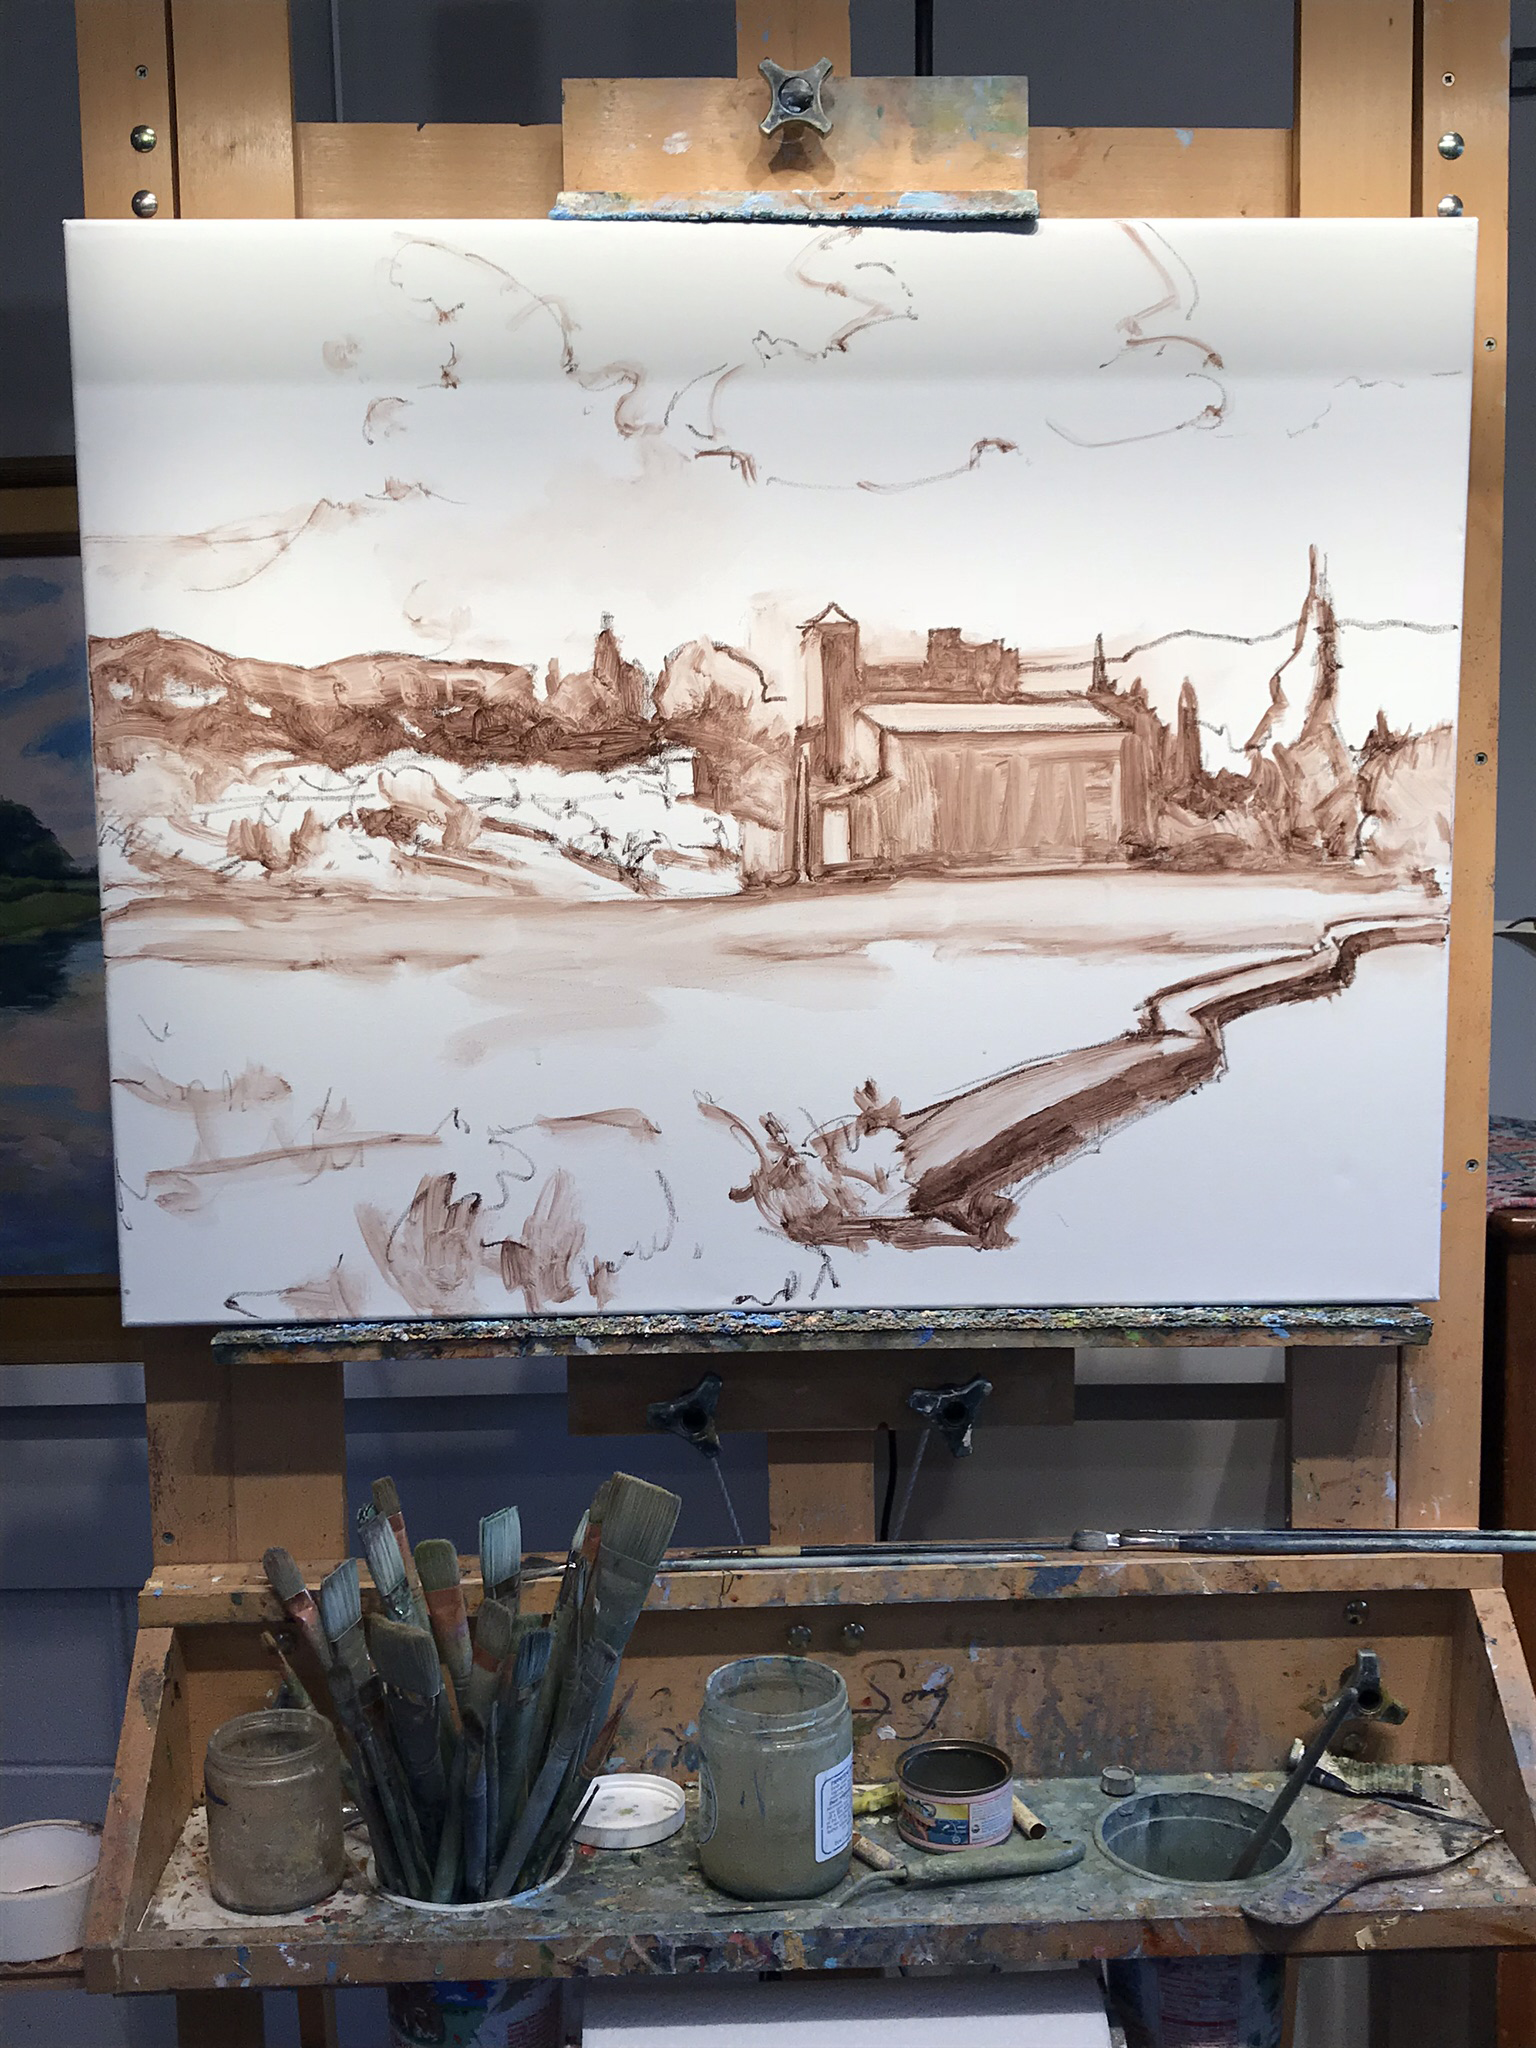
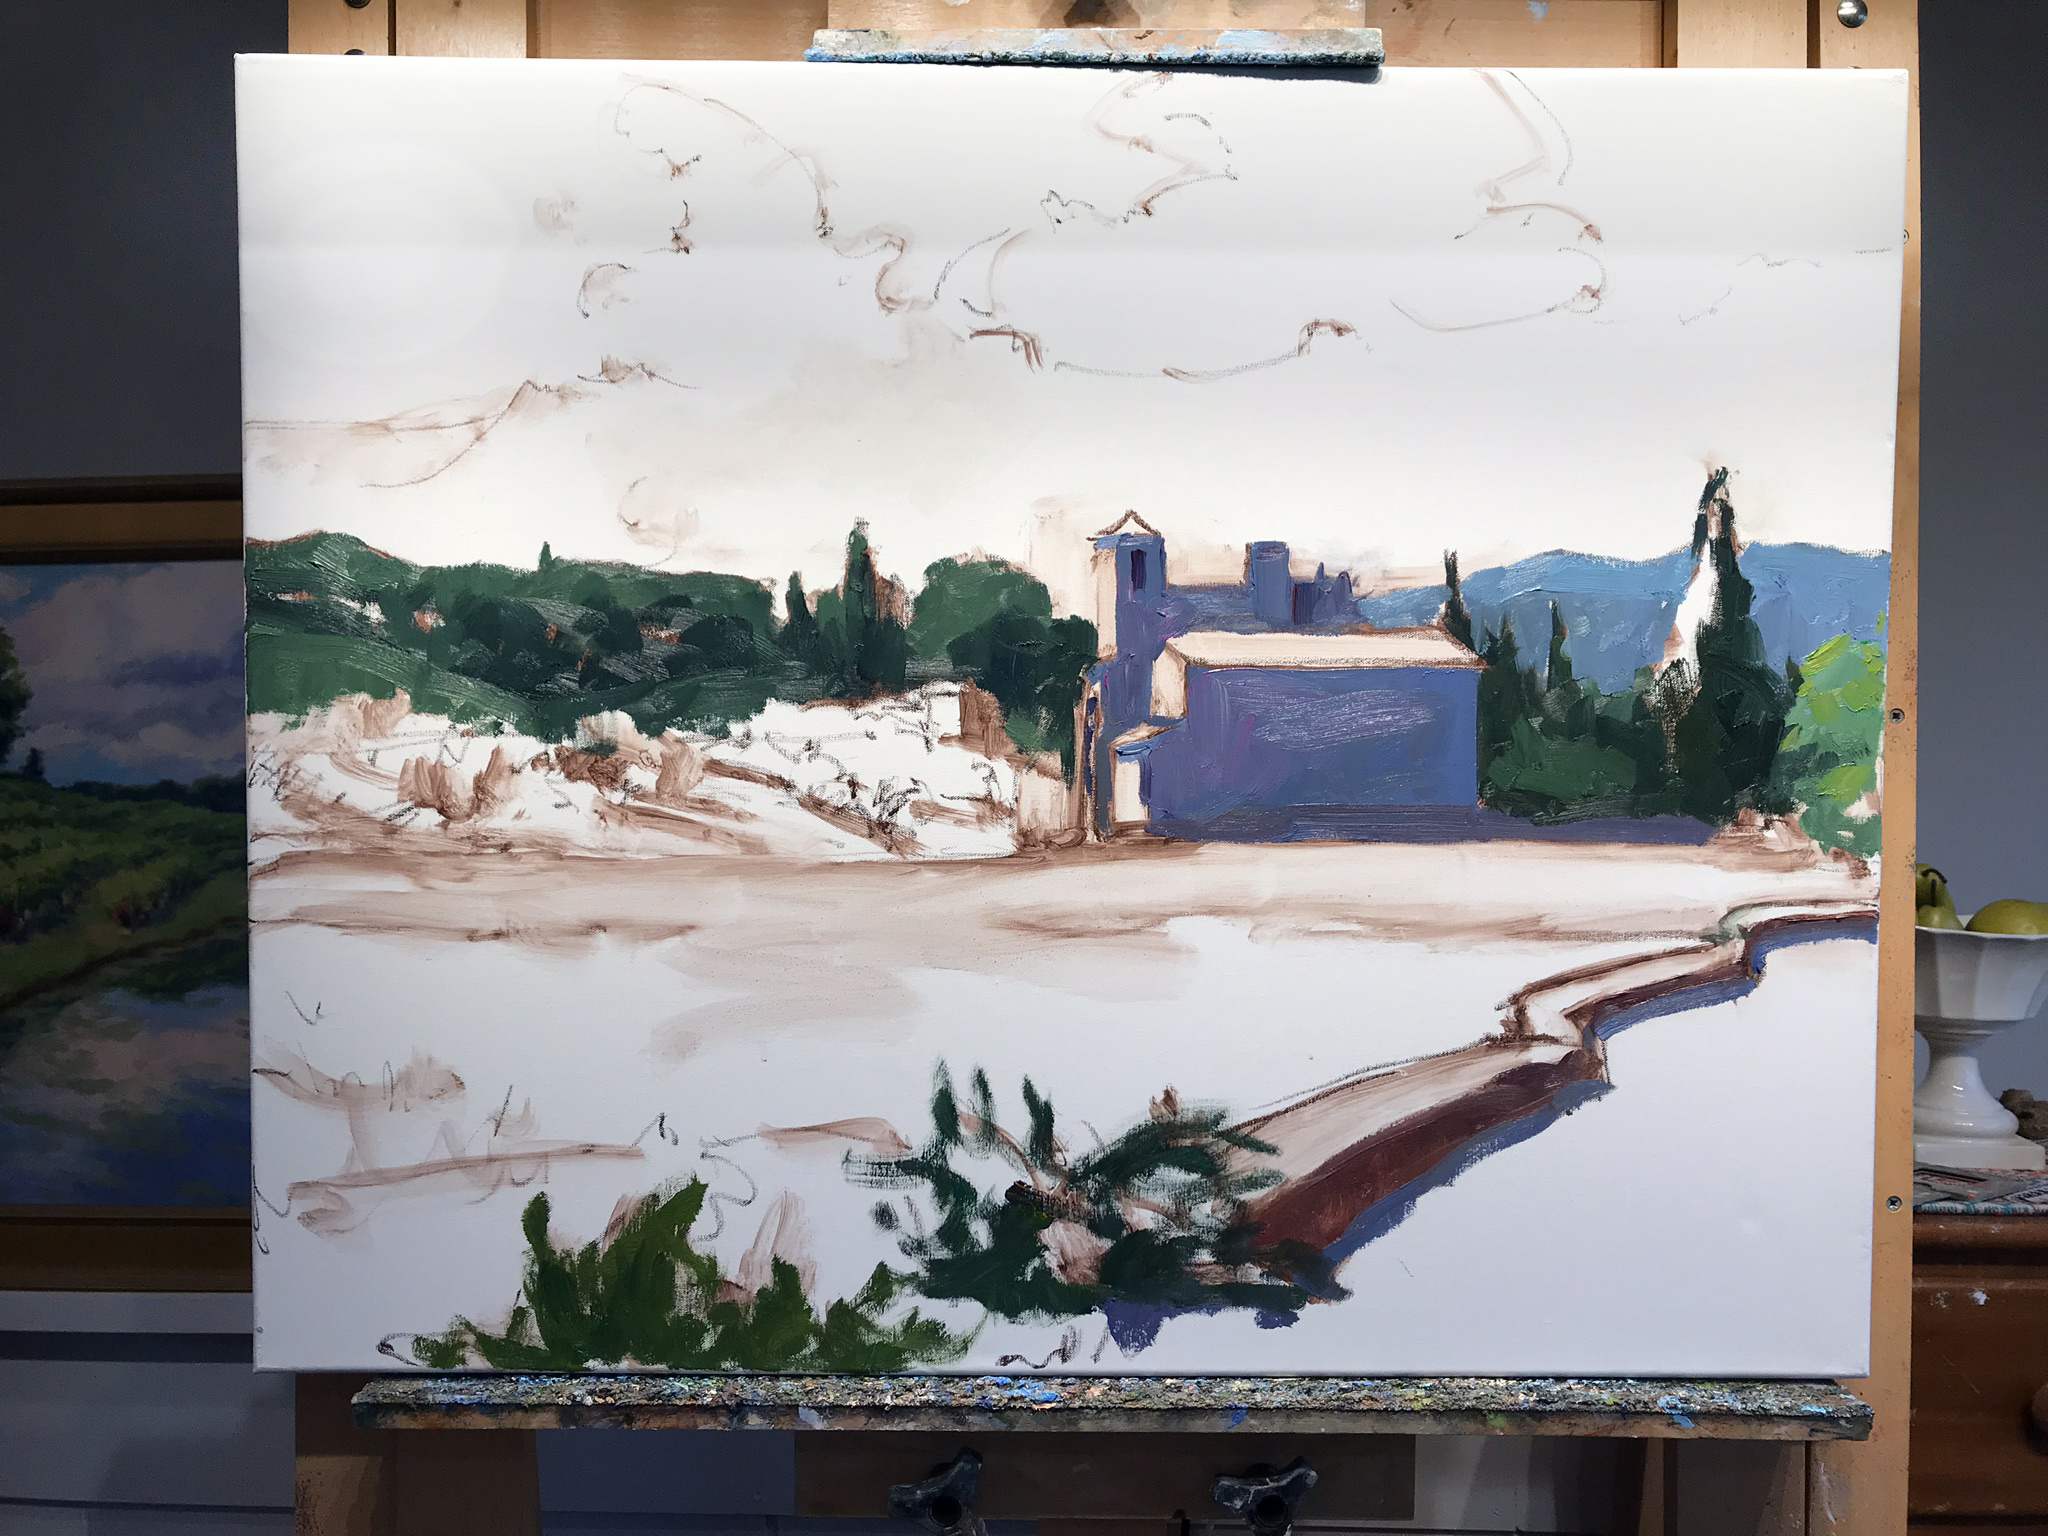
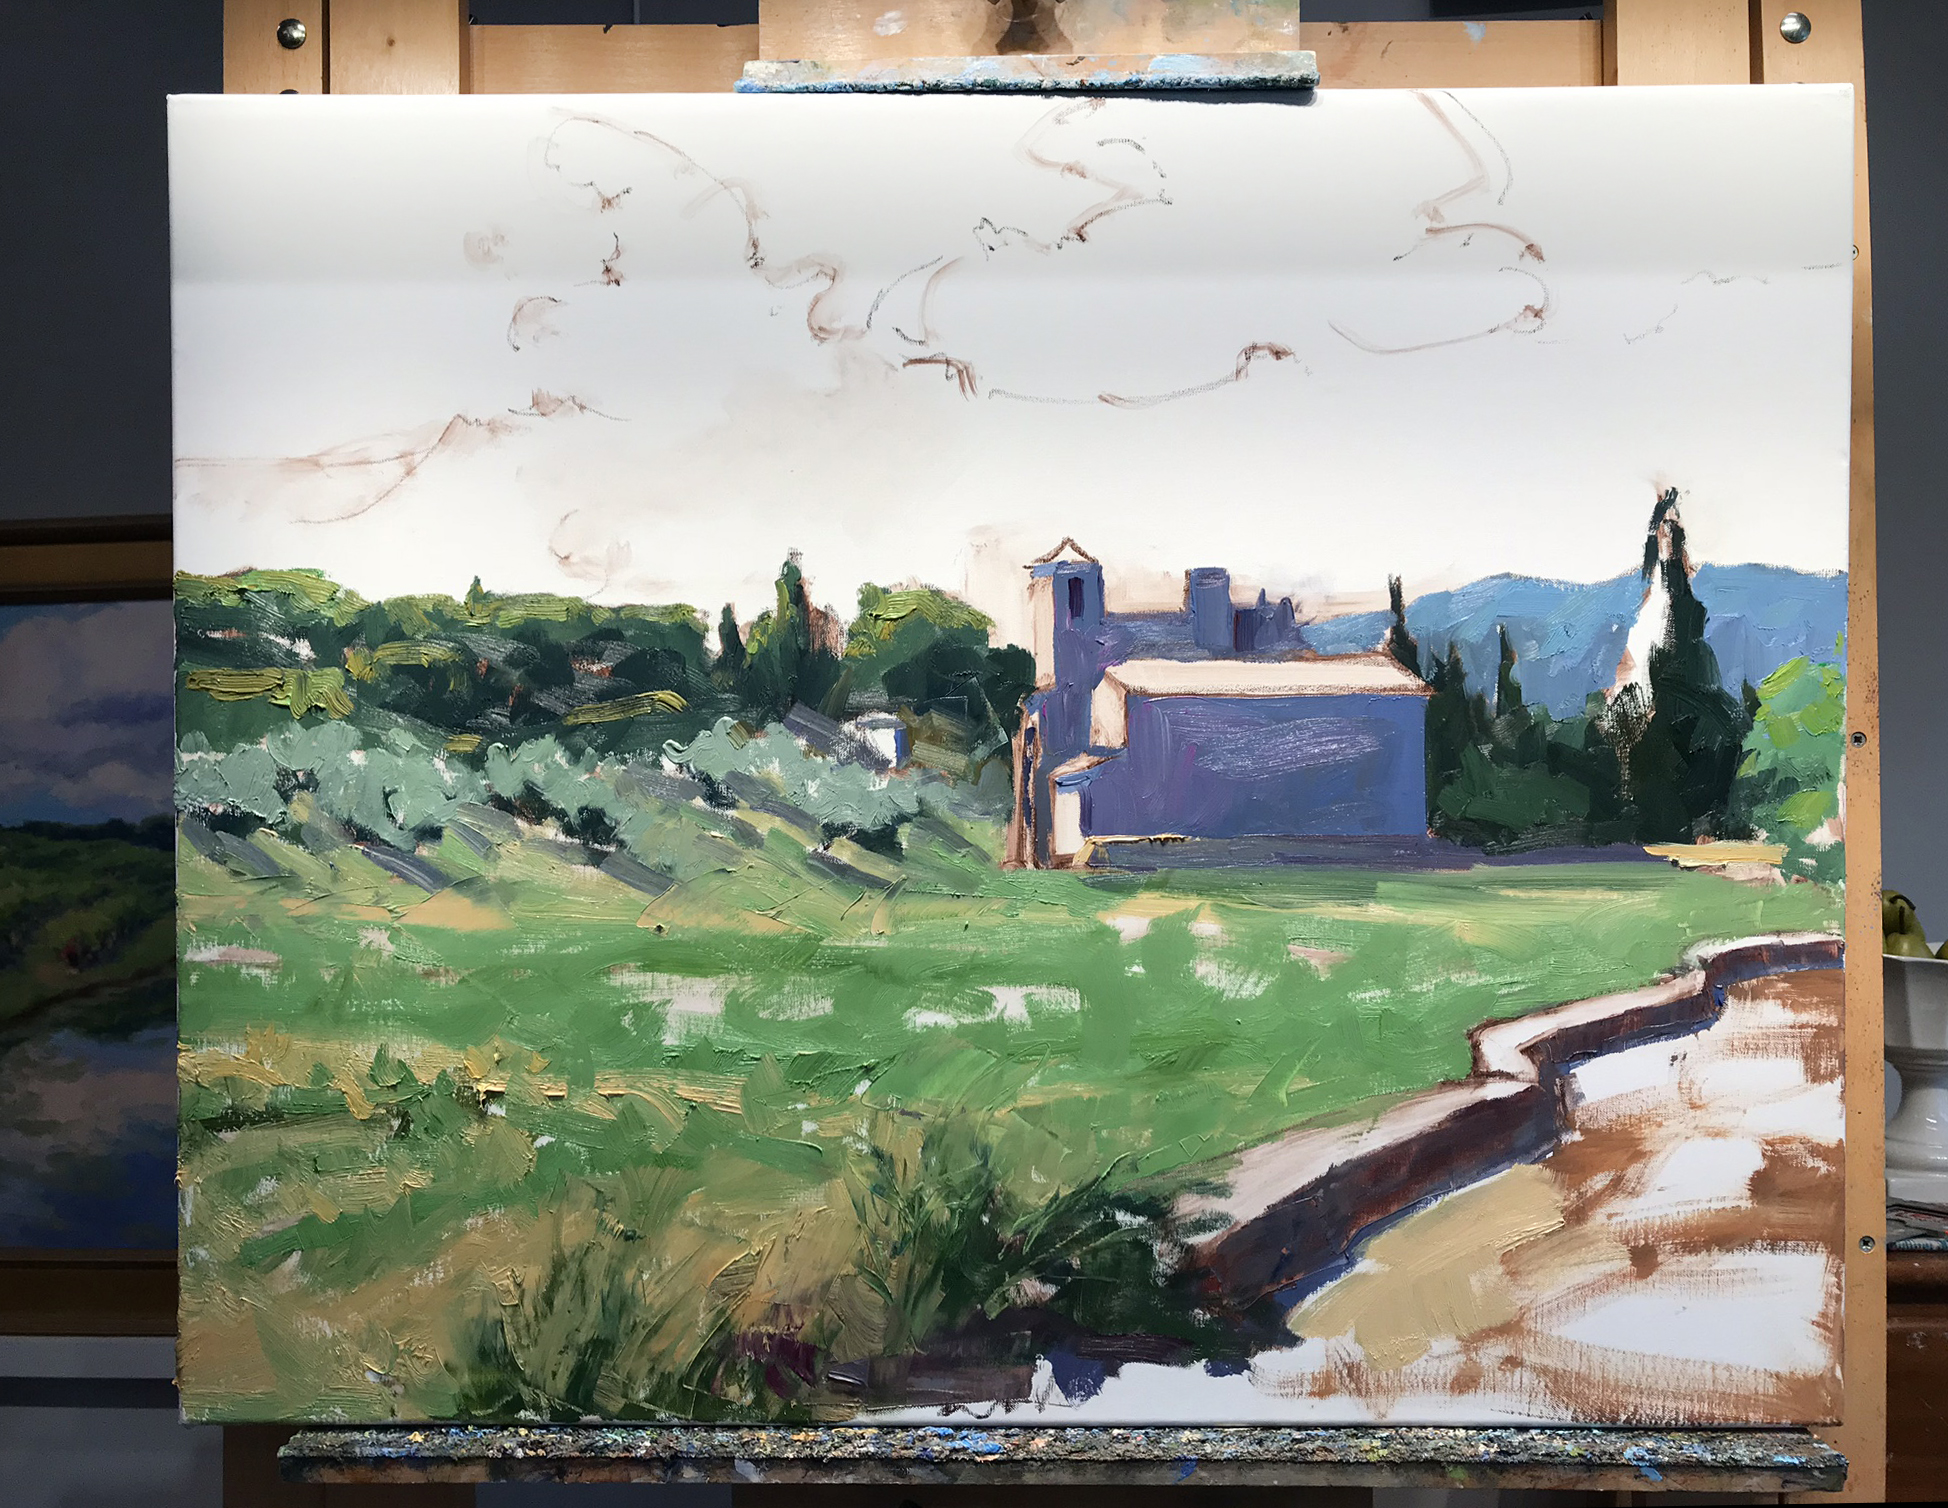
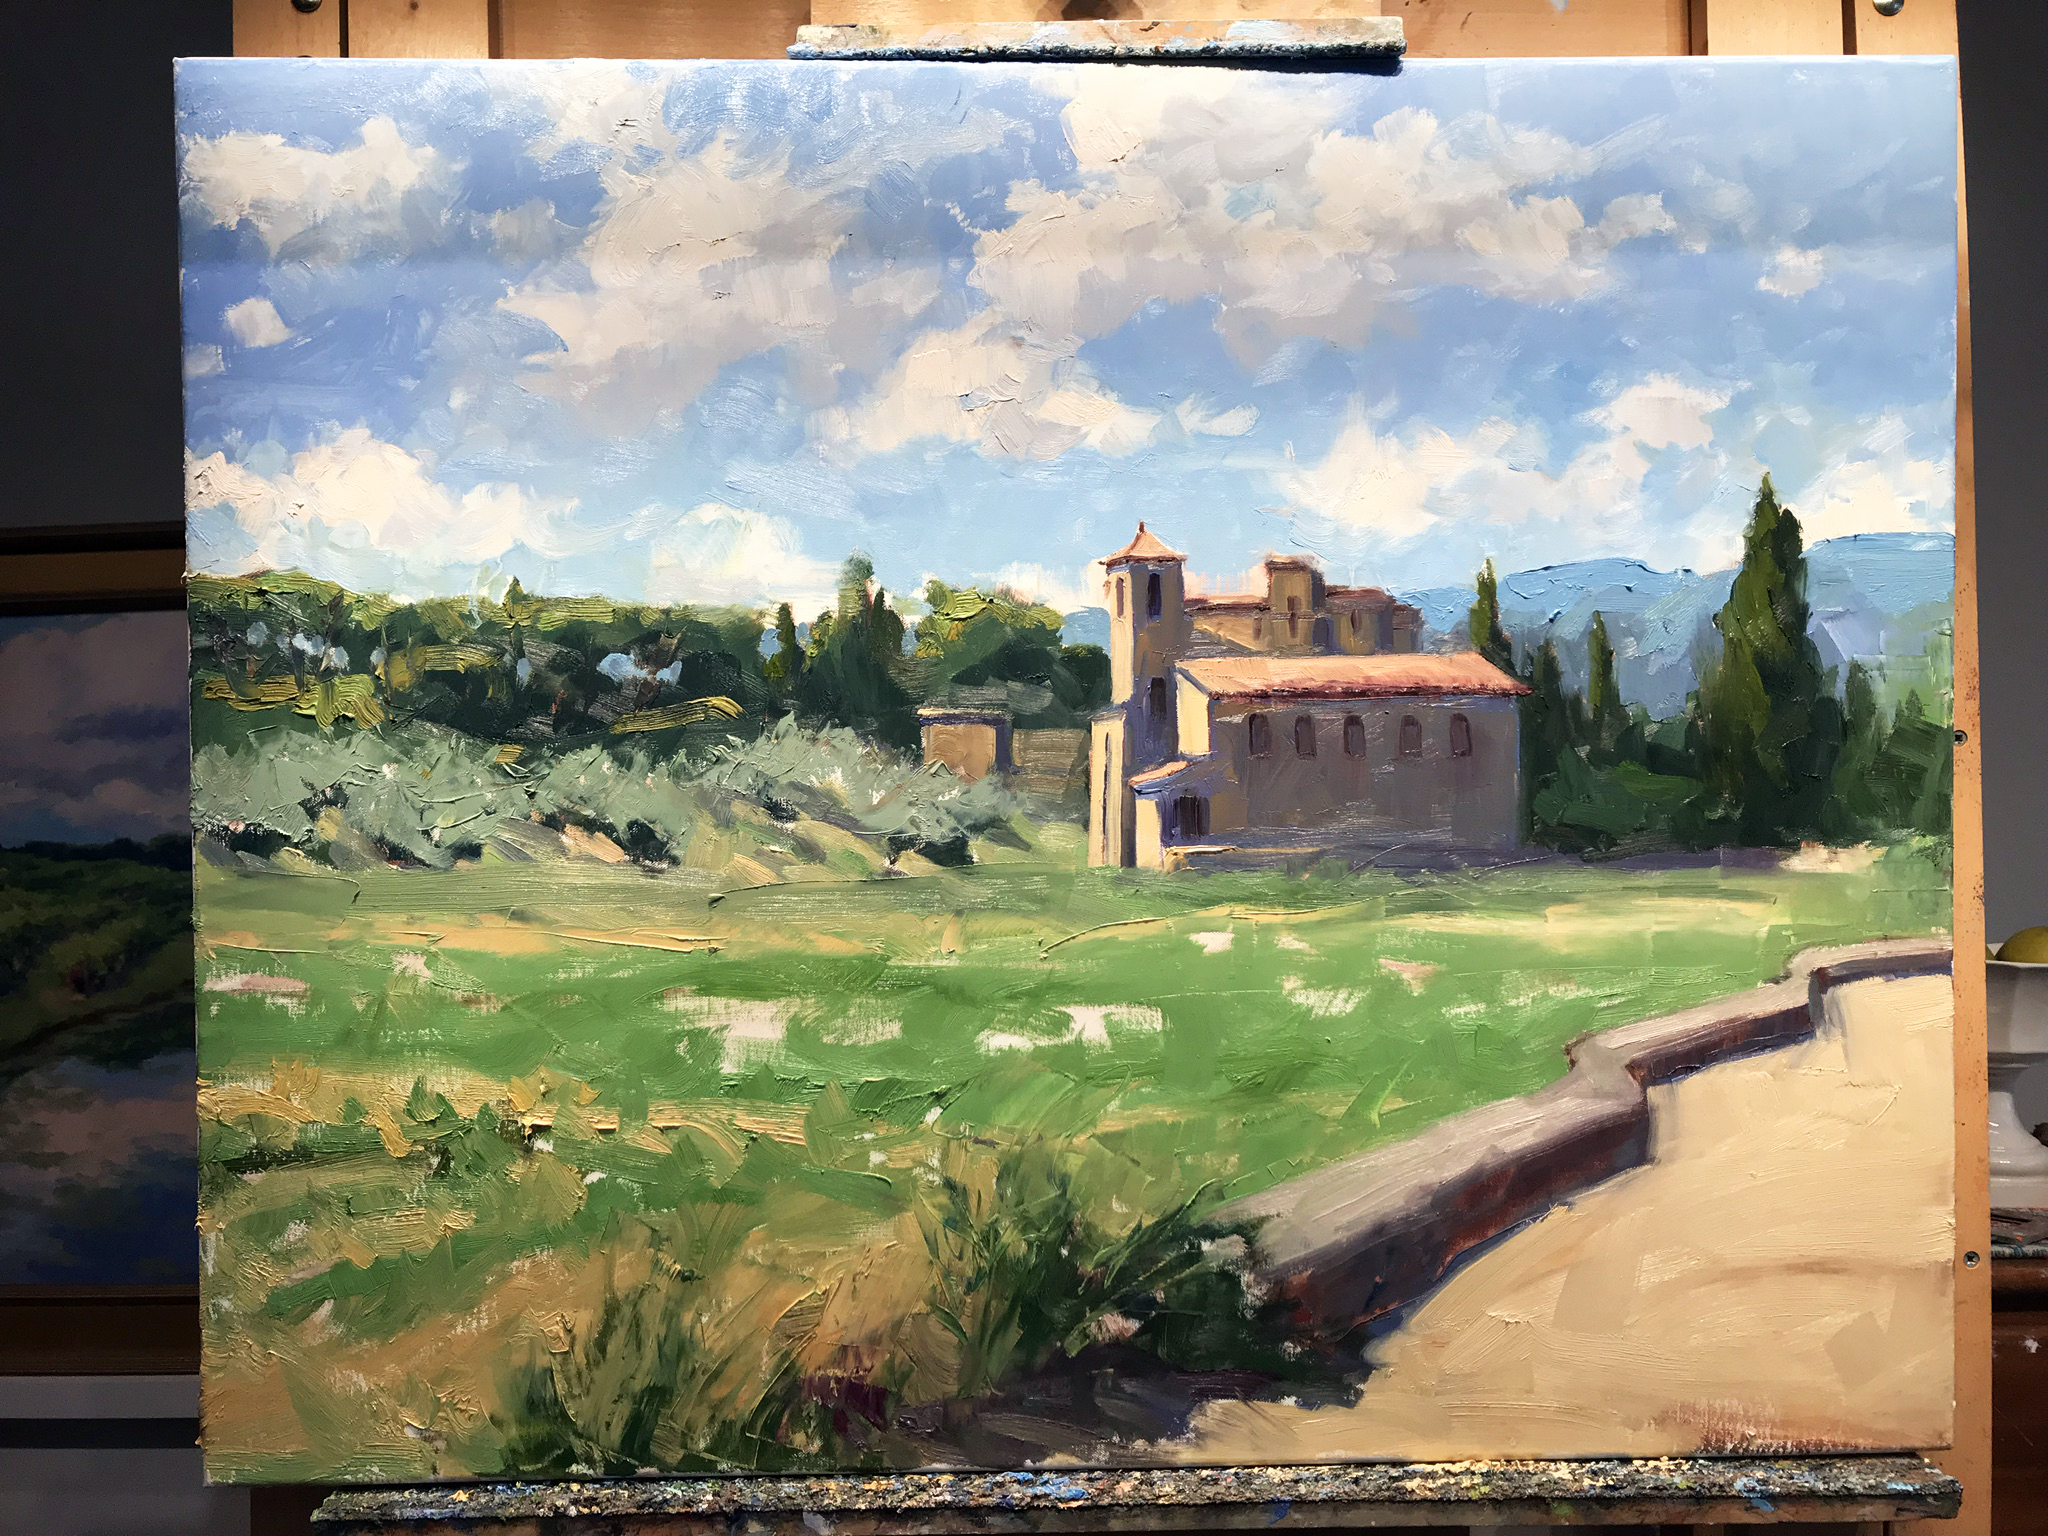
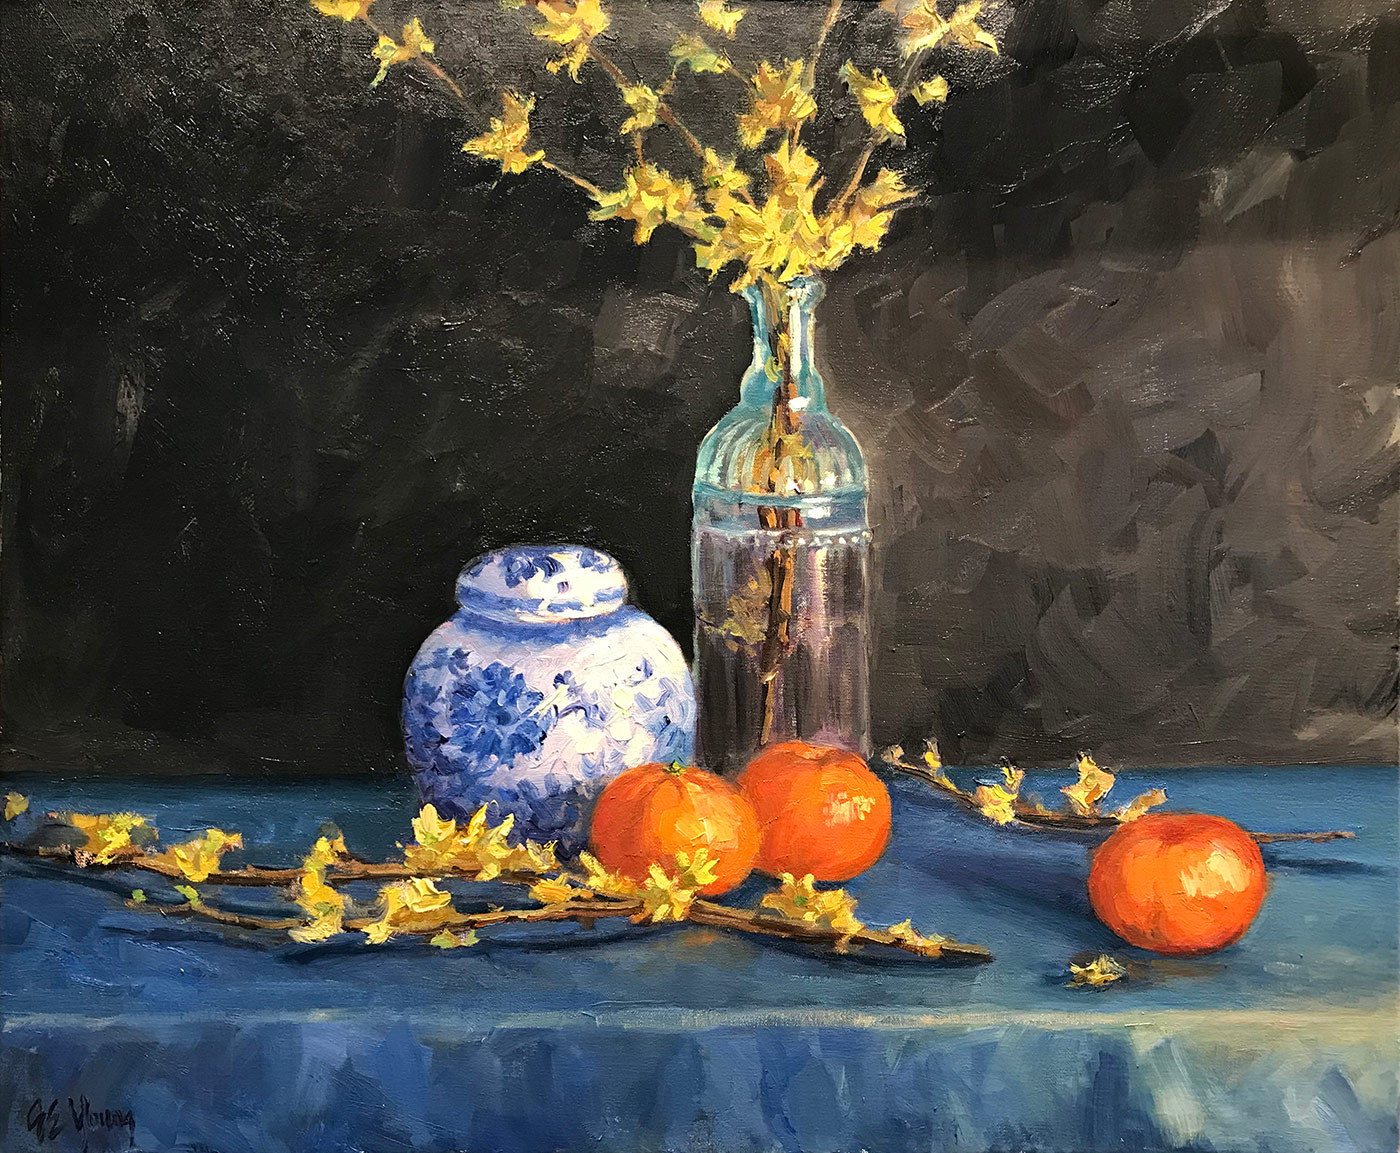
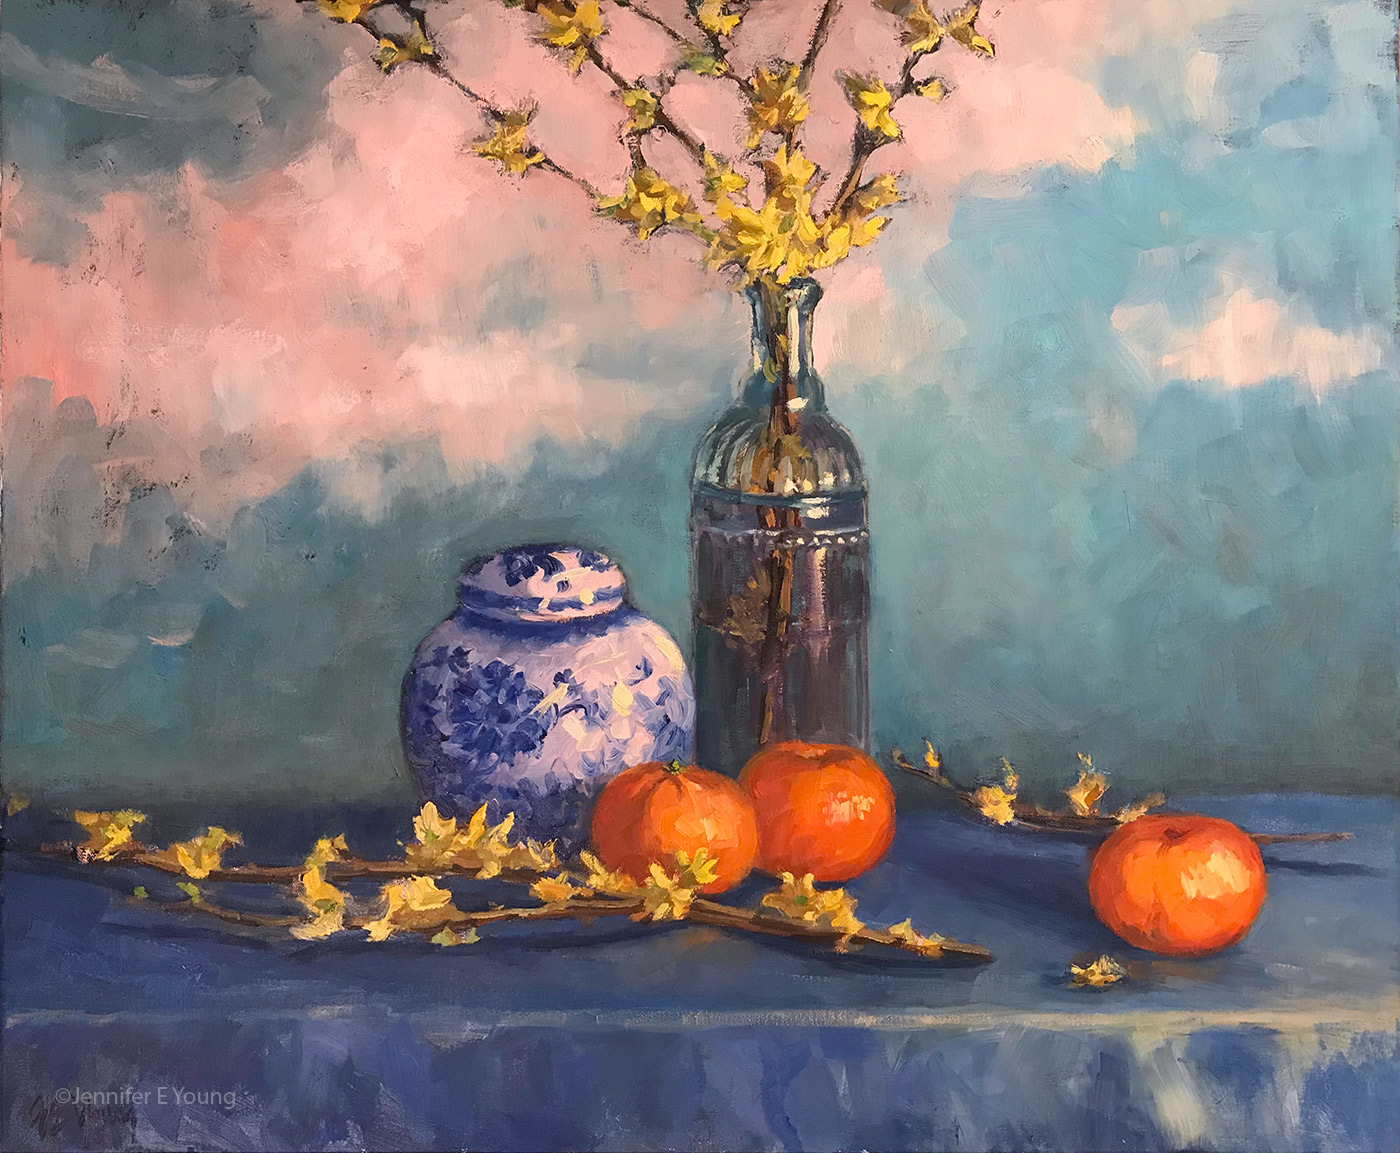
I loved the concept of this class, which was to distill the subjects, whether still life or the live model, to essential planes, light and shadow, and color, in quick small oil studies. Each class was roughly divided into two 1 1/2 hour sessions, beginning with one or two objects (a vase, a watering can, a piece of fruit) and various combinations of colorful backdrops. Gradually through each class the level of difficulty increased, until switching at last to the live model.

Quick studies done in class, 8x10” and 6x8”

Quick studies done in class, 8x10” and 6x8”

My biggest takeaway from this class was the importance of regular practice, with quick studies as a sort of artistic calisthenics. These little paintings, no matter how mundane the subject, were created with the INTENTION of allowing them to just be studies and nothing more. So often with my time constraints I feel a great pressure to create finished pieces— something I can sign and put a frame on. This class was not about that—at all—and I loved it! Frankly, I needed it.

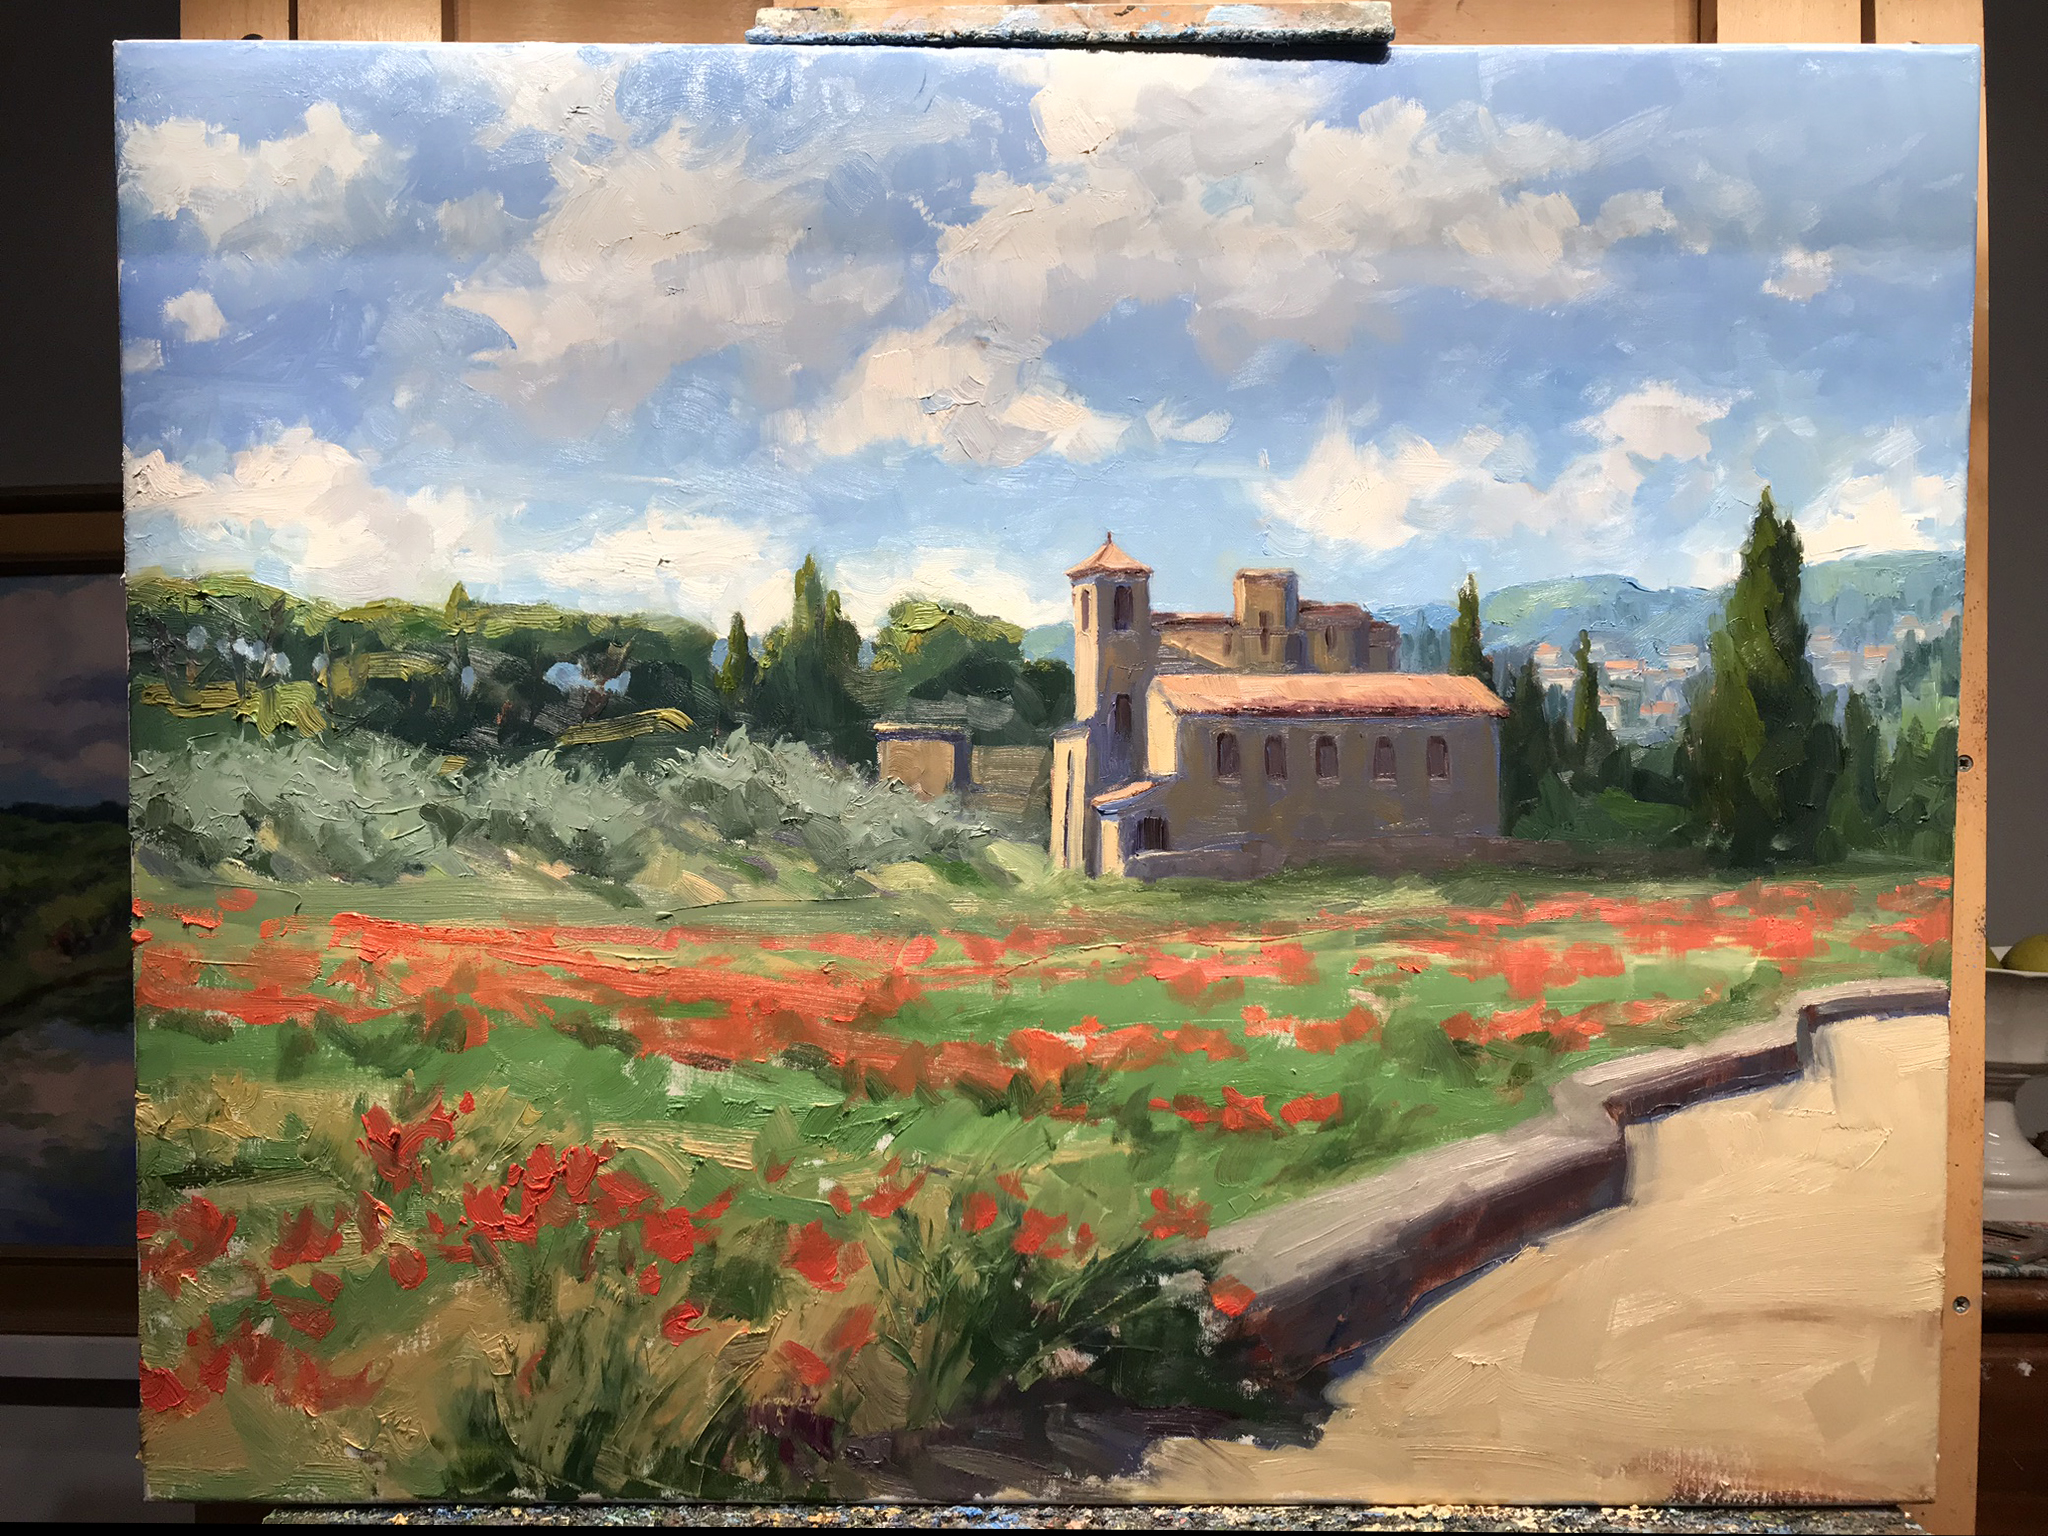
Putting a time limit on the sessions helped me avoid jumping into the fussy details too soon. This occurs also with plein air painting practice, though I tend to spend more time on those, establishing correct proportion and a pleasing composition. I can really see using this approach as a compliment to my plein air painting practice, on rainy days when I can’t get outside. It’s also just a good a regular practice to work into my studio time, to improve and sharpen the saw.

Escape to Provence! A Step by Step Demo

Over Christmas break as everything was pretty brown and exceedingly soggy outside, I decided to mine my many photos of sunnier times from my trips abroad. I will never forget my trip to Lourmarin, painting and eating my way through this beautiful part of Provence. I still long to go back, and am determined to do so, hopefully this time sharing it’s magic with my daughter. In the meantime I can always revisit the experience through paintings. So let’s get started, shall we?

“Le Printemps, Temple de Lourmarin”, Oil on linen, 24x30” ©Jennifer E Young

“Le Printemps, Temple de Lourmarin”, Oil on linen, 24x30” ©Jennifer E Young

Above is the completed work, photographed outside for correct color and no glare! This Protestant Church, Le Temple de Lourmarin, is simple and austere on the inside but it has a wonderful exterior and adds a sense of history and tradition as it sits like a sentry at the edge of town. Click through on the final image to read more or purchase this piece.

Edges, mark-making and tools

Happy New Year!🎉 Okay, granted I am a little late to the party, but I’ve had a busy couple of weeks moving into a new exhibit space for 2019. More on that soon, but today I wanted to share a bit about mark making, and neat little tool that I stumbled upon along the way.

I didn’t have tons of time over Christmas break to paint, but it doesn’t mean it hasn’t been on my mind. I have been thinking a lot about how I can loosen up, to create pieces that are truthful but not quite so literal. One of the things I struggle with is varying not only color but brushwork, so that there is not so much sameness everywhere. I vary brush sizes and shapes, but it still can leave me feeling a little bit like there must be something more. Sometimes I want to push a bunch of paint around and brushes alone don’t always do that.

Then one day, I purchased a Color Shaper. I actually bought this to spread gesso, because I have some pre-gessoed canvases that I bought that have been sitting around in my studio unused because are still a bit too rough and absorbent for my liking.

Before I even used it for gesso, I got curious. I had heard of other artists using these tools fairly extensively for applying paint in their work and I got to wondering whether it might be a useful tool for varying my edges and textures in my painting.

It didn’t really do what I was hoping for. These shapers come in varying degrees of firmness and the tool I ordered was an extra firm. Good for gesso spreading, but not for my painting. Still, I saw the potential so I went back online to see if I could get another one with more flexibility. But before I got that far, I stumbled upon these do-hickeys and fell in love.

colorshaper2.jpg

These guys, officially called Princeton Catalyst Wedges, are made of some kind of silicone or rubber and come in a variety of shapes . They are more flexible than my prior purchase but still firm enough to move the paint. They don’t have handles, but frankly I prefer this handle- less variety because it allows for more control.

What does it do? Well, for starters it pushes a heck of a lot of paint around, creating the ability to make bold, impasto passages or thinner, more ethereal ones.

coralsunset_detail.jpg

I can use it to make a fairly straight edge with the straight, thin side of the tool, or use it t scrape down passage to create softer edges.

coralsunset_detail2.jpg

I can use it as a blending tool, or a tool to separate out colors and make them stand out. In short, I can use it to exploit the properties of the paint in a way that is a nice variation from straight-on brushwork .

I first ordered the white tool, pictured above, left. Then then I discovered the black, which I like even better because you have greater versatility with both a long and a short edge. “Why not just use a palette knife,” you might ask? Well, I do love palette knife paintings but I always just end up switching back to brushes and reworking them because I have never been quite able to achieve that combination of softness and boldness I aim for. These little tools act like palette knives with more of a brush feel, if that makes sense.

“Coral Reflections, Late Summer”, Oil on linen, 24x36” ©Jennifer E. Young

“Coral Reflections, Late Summer”, Oil on linen, 24x36” ©Jennifer E. Young


I’m still not ditching my paint brushes; they are the work horses in my studio. But I’m having fun playing around with these new tools and exploring what I can do with them in my paintings.

Change is Good (Part II)

In my last post I explained how I go about making changes to a previously completed painting that may need some minor tweaking to improve it. Today’s post deals with more drastic measures. This still life isn’t really that old, but almost since its completion I felt I wanted to do something different to the background. Both the shawl on the left and the angles on the right bothered me, as did the color combinations as they related to the foreground. All of these elements served to distract more than enhance the still life arrangement. 

Still life, version I

Still life, version I

So, after sanding, scraping and oiling out (as described in my previous post) my first thought was to create a very simple dark background, which is a classical approach to still life painting employed by a lot of painters through the ages. I also got rid of the awkward angle in the lower right portion of the table cloth, and carried the horizon line straight across.

Still life, version II

Still life, version II

I actually liked these changes, though without the background distractions it really brought out how evenly divided the painting was by the bottle of forsythias, making for not-so-interesting negative space on either side, only accentuated by the plain dark ground. The dark color also really brought out the remaining texture underneath, even when the paint layer was built up. So, I decided to play with it a bit, knowing I could always come back to the simple dark background if I really wanted to.

“Forsythia and Delft Blue”, Oil on linen, 20x24" ©Jennifer E Young (click the image for details)

“Forsythia and Delft Blue”, Oil on linen, 20x24" ©Jennifer E Young (click the image for details)

What I arrived upon felt to me to be both whimsical and old world at once. It almost reminds me of an antique screen or stage set of a decorative painted sky. The “clouds” served to break up the background space, and the softer, happier palette made me feel happier too. It can be a little scary to make these kind of changes but I’ve come around to the idea that  if the painting is nagging on me, the benefit of change can outweigh the risk. Have I ever “ruined” a painting doing this? Yes indeed. Occasionally my over-zealous scraping can poke a hole straight through the painting. Other times my changes may fail to satisfy me and I end up scrapping the whole thing entirely. But if I’m not satisfied with the painting as it is, it’s probably worth risking it. In any case, if I’m lucky, I have miles of canvas to go before I’m done. 

Change is Good (on revising oil paintings)

I’m not afraid of anything in this world
There’s nothing you can throw at me
That I haven’t already heard
I’m just trying to find a decent melody
A song that I can sing in my own company
— Songwriters: Adam Clayton / Dave Evans / Larry Mullen / Paul Hewson (U2)

I've heard it said that there's nothing new under the sun, and that's probably true when it comes to painting. Nevertheless,  I never stop striving to improve, both in terms of technique and in how best to express myself. I want to make work that speaks to me and hopefully speaks to others as well. No one painting can say everything and I don't expect it to. The best paintings say just enough, with sensitivity, but without overstating. 

And then there are the ones that need re-stating. :-/  Often with such paintings it is easier to just wipe down or tear up my first effort and see if I can try again on a fresh canvas. Sometimes though,  it seems worth the effort to attempt a revision first before scrapping the whole darn thing. If the painting is fresh and new, reworking is a fairly easy and straightforward task, as there isn't an under-layer of built up paint to compete with.

But it may not occur to me right away exactly what change is needed, and it's only after sitting with it a while that I want to go back into it again. In these cases, a little bit of elbow grease is required, both to ensure proper adhesion of the new paint layers and to knock down any unwanted texture. 

My painting, "Rugosa Coastline" is a studio piece that was based on a smaller plein air piece I did when I was up in Maine. After a few months of thinking about it I decided that it lacked something that the plein air piece captured. I felt the studio piece was labored, overall too busy, and the colors, especially in the foreground greenery,  too intense for the time of day. So I set to work to see if I could make a few changes, to maybe loosen it up, and tone down the colors to ones more faithful to the time of day I was trying to capture.

First pass of my 24x30" studio painting based on the smaller plein air piece below.

First pass of my 24x30" studio painting based on the smaller plein air piece below.

"Day's End, Lane's Island", Oil on linen, 11x14" ©Jennifer E Young

"Day's End, Lane's Island", Oil on linen, 11x14" ©Jennifer E Young

My first order of business was to knock back some of the texture. Not all texture in the under layer is bad, but if there is  a lot of texture that shows through as a "ghost" image I will sand it down a bit. If it's really built up I may find I need scrape it away razor blade, very carefully, (and pray I don't poke a hole in the canvas). 

Next I will "oil out" to give the new paint layer better adhesion to the partially dried layer underneath. To oil out, solvents or medium (or a combination) is brushed in a thin layer on the surface of the portion of canvas you want to rework. Most often I just use a little Gamsol for this purpose. 

"Rugosa Coastline" (SOLD) Oil on linen, 24x30" ©Jennifer E Young

"Rugosa Coastline" (SOLD) Oil on linen, 24x30" ©Jennifer E Young

The resulting painting was still a bit different than the little plein air piece, but it felt truer to the time and place and to the feelings that I had when creating the painting on the spot. I felt significantly happier with the revised version of this painting, and wouldn't you know, someone else did too? It sold not long after the revision. 

Tune in to part two in my next post, where I'll share another revision I undertook, which ended up with more extensive and fairly dramatic changes.